Configuration steps
Step 1: Connect your fraud detection provider
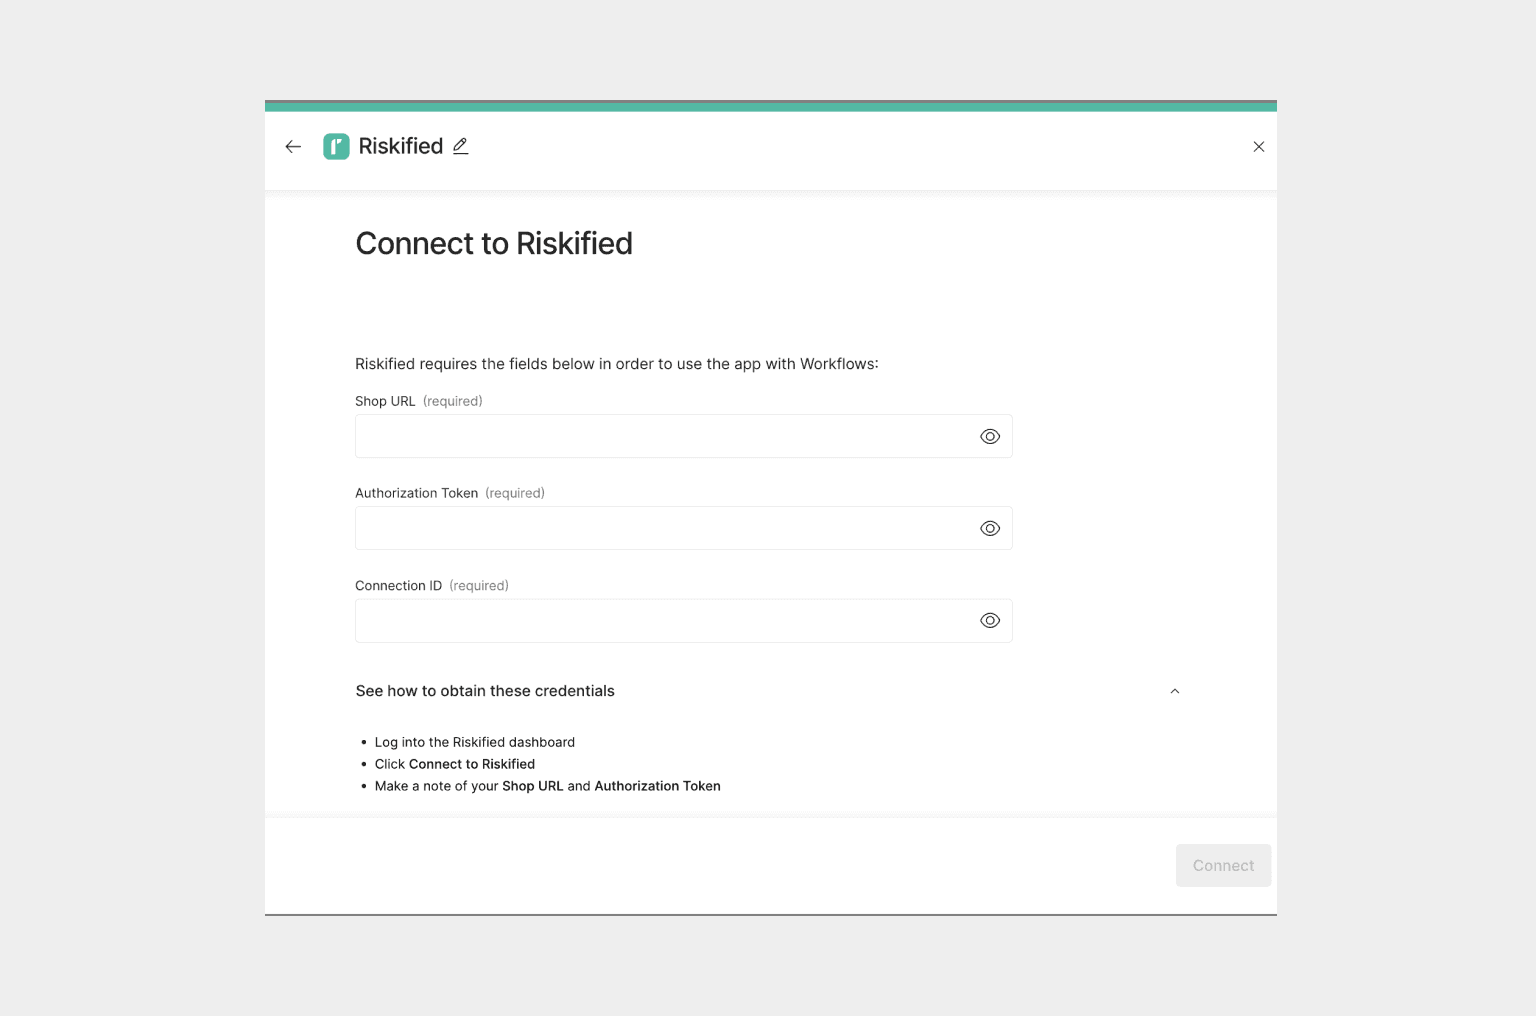
You need at least one fraud detection provider connected to begin processing fraud checks through Primer.
- Select the fraud prevention provider you want to add via the Primer Dashboard
- Add your provider by populating and submitting the form
Step 2: Add fraud checks to your payment workflow
This guide assumes you already have a payment workflow configured. To learn more about how to set up a payment flow, read more here.
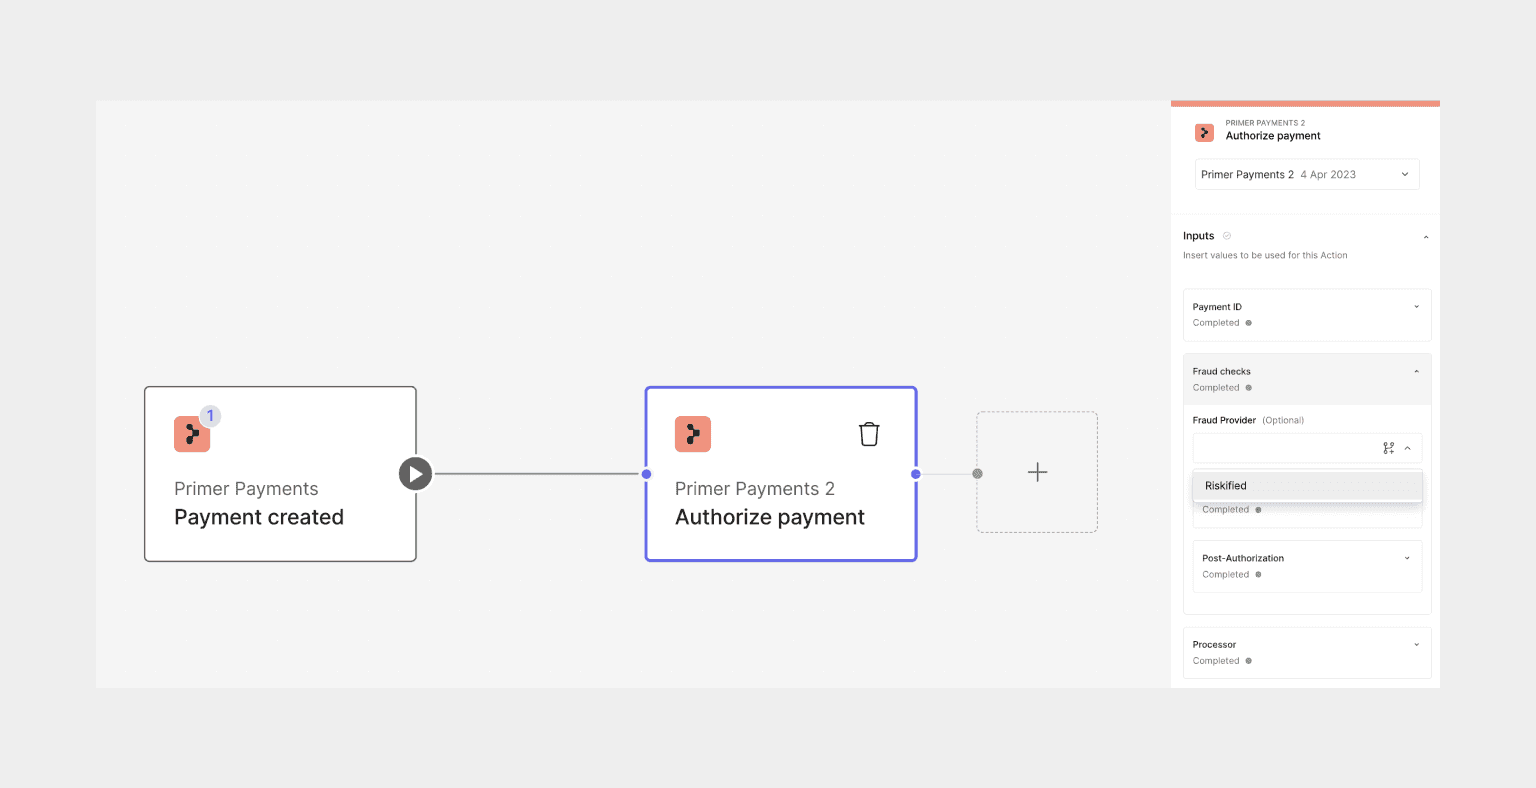 Select the fraud detection provider you will use for your fraud checks (pre-authorization and/or post-authorization) from the dropdown menu. This will be populated with all fraud detection providers connected in Step 1.
Pre-authorization fraud check
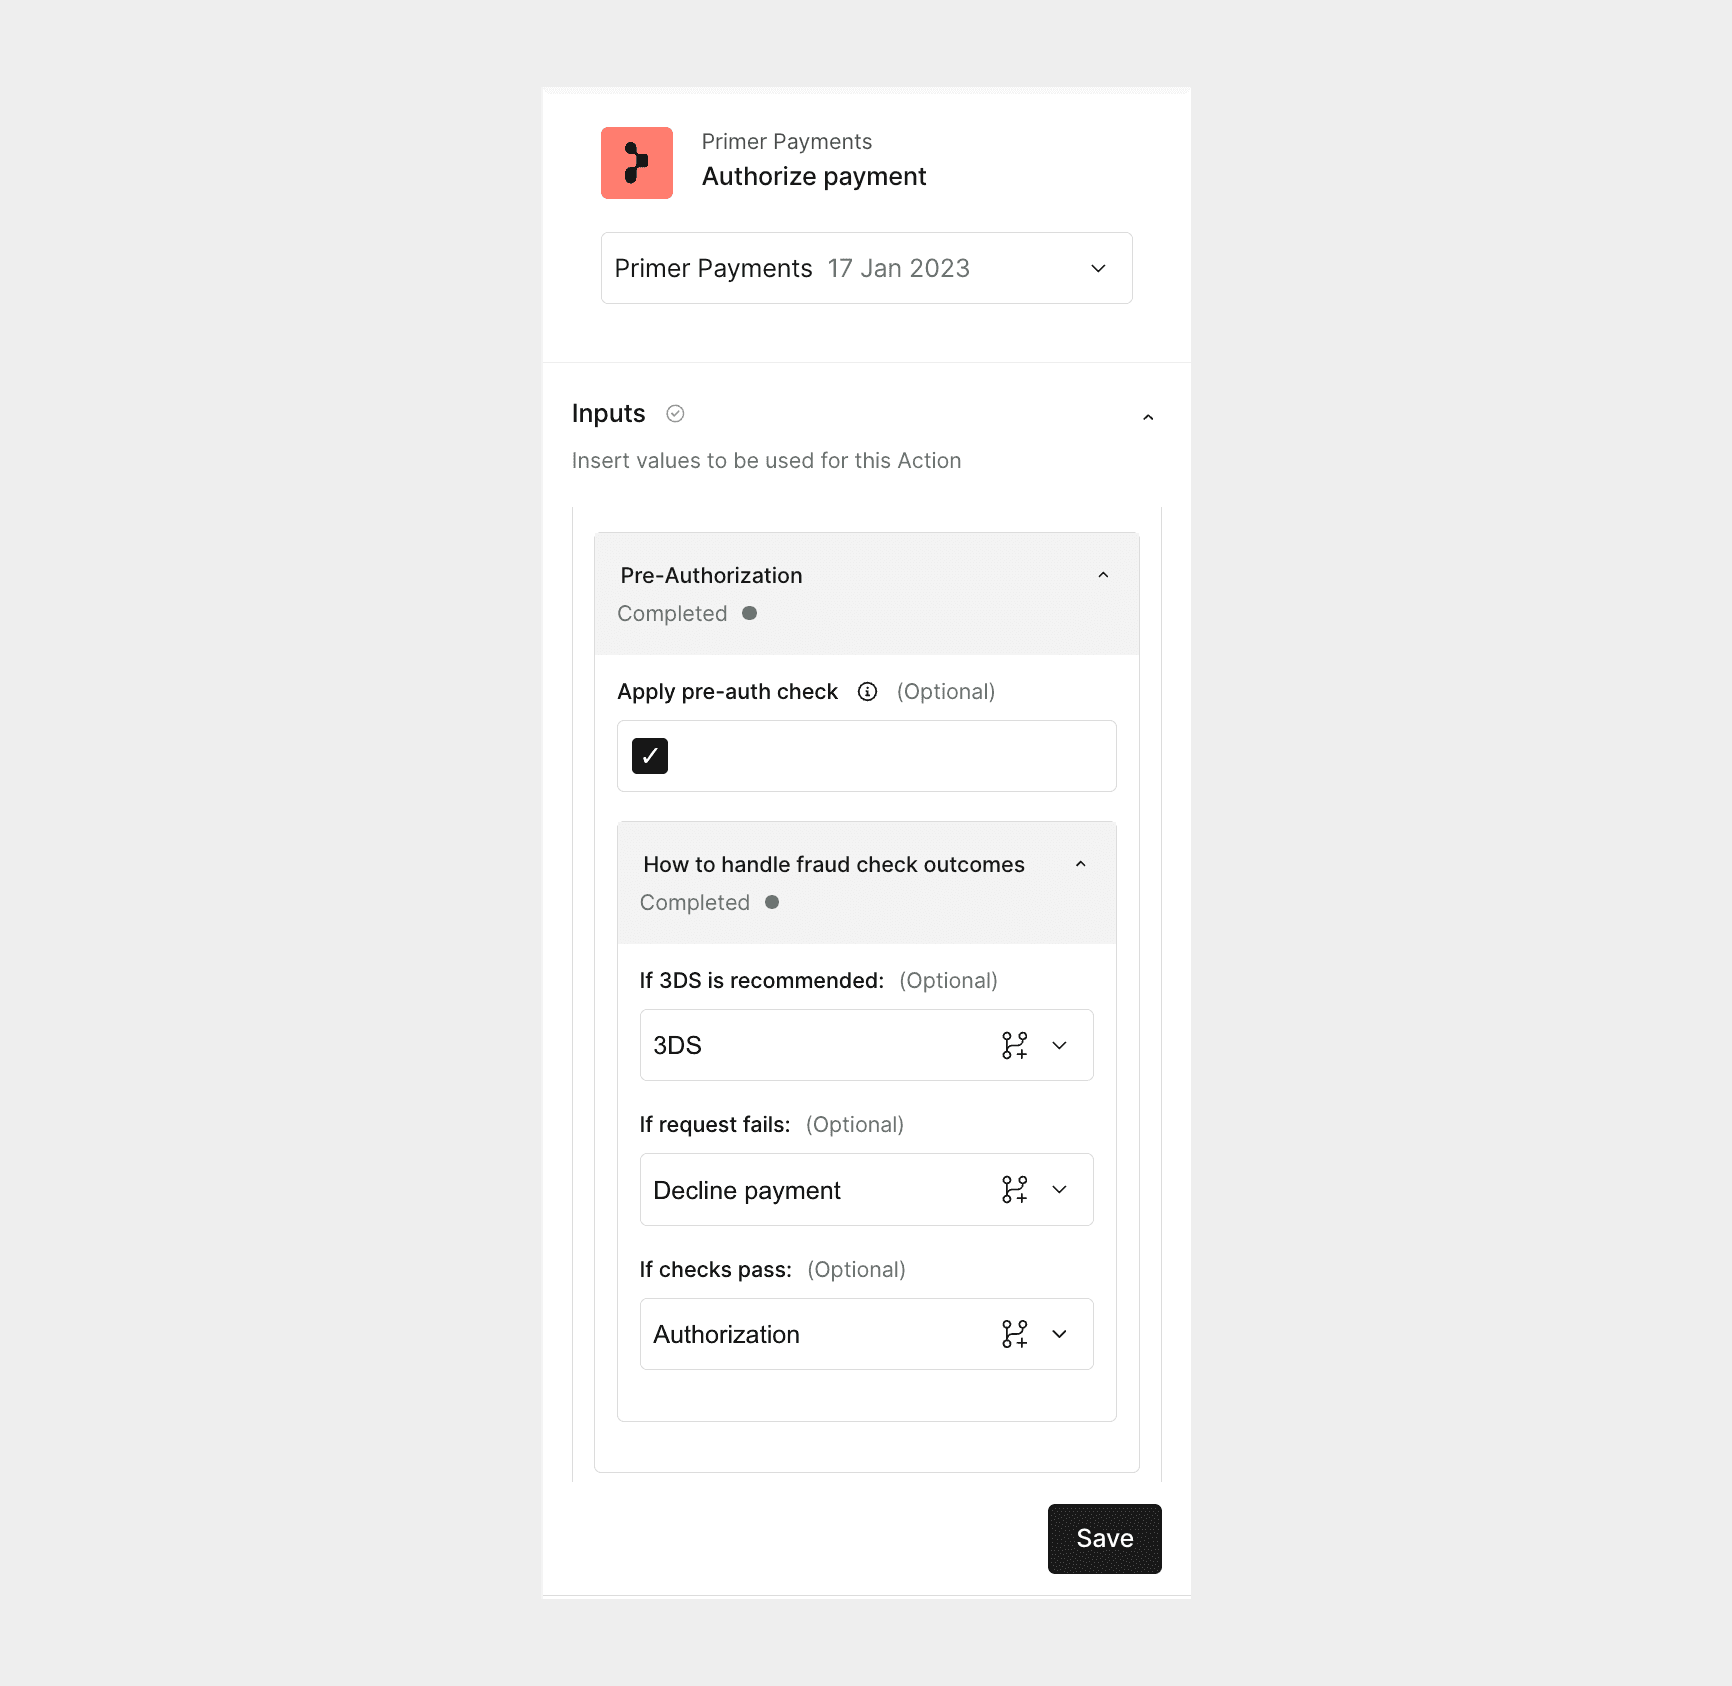
Toggle on “Apply pre-auth check” by selecting the checkbox. This means that every payment that is processed by this Action will attempt a pre-authorization fraud check.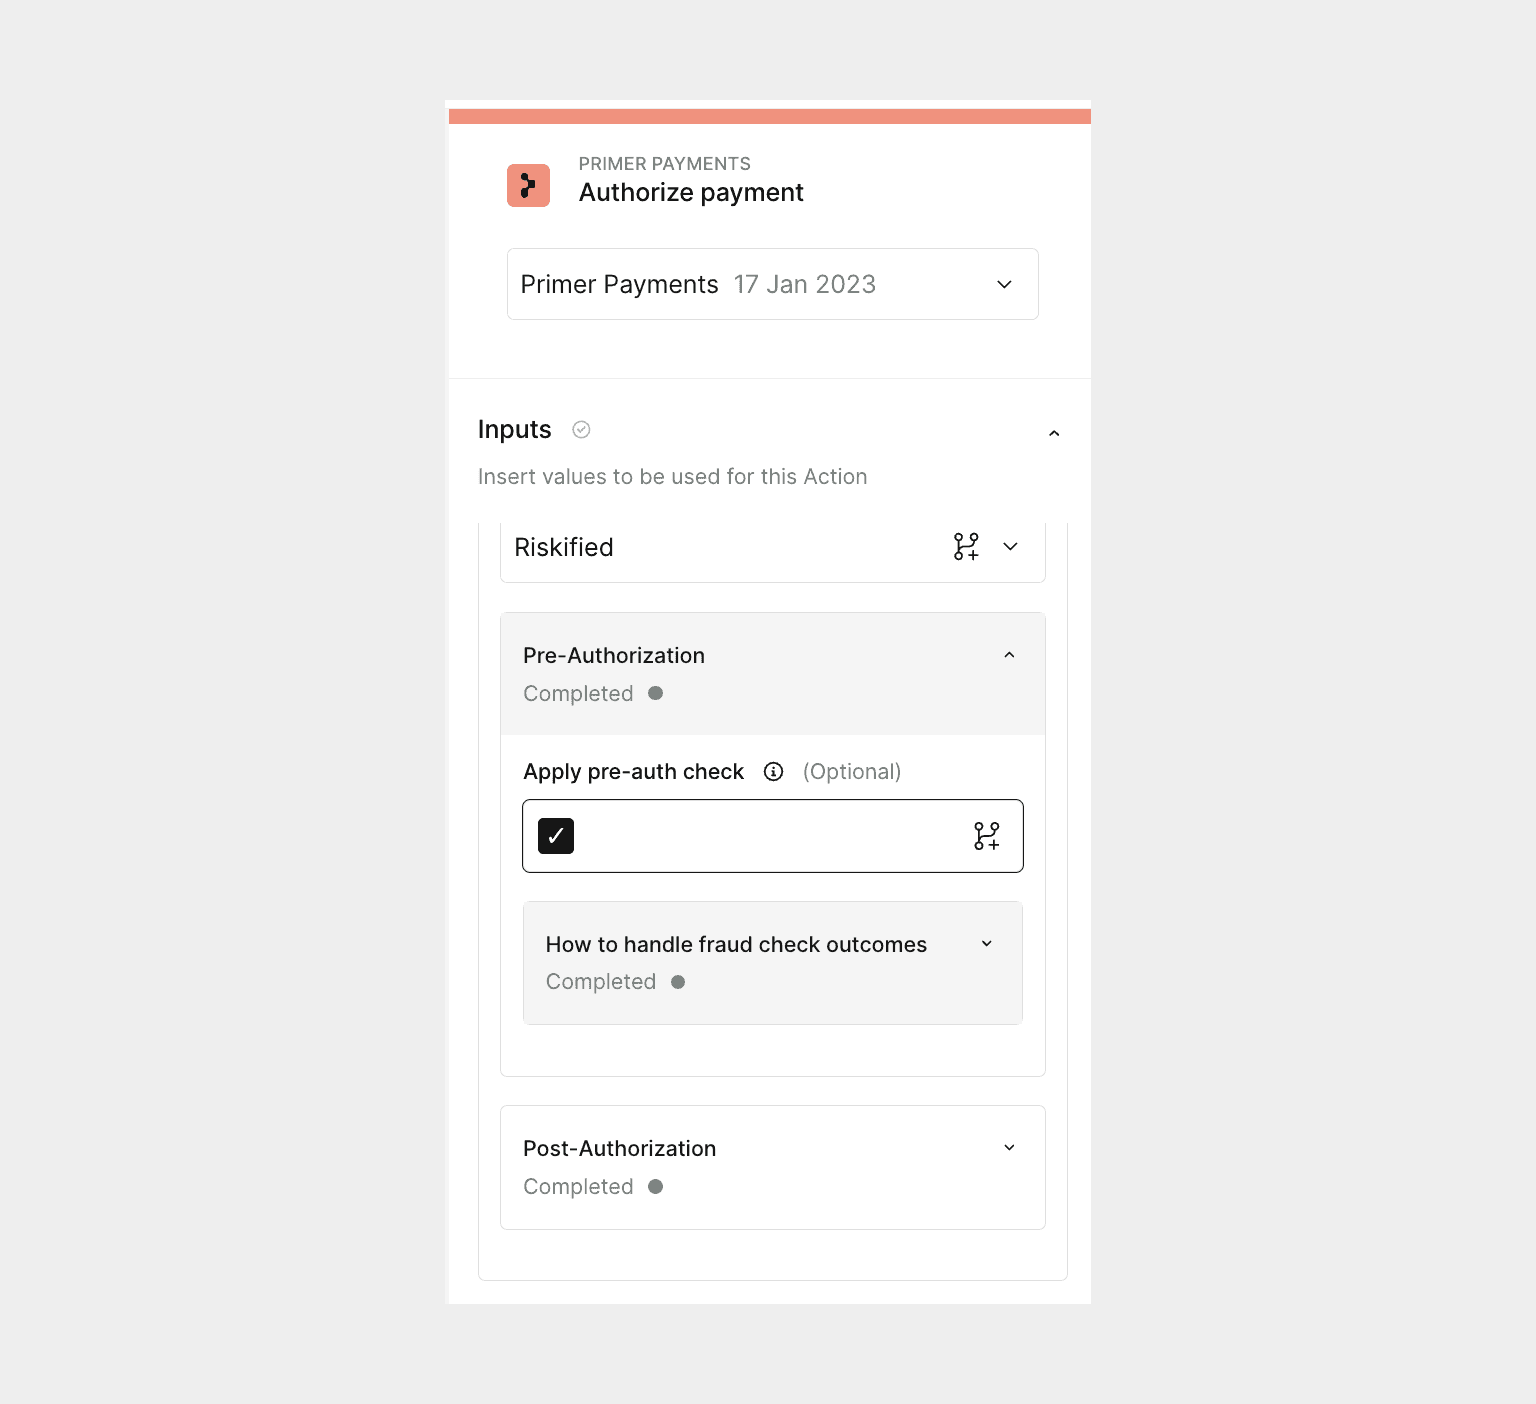 To enable your pre-authorization fraud check to dictate when to show 3DS, set the “3D Secure preference” to
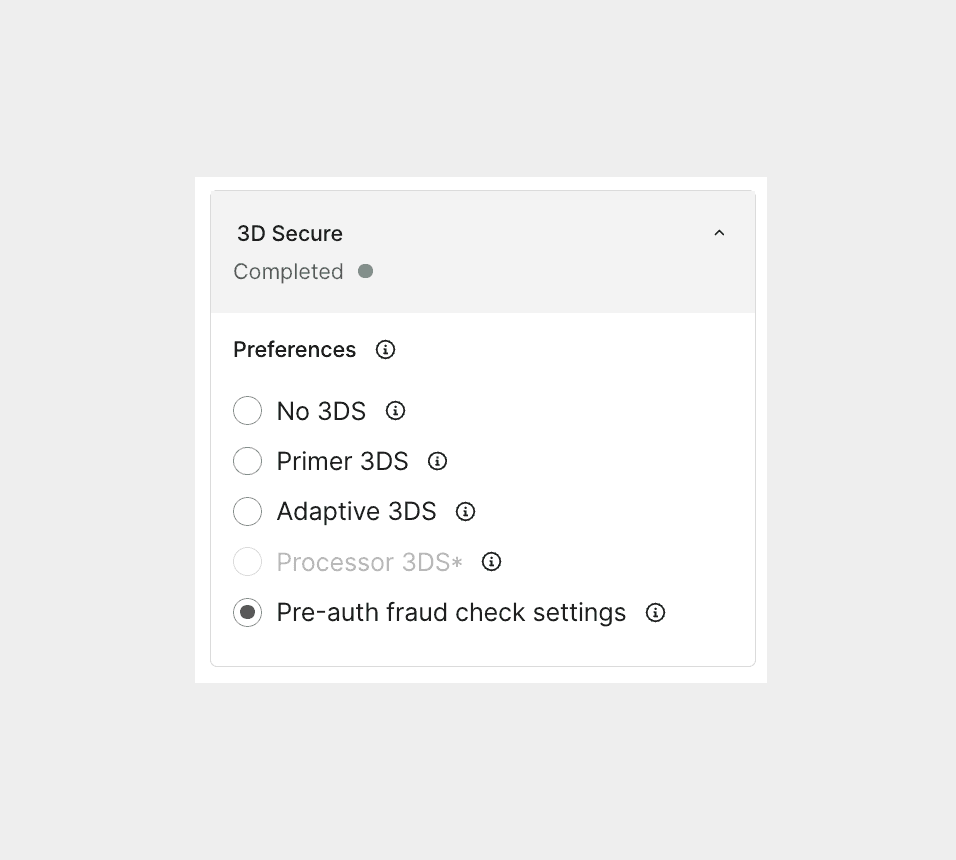
 Pre-auth fraud check settings.
 You need to determine the business logic for your pre-authorization fraud check and configure it appropriately. For each possible pre-authorization fraud check outcome, decide whether to show 3DS, run a 3DS exemption, go straight to authorization, or reject the payment.
This is configured by selecting one of the options from the dropdown for each outcome.
You need to determine the business logic for your pre-authorization fraud check and configure it appropriately. For each possible pre-authorization fraud check outcome, decide whether to show 3DS, run a 3DS exemption, go straight to authorization, or reject the payment.
This is configured by selecting one of the options from the dropdown for each outcome.
If you decide to reject a payment after a fraud recommendation, the payment will either be:
- automatically declined after a pre-authorization fraud check
- or automatically cancel after a post-authorization fraud check
Post-authorization fraud check
Toggle on “Apply post-auth check” by selecting the checkbox. This means that every payment that is processed by this Action will attempt a post-authorization fraud check. Similarly to the pre-authorization fraud check, you need to decide how to handle scenarios where there’s a technical problem preventing the fraud check and the request fails: either the payment remains authorized or cancel the payment.
If the fraud check does not pass, the payment will be canceled automatically. If it’s a customer-initiated payment, the customer will see the fail screen.
Step 3: Pass additional data in the client session
The same applies if you use the advanced manual SDK flow and send the request.
customer and order objects that can be passed in and are used to populate the request to your fraud detection provider.
It’s recommended you agree with your provider on what fields should be passed to ensure optimum accuracy of the fraud check as this does vary based on which fraud detection provider you use.
The following additional data points will also be used in the fraud request if they are passed:
| Field | Type |
|---|---|
fraud_context.device_details.device_id | string |
fraud_context.device_details.referring_site | string |
fraud_context.device_details.source | string |
fraud_context.device_details.browser_ip | string |
fraud_context.device_details.accept_language | string |
fraud_context.device_details.user_agent | string |
fraud_context.device_details.cookie_token | string |
fraud_context.merchant_details.merchant_name | string |
fraud_context.merchant_details.merchant_provider_id | string |
fraud_context.merchant_details.merchant_category_code | string |
fraud_context object to the metadata object passed in the request. Below is an example:
How to monitor fraud checks
You can monitor your fraud checks using the:- payment timeline
- payment object
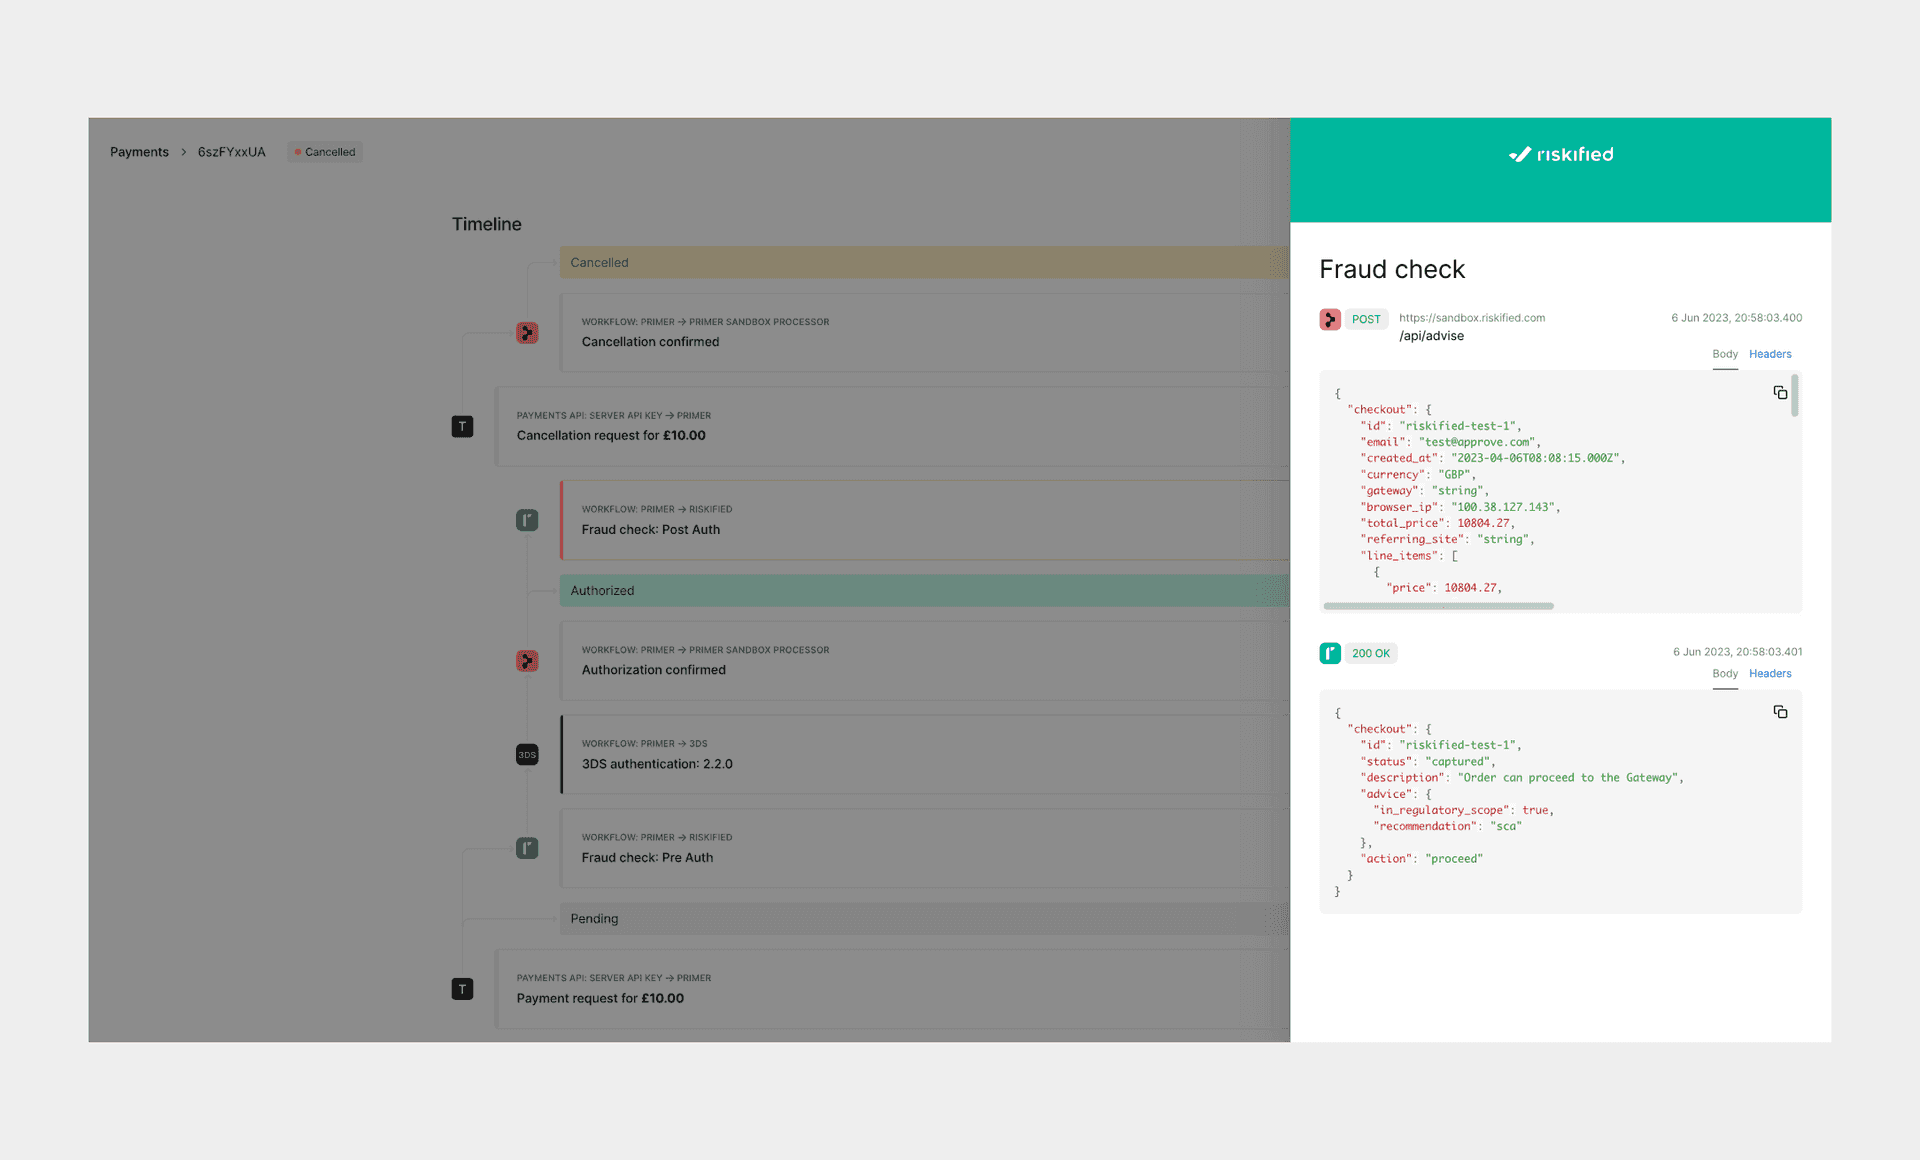
Payment timeline
Primer is not a black box - your fraud check events will be visible in the payment timeline.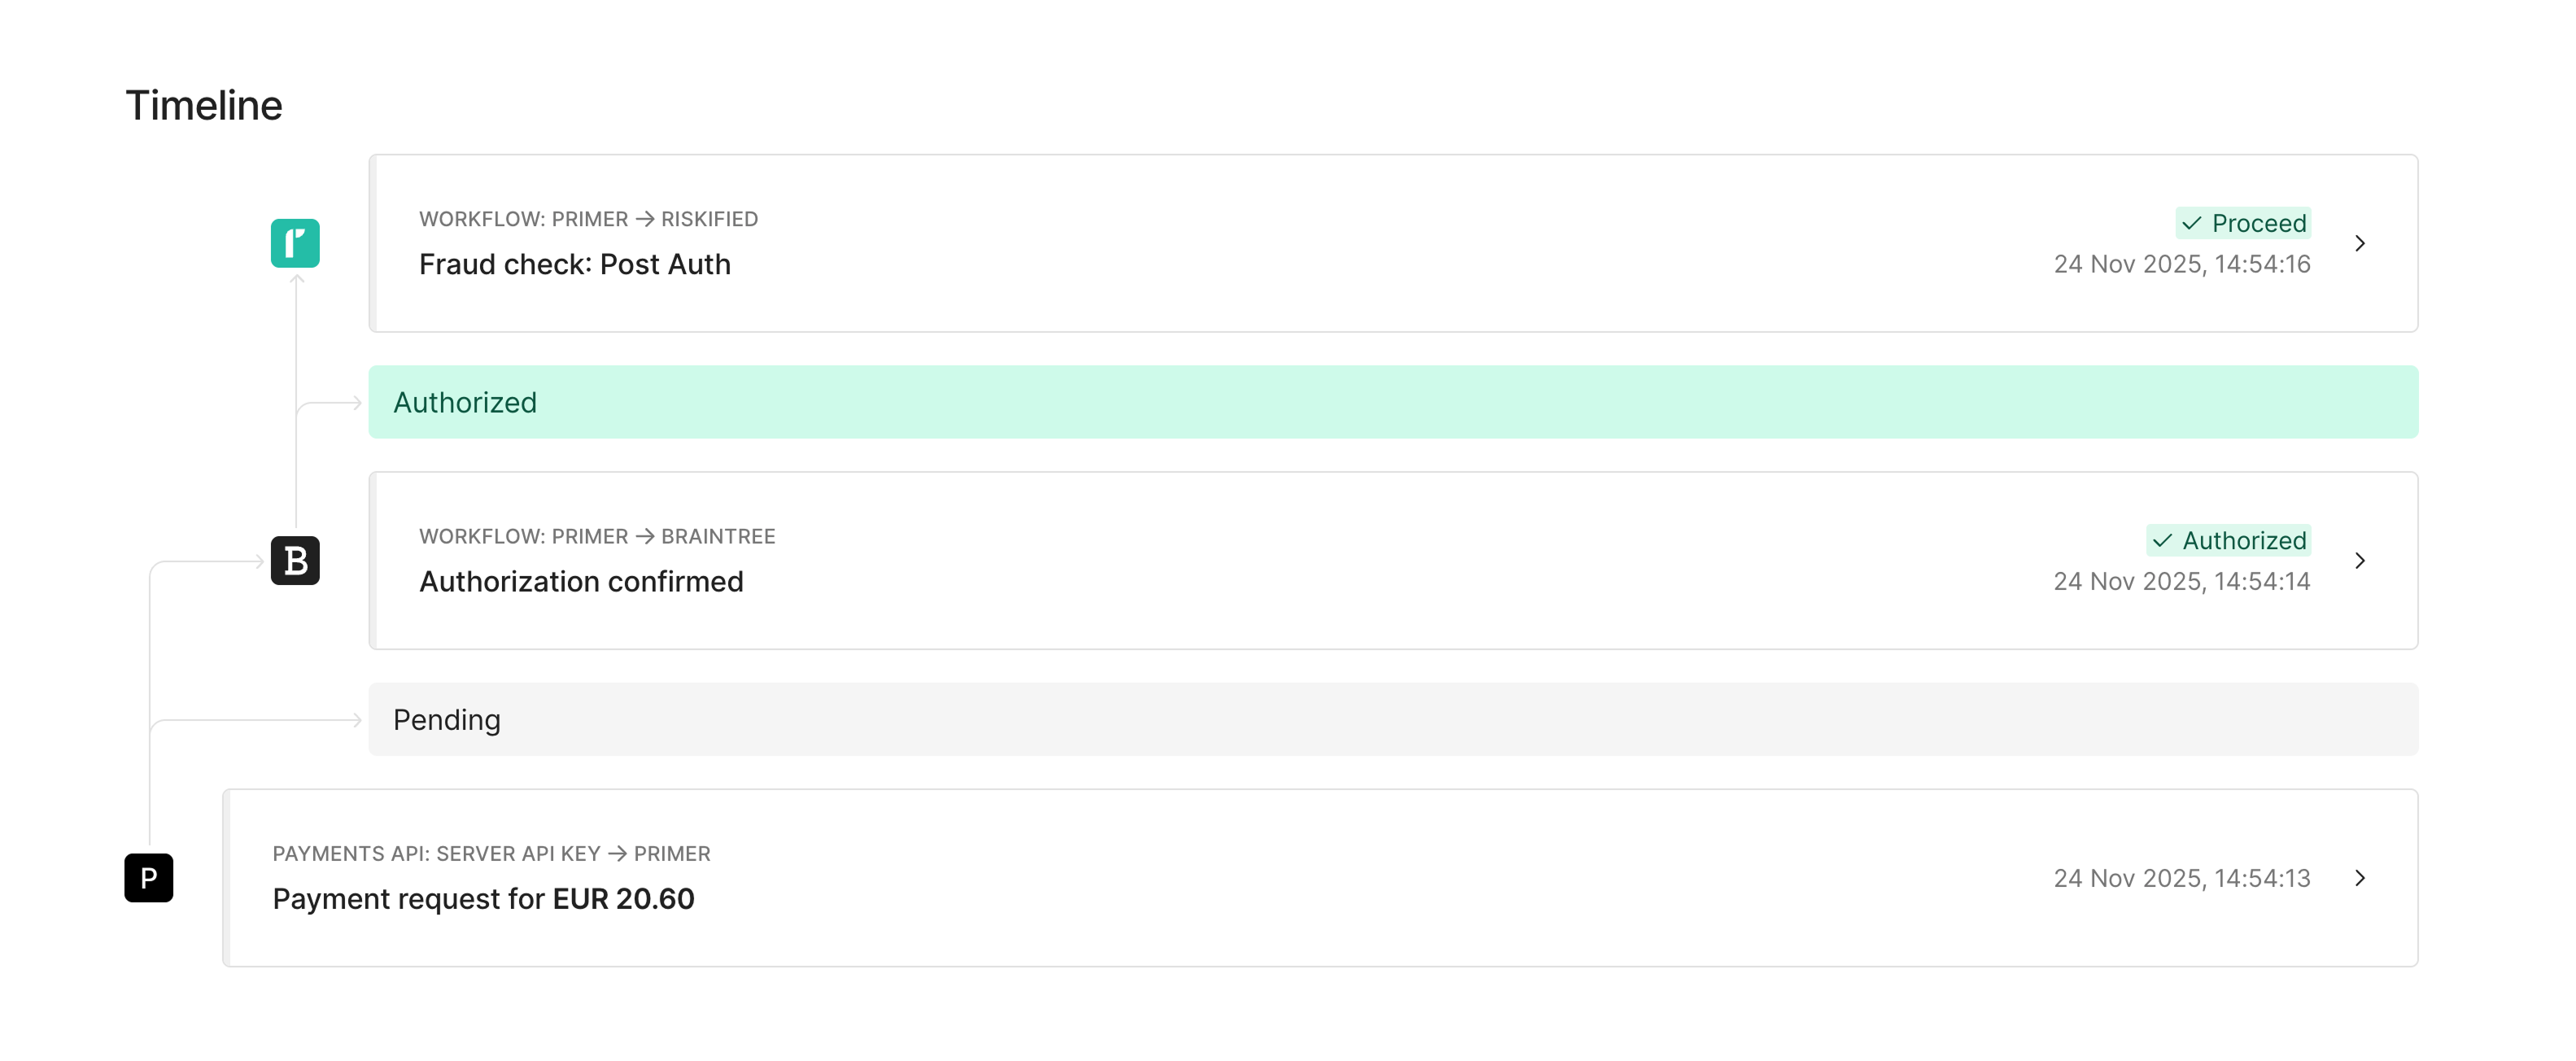 Select a specific event to see the full requests and responses with your fraud detection provider.
Payment object
For & (>=v2.2), the response includes the following object:preAuthorizationResult is THREE_DS_EXEMPTION. See the API enum for possible values:
Note: preAuthorizationRecommendation is only returned when preAuthorizationResult is THREE_DS_EXEMPTION.
This is also part of the Payment Status Update webhook notification as well.
Testing
Notes
- The
riskData.fraudCheck.postAuthorizationResultfield won’t be included in the Payment Status Update webhook as the payment status updates before the post authorization fraud check is run.- If this field is required when you receive this webhook, use the request. The field will only be present once the post-authorization fraud check is complete.
- If the payment is due to the post-authorization fraud check, a new webhook notification will be sent and this field will be included.