What is a workflow?
When a payment is created, you need to determine where to route the payment - this is where Workflows comes in.
Workflows enable you to build end-to-end payment automation flows without writing any code. A workflow is necessary to dynamically process payments created via Primer.
Primer gives you all the building blocks to create and manage your workflows based on your own business logic and requirements.
How to create a workflow
Head to the Workflows section of the Dashboard to create your first workflow.
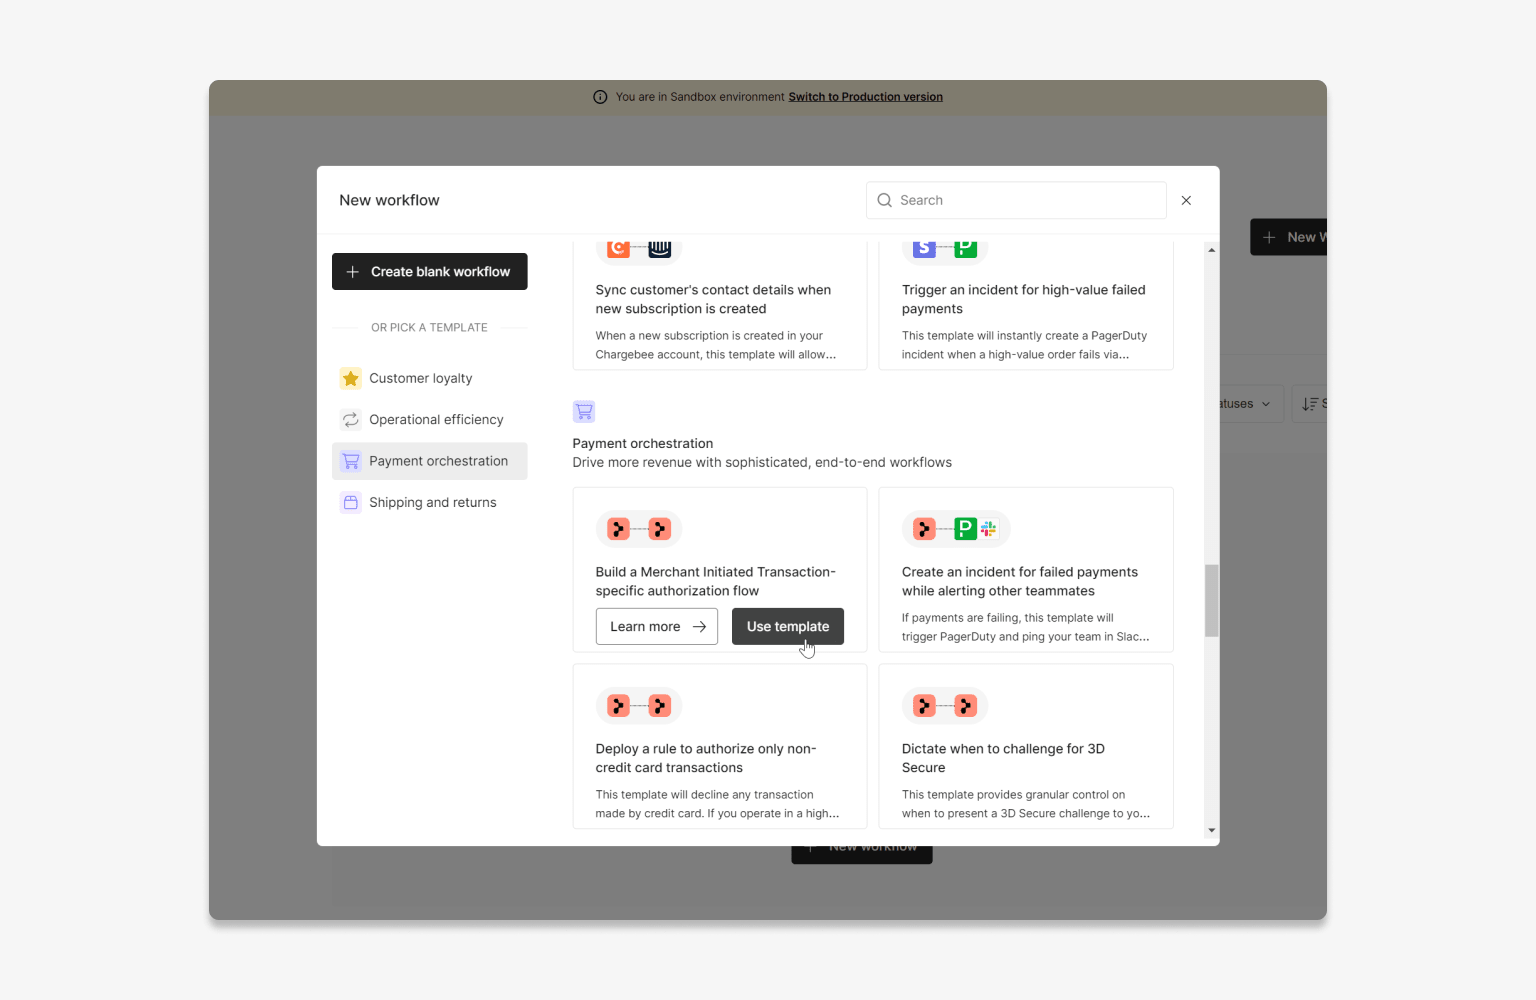
Start from a template
When creating a new workflow, you can browse all available templates that Primer has made available for a wide array of use cases, such as Payment Orchestration and Operational Efficiency.
A template, same as a workflow, consists of a Trigger and multiple blocks (Utilities, or actions with Inputs already set up). Each template covers a very specific use case but you can always tailor the workflow according to your requirements once you have added it to your account.
Start with a blank workflow
If you do not want to use an existing template but start from scratch, you can also build a workflow on your own by choosing an app’s trigger.
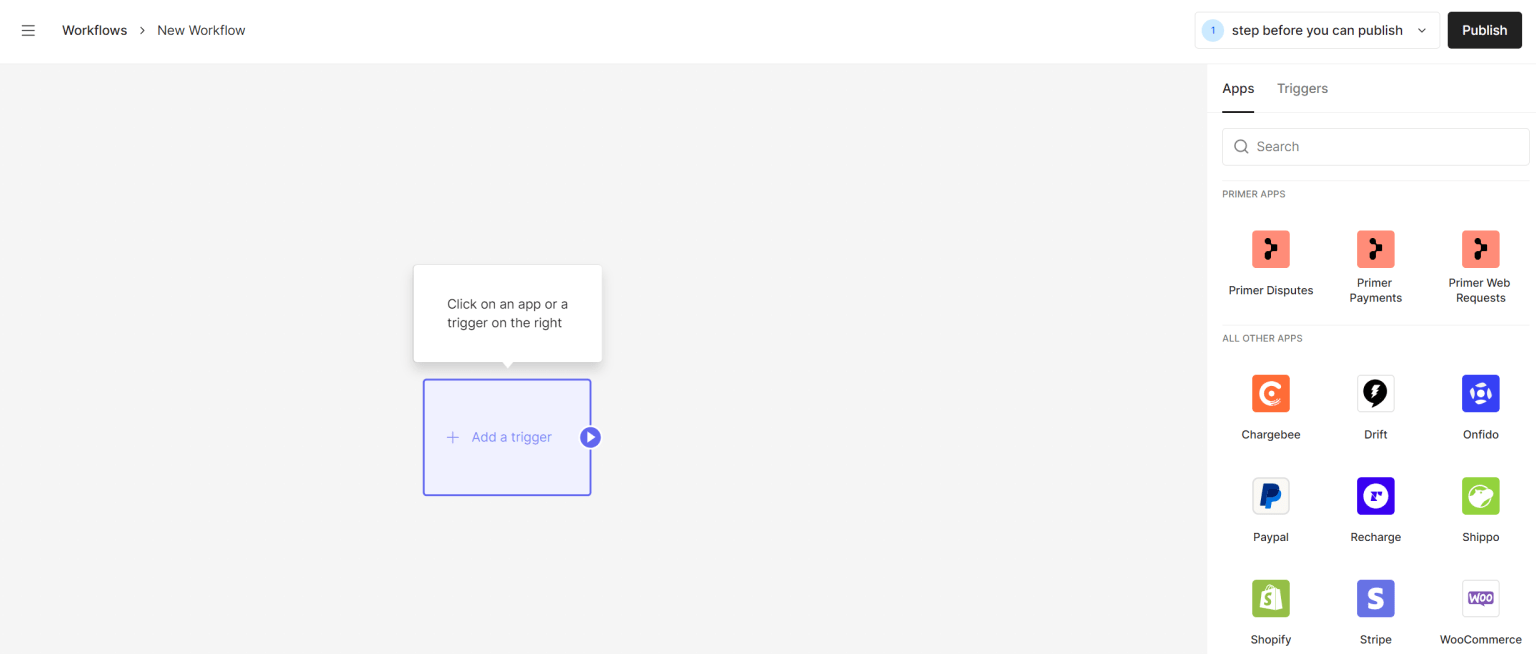
Select a Trigger
Creating a workflow from scratch always starts with the selection of an app and one of its Triggers.
Choosing this Trigger is critical: your workflow will start executing every time an app emits an event matching that Trigger.
For example, you can start a workflow when:
- a payment is created via the Payments app
- a payment status is updated via the Payments app
- a monitor event is created via the Monitors app
- a dispute status is updated via the Disputes app
- an Onfido KYC result is received via the Onfido app
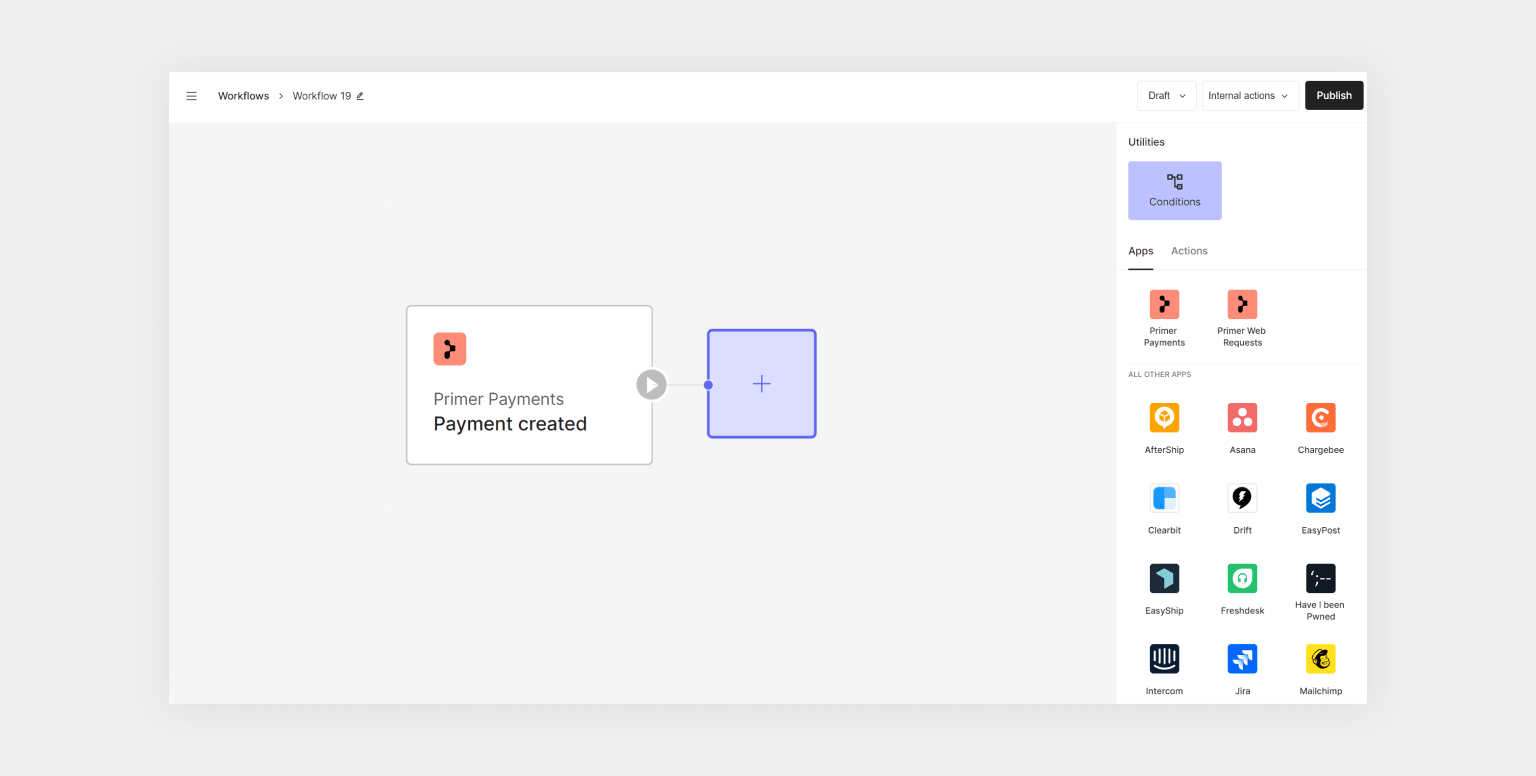
In our example, we want to run our workflow each time a payment is created. The “Payment created” Trigger from the Payments App is perfect for this.
Once the Trigger has been selected, your workflow will be in draft mode. This workflow will not be live until you publish it.
The Trigger will produce a set of output values that you can use in the next workflow block to build upon.
With only a Trigger on the canvas, the workflow is not actively doing anything just yet. Now we can start adding some actions.
Add actions
Actions can be added to a workflow to perform tasks, such as:
- sending a message to Slack
- creating a task on Asana
- authorizing a Payment using the Payments App with a payment processor
Add an action after a trigger, or after any block in the workflow. You can add more than one action to build flows with multiple blocks. Click on the action that you want to use and drag it onto the canvas, you will see placeholders where you can drop an action.
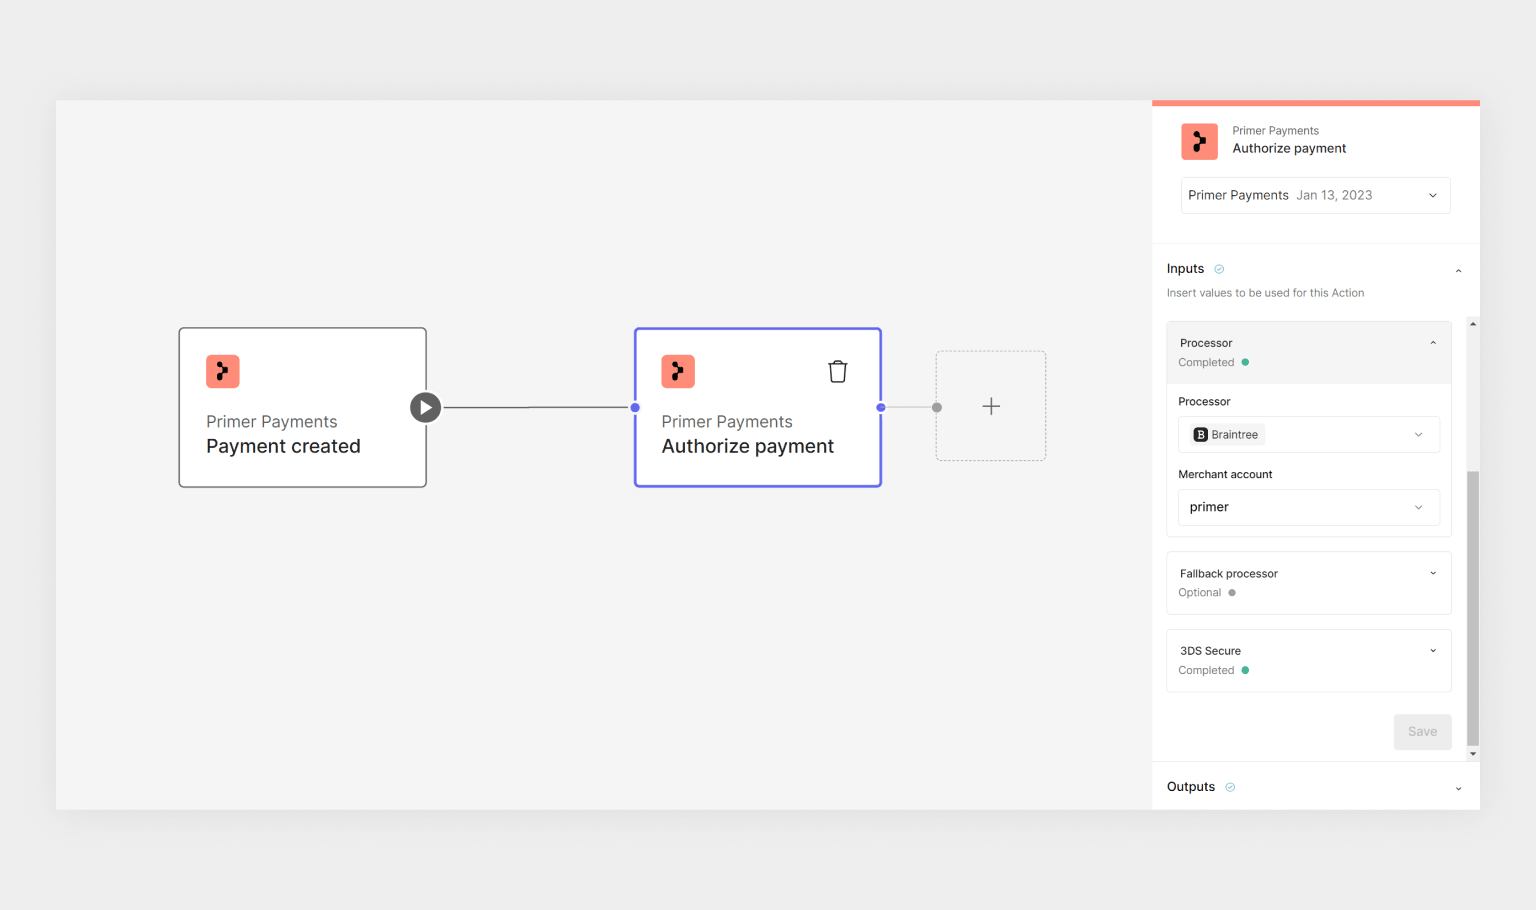
Each action has to be configured with a set of input values. These values are critical for the action to successfully complete its task. For instance:
- “Send a message to Slack“ needs to know what message to send, and to which Slack channel
- “Create a task on Asana” needs to know under which project to create the task, as well as its title and description.
- “Authorize a payment” needs to know which payment to authorize, and which processor to use
These input values can come from different places:
- From a Trigger: e.g. the ”Authorize payment” action can use the payment ID from the “Payment created” Trigger
- From a previous action: e.g. the ”Send a message to Slack” action can use the task URL provided by the “Create a task on Asana” task
- Set up manually: e.g. you can specify the slack channel for the ”Send a message to Slack” action
Actions are automatically executed when the previous action or trigger is successfully completed. Similarly to Triggers, an action produces output values that are available downstream. This enables you to chain multiple actions together, each being able to make use of outputs of previous blocks.
Publish your workflow
To process a payment, you will need at least one workflow that is made of the following blocks:
- “Payment created” trigger
- “Authorize payment” action
You can also set up other payment actions in the workflow, including “Capture”, “Refund” and “Cancel”. See the Payments App section to learn more.
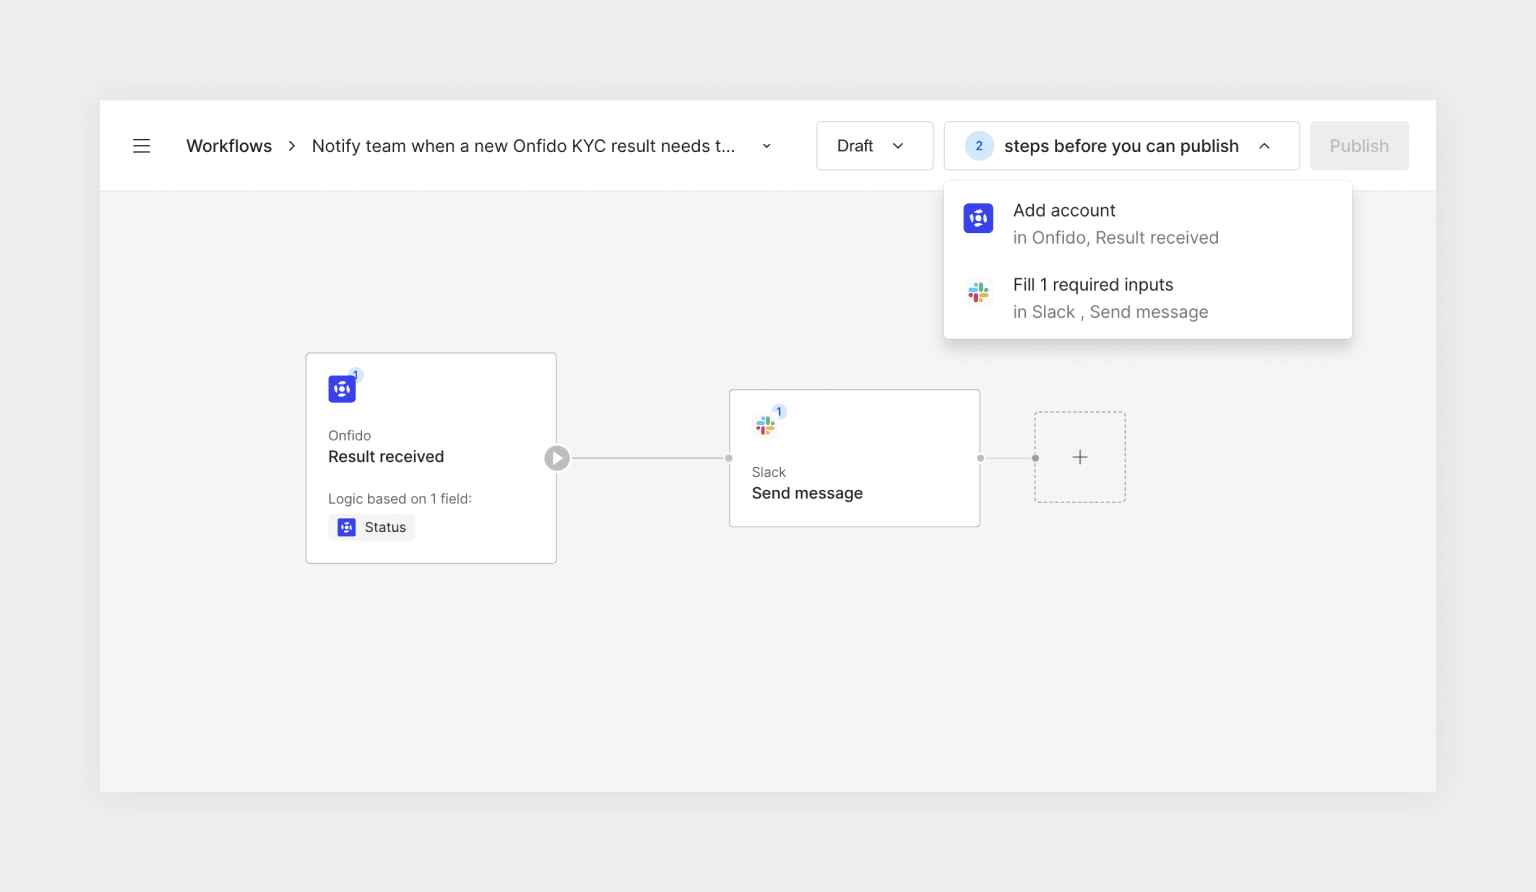
Before you publish your workflow, we validate that all blocks are properly configured. Any incomplete blocks are highlighted so that you can apply the necessary fixes. Learn more about validation.
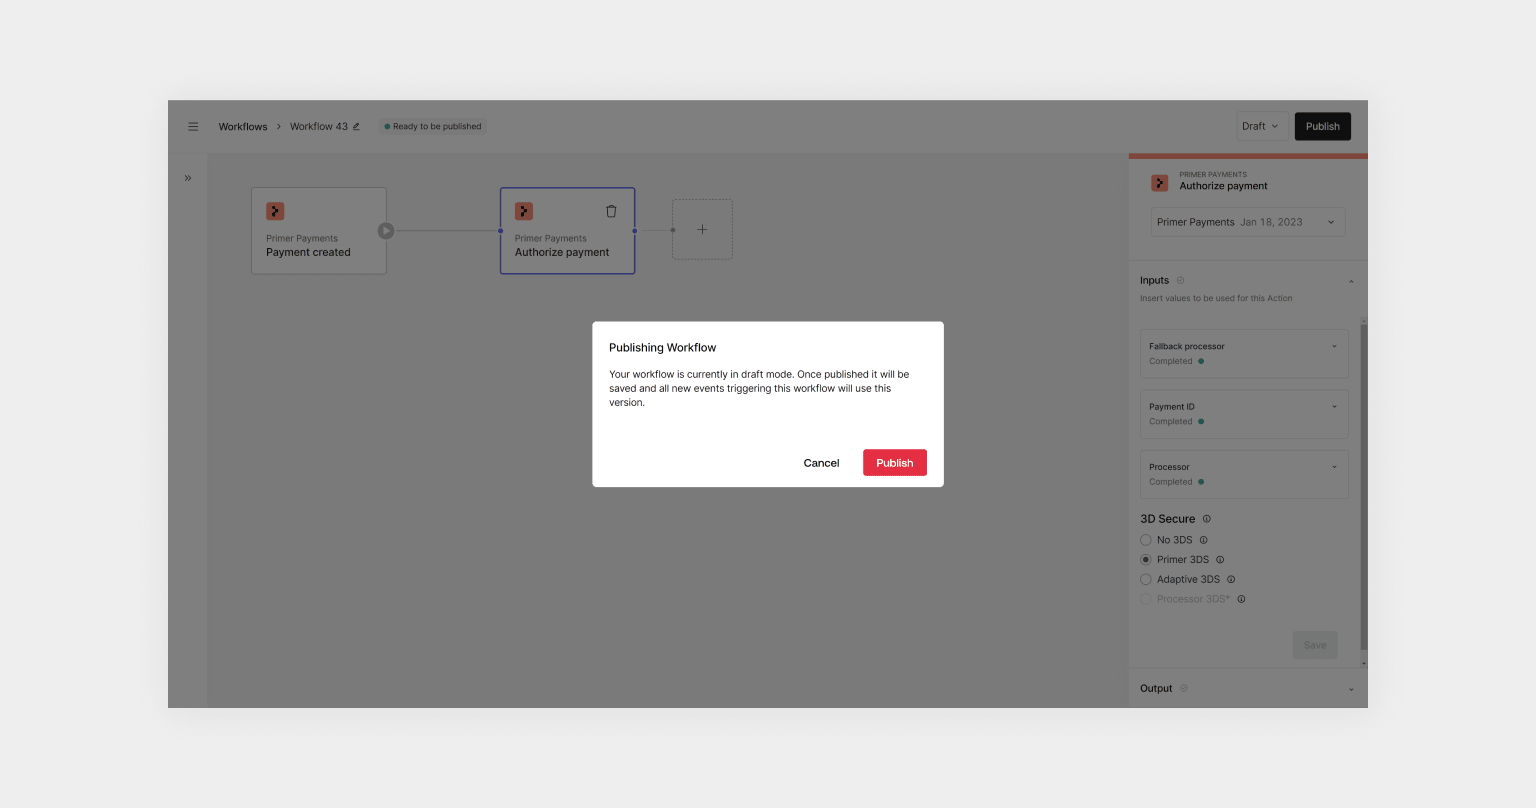
Once all blocks are correctly configured, the “Publish” button becomes enabled and you can proceed with publishing your workflow.
If everything is in order… congratulations, you have just created and published your first workflow.
From now on, your workflow will be executed whenever an app emits an event matching that trigger. In the case of this workflow, the payment will be authorized every time a payment is created.
If anything doesn’t work as intended, check our monitor workflows guide to learn how to troubleshoot your workflows.
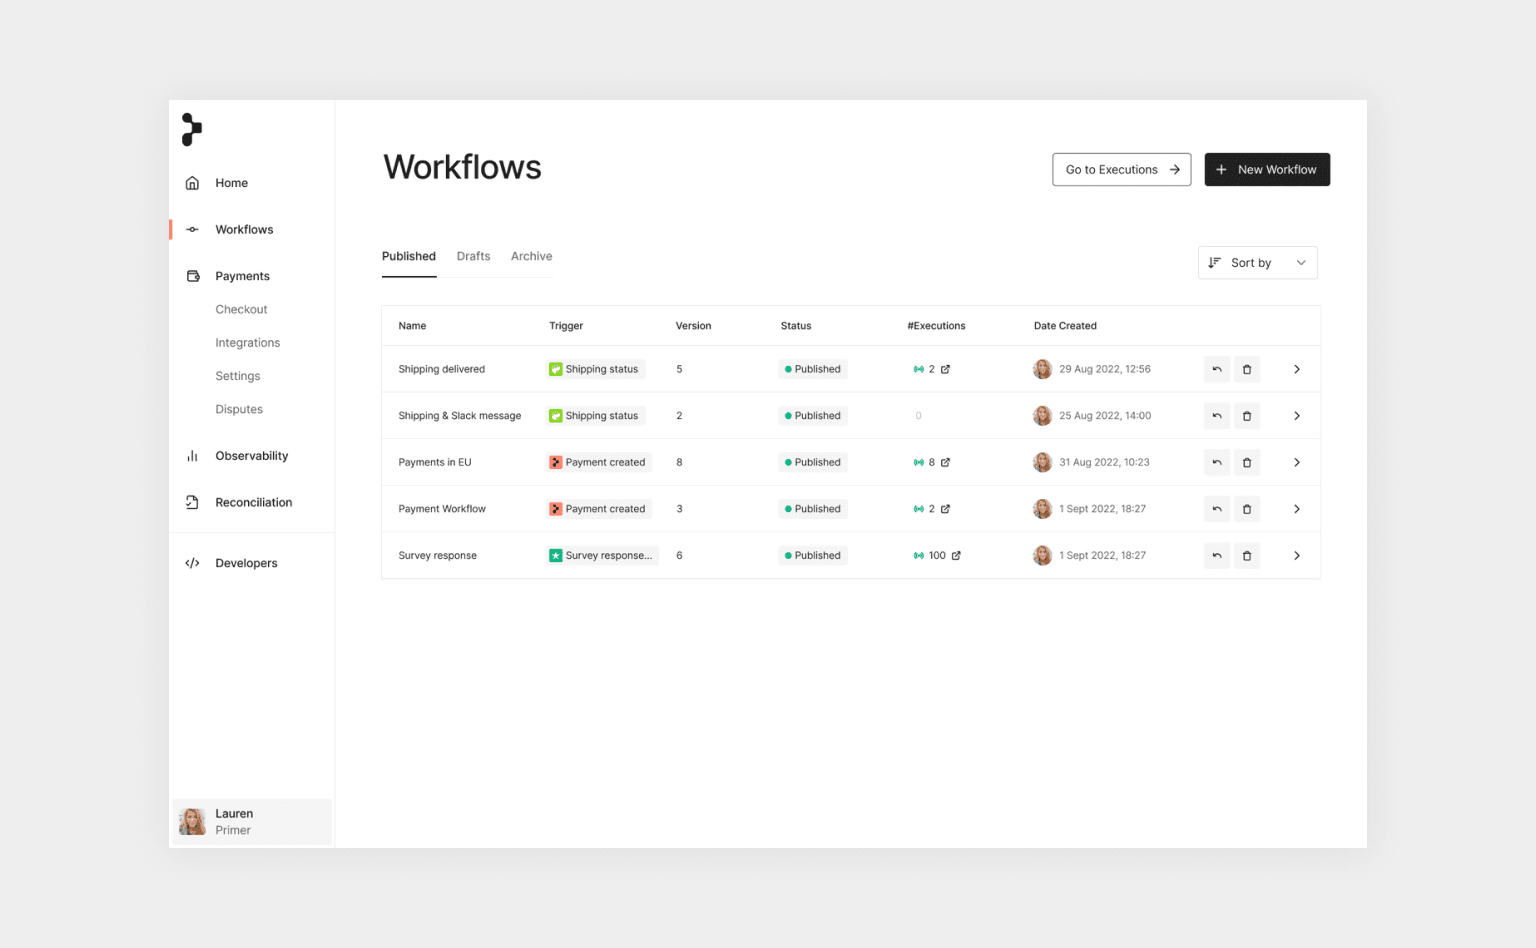
On the Workflows overview page you can see all your published workflows, as well as draft and archived workflows.
Once published, you can still edit your workflow. The changes will be saved as a draft first, but you can always promote your draft by publishing again.
You also have the option to archive a workflow to prevent any new executions. Workflows that have never been published can even be deleted, as no runs are associated with them.
Use Utilities
The workflow we just created is very simple as it runs linearly from left to right.
Utilities help you create more complex workflows, like using the Conditions or Split Utility to branch a workflow into multiple routes.
Conditions exist on two levels: either on the Trigger itself (“Trigger Conditions”) or as a Utility within your workflow route.
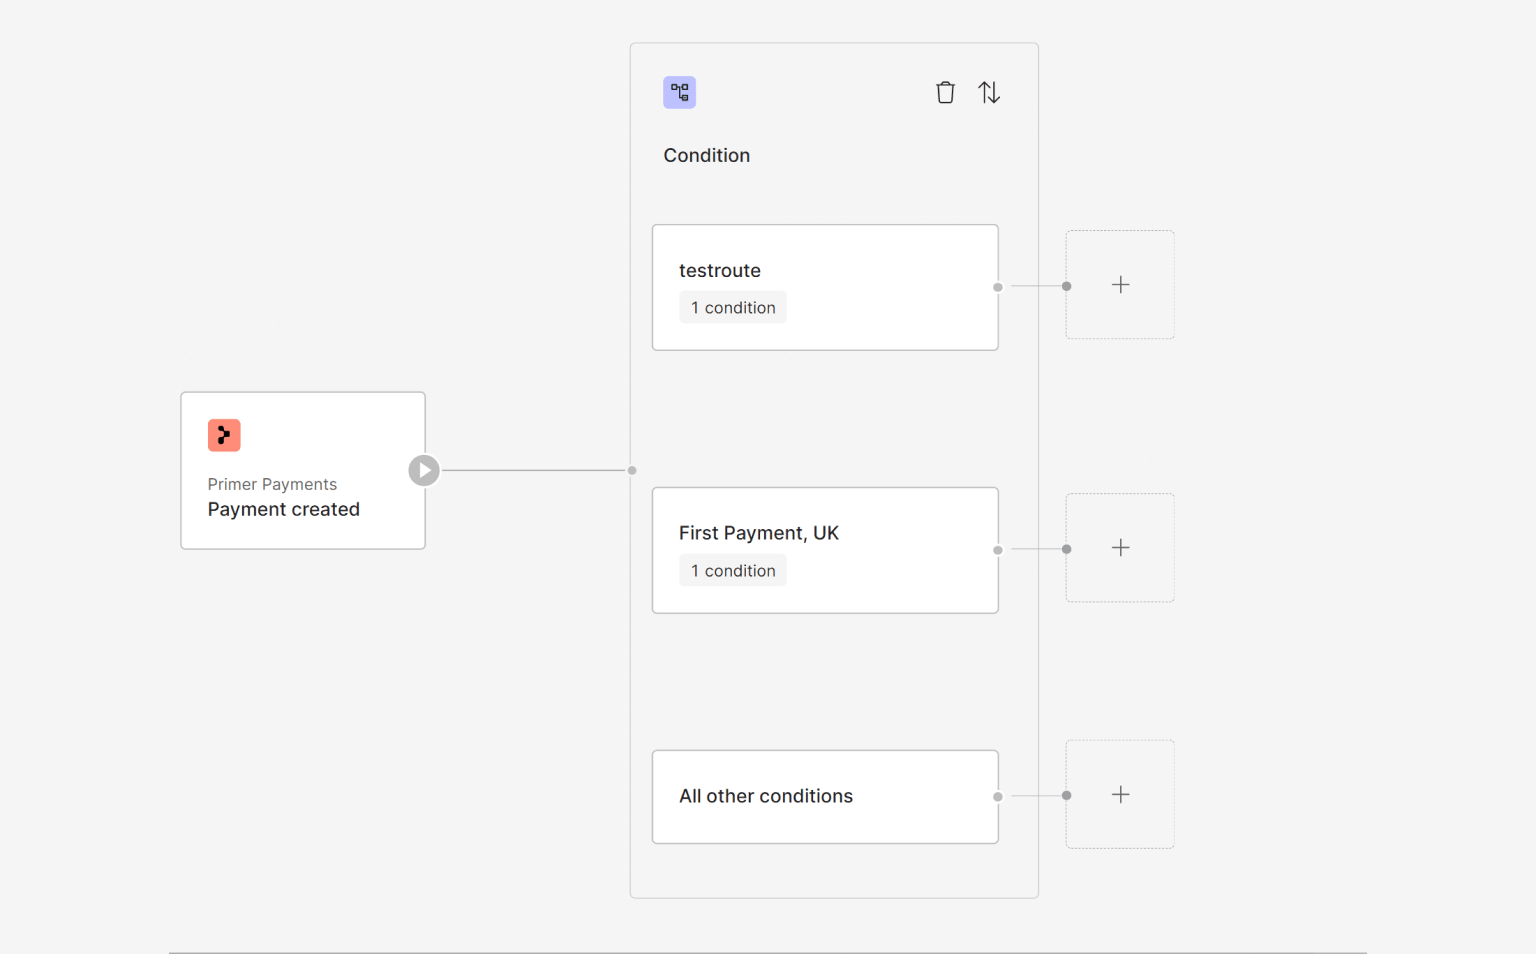
Workflow Conditions
Conditions within the workflow allow you to create multiple routes. For example to run a different set of actions depending on the country of the payment:
Only one route is executed at a time. If multiple routes have their conditions met, only the top-most route will be executed. Be mindful that this only applies to conditions within the workflow.
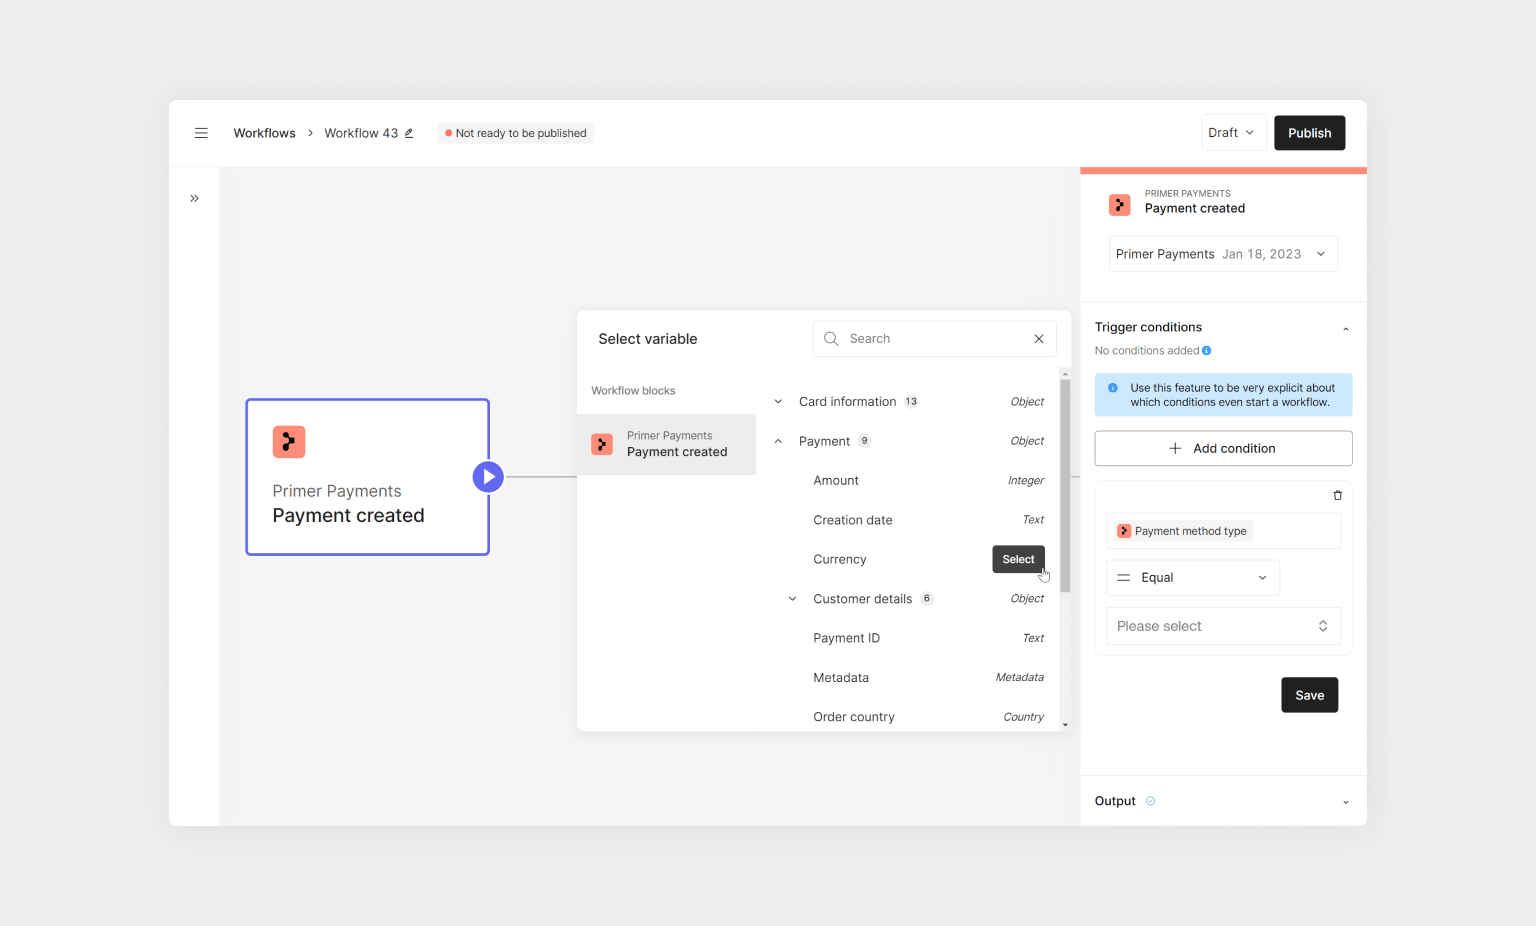
Trigger Conditions
Trigger Conditions enable you to set conditions for when to actually start a workflow. For example executing a “Payment created” Trigger only for Ecommerce payments, or split payment workflows by payment method, or have different workflows depending on specific shipping updates.
Be mindful when setting up the conditions when to start a workflow, as otherwise you are risking starting more than one workflow if the set-up is not explicit enough, or no workflows at all if the set-up is too restrictive.
Start automating
You are now able to supercharge your payment stack with the power of Workflows.
To build more powerful workflows, we encourage you to: