Headless Checkout
Where there is a need for more customization and control over the checkout experience, a headless version of Primer’s Universal Checkout is available.
You can use Headless Universal Checkout with your UI, giving you more flexibility and allowing you to move faster when making design changes, while still having Universal Checkout capture sensitive PCI card data or other form data.
If you’re looking for a simpler way of integrating Universal Checkout, consider integrating our Drop-In checkout.
Not all payment methods are currently compatible with Headless Checkout.
Please refer to this table to learn more about the payment methods available for Headless Checkout.
Before you start
Before you start, make sure:
- you are ready to process a payment
- Universal Checkout is properly configured in the dashboard
Create a client session
A client session is the starting point for integrating payments at Primer. You can attach any data associated with the order to your client session.
Creating a client session provides you with a client token, a temporary key used to initialize the Universal Checkout.
The information you include in the client session is used in the Dashboard:
- to conditionally route payments with Workflows
- to activate payment methods and other features in Universal Checkout
So pass as much information as you can!
Generate an API key
Requests to our API are authenticated using an API key in the X-Api-Key header. Create an API key by visiting the developer page of the Primer Dashboard.
Make sure to set the following scopes for your API Key:
client_tokens:writetransactions:authorize
Make a client session request
On your server, create a client session with
.Make sure to pass at least the following data:
| Field | Description |
|---|---|
| orderId | Your reference for the payment. _Make sure to keep track of orderId - you will later receive updates to the payment via Webhooks. The payment will contain the orderId specified in the client session. _ |
| currencyCode | The three-letter currency code in ISO 4217 format. e.g. use USD for US dollars. |
| order ↳ lineItems | The details of the line items of the order. |
The body of a successful response contains a clientToken that you will use to initialize the Universal Checkout.
Here is how the client session request to the Primer API should look like:
Get Started
Primer Headless Universal Checkout works in a simple way:
- Get a
clientTokenfrom your server - Start Primer Headless Universal Checkout with the client token
- Primer Headless Universal Checkout will then return the
available payment methodsfor the session initiated. Those payment methods that have been configured in the Dashboard and whose conditions match the current client session will be returned. - You show the user the list of available payment methods.
- When the user selects a payment method, show its UI to enable the user to enter their credentials. Depending on the payment method, you will have to either ask the SDK to render it, or build the UI yourself.
- Primer’s Headless Universal Checkout will then create a payment for you and manage its lifecycle. You will receive a confirmation of payment with a callback to indicate the checkout flow has completed.
Step 1. Install the SDK
Please review the Content Security Policy (CSP) recommendations before installing.
With npm
Our Web SDK is available on npm under the name @primer-io/checkout-web.
This package includes TypeScript definitions.
- The npm package only works if used alongside a bundler such as Webpack or Parcel. If you’re directly writing JavaScript using
scripttag, please use our CDN instead. - As of today, the npm package does not work in a server environment. If you are using Next.js, Gatsby, or a similar framework, make sure the
Primerfunctions are called on the client side, or use our CDN instead.
With our CDN
Include the Primer.min.js script and the Checkout.css stylesheet on the page where you want to render the Checkout.
Make sure to pass the proper version in the URL.
The Primer.min.js will add the Primer object to the global scope:
Step 2: Initialize Primer’s Headless Universal Checkout
Generate a client token
Request a client token from your backend by creating a client session.
Check our guide on how to create a client session here.
Remember that based on your client token different payment methods will be available for display.
Configure Headless Universal Checkout
Once you have a client token, initialize Primer’s headless checkout with Primer.createHeadless(clientToken, options).
Make sure to implement at least the following callbacks:
onAvailablePaymentMethodsLoad(paymentMethodTypes)
returns the available payment methods for the client session. Use it to render a list of payment methods.onCheckoutComplete(data)
is called when the payment has been successfully completed. It returns a reference to the payment.onCheckoutFail(error, data, handler)
is called if the payment fails to be created or processed.
Payment methods are added and configured through your Primer Dashboard. onAvailablePaymentMethodsLoad will return the payment methods
whose conditions match the current client session.
Finally, call headless.start() to retrieve the list of payment methods, and start the checkout flow.
Here is a full example to configure and start Headless Universal Checkout:
See more options and events in the SDK API Reference
Step 3: Show available payment methods
When the checkout is done initializing, the callback onAvailablePaymentMethodsLoad is invoked. Use this event to show the list of payment methods to the user:
-
Some payment methods such as Google Pay, Apple Pay, and PayPal require Primer to manage their payment method button.
-
For the others, you have full control over how the payment method button should be presented. To assist you, Primer exposes the
AssetsManagerthat enables you to retrieve the logo and main colors attached to each payment method.
The assets manager is only available once onAvailablePaymentMethodsLoad has been called.
Step 4: Handle payment method selection
Headless Universal Checkout enables you to create any UI that suits your needs, using the components and data we provide.
Step 4.a: Handle cards
When PAYMENT_CARD is available as a payment method and provided via onAvailablePaymentMethodsLoad, build your card form using Primer input elements.
Get started by creating a payment method manager for cards.
Show card fields
Headless Universal Checkout securely captures payment method data while fully embedded in your app. By communicating directly with Primer’s PCI-L1 tokenization service, Universal Checkout transforms sensitive customer data into a secure uniform string called a payment method token.
First, prepare containers in the DOM for the Primer hosted inputs. You would need three containers for the card number, the expiry date, and the CVV.
Then, create the hosted card inputs:
Finally, render your inputs into the relevant containers:
Customize card fields
Card fields are rendered with individual iframes in order to remain PCI-L1 compliant. One key consequence is that the CSS of your page will not be propagated to the card fields. This includes color, and font.
Pass a style object to the render function to configure colors and font options.
Check the “Styling Inputs” section of the Customize Universal Checkout guide to learn how to adapt the style to your requirements.
Reset card form
If needed, the card form can be cleared by calling reset():
Remove card elements
Call removeHostedInputs() to remove the hosted card input fields from the DOM:
Detect card type
When the user enters the card credentials, Headless Universal Checkout automatically detects the possible types of the card.
Listen to the callback onCardNetworksChange on the card manager to receive the type of card.
Learn more about onCardNetworksChange in the API reference.
Capture cardholder name
You are free to render the cardholder name input however you want.
As the user enters their cardholder name, call setCardholderName(cardholderName) to pass the cardholder name to the cardManager:
If the cardholder name is required, its content will be validated by Headless Universal Checkout.
You can specify whether the cardholder name is required by setting an option when initializing Headless Universal Checkout:
Handle input errors
The event change, available on each input, reacts to input changes. This returns if the input is valid or not, and the error type.
Validate and Submit
When the user submits the card information, follow the following flow:
- First, validate all the inputs using the
validate()function that does basic validations on the hosted inputs. - Then, submit the validated data using the
submit()function. This triggers the payment creation.
For example, if the user clicks submit, you can handle it as follows:
Calling submit() triggers the creation and handling of the payment.
- If
onCheckoutCompleteis called, show a success message and reset the inputs. - If
onCheckoutFailis called, show a failure message and allow the customer to try again with the same details.
Prepare 3DS
When the user pays by card, the Workflow will decide whether a 3DS challenge is required or not. If so, Headless Universal Checkout will automatically render the 3DS challenge in context.
To improve 3DS success rates, it is recommended to pass the following elements in the Client Session:
customer.emailAddresscustomer.billingAddress
Integration example snippet
Below is an example code snippet of how it all fits together.
See more options and events in the SDK API Reference
Step 4.b: Handle payment methods with native buttons
This applies to PayPal, Apple Pay and Google Pay.
Some payment methods require Primer to manage the payment method’s button and implementation, and only require you to display the button to your customer.
Follow this approach when PAYPAL, APPLE_PAY or GOOGLE_PAY is available as a payment method and provided via onAvailablePaymentMethodsLoad.
Render the button
Get started by creating the payment method manager:
Then, create an instance of a payment method button and render it:
See additional style options in the SDK API Reference.
Handle button clicks (optional)
When the payment method button is clicked, Headless Universal Checkout automatically handles the rendering of the payment method screen and the payment. Based on the result of the payment, you should handle different callbacks.
- If
onCheckoutCompleteis called, show a success message and hide the button. - If
onCheckoutFailis called, show a failure message and allow the customer to try again.
You can also listen to the click event for logging or analytics purposes:
Other button methods
The button object also supports other methods:
Integration example snippet
Below is an example code snippet of how it all fits together.
Step 4.c: Handle payment methods with redirect
Some payment methods require redirecting to another web page in order to capture payment details.
Headless checkout automatically renders that web page in a popup window in order to maintain the current context.
Get started by creating a payment method manager:
When the user has selected the payment method, call the start function. This function automatically:
- opens a popup to present a loading indicator, then the payment method web page
- shows an overlay on top of your page that prompts the user to focus on the popup
Make sure start is called synchronously after a click
start opens a popup. However, most browsers have strict popup-blocking rules to protect the user. One such rule is to only allow popups that result from a direct user action.
Therefore, to ensure that the popup is properly rendered, make sure to call this function immediately after a user click.
If the browser cannot open popup windows, the current window will be redirected instead.
To ensure maximum compatibility, read the guide on how to handle redirects.
Step 4.d: Handle Klarna
The Klarna payment method requires selecting a payment category before redirecting to capture payment details and finalize the payment.
You can create the interface for selecting a payment category before the redirect. Using an api function exposed by the payment method manager you can start the checkout, after the payment category has been selected and confirmed, and it will automatically render the payment web page in a popup window.
Get started by creating a payment method manager. You need to provide a callback function, onPaymentMethodCategoriesChange, in the options parameter of the createPaymentMethodManager function:
Use the data sent through the onPaymentMethodCategoriesChange callback and use it to render a custom user interface for the user to be able to select payment categories. More details about the callback can be found here
Klarna will need to render more details about the payment method inside a container. You need to provide a containerId, that belongs to a container in the DOM, which will later be used to render payment details about the selected payment method category.
When a payment method category has been selected call the renderCategory function from the payment method manager. The renderCategory function uses the id of the selected payment method category, a containerId and an onHeightChange callback in order to render more details about the category in the selected container.
The onHeightChange callback will return a new height based on the selected payment method category. Use the new height to change the height of the container in which Klarna will render the payment category details. More details about the callback can be found here
When the user has selected a payment category and has confirmed the start of the payment, call the start function. This function automatically:
- opens a popup to present a loading indicator, then the payment method web page
- shows an overlay on top of your page that prompts the user to focus on the popup
Step 4.e: Handle Stripe ACH
The Stripe ACH payment method requires filling in a form with the customer’s first name, last name, and email, and then going through the Stripe interface to collect the bank account details. Once the bank details are collected, the mandate should be displayed together with a button so the customer can click to confirm it.
Optionally, if it’s an existing customer, the existing customer details can be used to pre-populate the input fields.
You can grab the details from the onClientSessionUpdate callback and store them on a variable, example:
The customer client session property can be undefined.
The onClientSessionUpdate is always called once before the onAvailablePaymentMethodsLoad, so the payment method manager can be created as usual.
When creating the ACH payment method manager, the stripePublishableKey needs to be provided, and optionally, the onCollectBankAccountDetailsComplete callback.
After creating the manager and displaying the form, the data can be submitted.
In case something is wrong, a validation result will be returned, and if there’s no validation error, the collectBankAccountDetails method can be called to start the Stripe flow.
Alternatively, instead of awaiting for the collectBankAccountDetails promise to be resolved, the onCollectBankAccountDetailsComplete callback can be set up to display the mandate screen.
Once the customer clicks the confirm button, the confirmMandate method can be called.
Backend API V2.4 enhances reliability and minimizes synchronization issues with external processors by significantly extending payment timeouts. This longer timeout accommodates external processor limits and internal operations, ensuring more reliable transaction handling. These improvements are fully supported starting with Primer iOS SDK 2.34.0, so upgrading your app to use the newest SDK version is highly recommended when creating client sessions with API V2.4.
Install the SDK
With CocoaPods
Add the following in your Podfile:
Then run pod install to install PrimerSDK on your workspace.
In case you encounter an error that the bundle needs signing on Xcode 14, add the following post-install script in your podfile.
With Swift Package Manager
The Swift Package Manager is a tool for automating the distribution of Swift code and is integrated into Xcode. In order to add PrimerSDK with Swift Package Manager:
- Select your project, and then navigate to
Package Dependencies - Click on the + button at the bottom-left of the
Packagessection - Paste https://github.com/primer-io/primer-sdk-ios.git into the Search Bar, or search for
primer-sdk-iosin the Search Bar. - Press Add Package
- Let Xcode download the package and set everything up
For more details about SDK versions, please see our changelog.
Step 1: Prepare Headless Universal Checkout
First, import the PrimerSDK. Then call PrimerHeadlessUniversalCheckout.current.start to start the checkout session with your client token and a delegate to receive important events.
The completion handler will return the available payment methods for the current session. We will use them later to present a list of payment methods.
Each available payment method contains the following:
paymentMethodType
a unique string identifier for the payment method (e.g.ADYEN_IDEAL)paymentMethodName
a user friendly English localized string identifier for the payment method (e.g.Apple Pay)supportedPrimerSessionIntents
an array ofPrimerSessionIntentwhich defines what intents can be used with this payment method (i.e..checkoutor.vault).paymentMethodManagerCategories
an array which defines the payment method managers that can be used with this payment method (i.e..nativeUIor.rawData).- [Optional]
requiredInputDataClass
the class type that should be used with the raw data manager.
Implement the primerHeadlessUniversalCheckoutDidCompleteCheckoutWithData(_:) which will notify you when the checkout is complete with a payment.
Step 2: Render available payment methods UI
You should now have the available payment methods for the client session.
You can render your own UI for each payment method, or take advantage of the PrimerHeadlessUniversalCheckout.AssetsManager helper to get access to payment methods’ assets.
The payment method asset contains the following:
paymentMethodType
a unique string identifier for the payment methodpaymentMethodName
a user friendly English localized string identifier for the payment method (e.g.Apple Pay)paymentMethodLogo
an instance of thePrimerPaymentMethodLogopaymentMethodBackgroundColor
an instance of thePrimerPaymentMethodBackgroundColor
The PrimerPaymentMethodLogo holds UIImage objects for different scenarios
- [Optional]
colored
aUIImageto be used anywhere - [Optional]
dark
aUIImageto be used in dark mode - [Optional]
light
aUIImageto be used in light mode
The PrimerPaymentMethodBackgroundColor holds UIColor objects for different scenarios
- [Optional]
colored
aUIColorto be used anywhere - [Optional]
dark
aUIColorto be used in dark mode - [Optional]
light
aUIColorto be used in light mode
colored, dark and light variables are all optional, but it is guaranteed that the objects will contain at least one of them.
With the above images and colors you can build your own payment methods UI 💪
Step 3: Implement a payment method manager
Now that your UI presents the available payment methods, let’s use the payment method managers to allow users to go through the payment method flow.
A payment method manager is a class abstracting the state and UI of a given payment method. Currently, 3 payment methods managers are supported, each of them responsible for a different payment method category.
PrimerHeadlessUniversalCheckout.NativeUIManager
The native UI manager is responsible for payment methods that need to present their own UI (e.g. Apple Pay).PrimerHeadlessUniversalCheckout.RawDataManager
The raw data manager is responsible for payment methods that need to receive data from the user (e.g. card form).
Bear in mind that a payment method could be implemented by more than one payment method manager. Check which managers are supported for each payment method in the paymentMethodManagerCategories of the payment method objects received in Step 1.
A manager can only be used after Headless Checkout has been initialized. We consider Headless Checkout to be initialized after the primerHeadlessUniversalCheckoutDidLoadAvailablePaymentMethods is triggered and payment methods for the provided clientToken are returned.
If that’s not the case Headless Checkout throws a uninitialized-sdk-session error.
If a payment method manager gets initialized with an unsupported payment method type (i.e. the payment method’s object doesn’t include the manager’s category), Headless Checkot throws an unsupported-payment-method-type error.
Native UI manager
This manager can be used for the payment methods that contain .nativeUI in the paymentMethodManagerCategories array.
The native UI manager is typically used for the payment methods that need to present their own UI, such as Apple Pay.
Make sure that the intent passed in the showPaymentMethod function (.checkout for making a payment, .vault for vaulting the payment method) is supported by the payment method. Check the supportedPrimerSessionIntents array of the payment method.
That’s it! The SDK will present the native UI to the user, and then attempt to create a payment.
The payment’s data will be returned on primerHeadlessUniversalCheckoutDidCompleteCheckoutWithData configured in Step 1.
Raw data manager
This manager can be used for any payment method that contains .rawData in the paymentMethodManagerCategories array.
The raw data manager can be used for payment methods that allow you to capture customer data yourself. This gives you full control over the UI while still taking advantage of all the features that make Primer great.
At any point, you can validate your data by calling setRawData() and by listening to primerRawDataManager(_: dataIsValid: errors:) - the SDK will return errors specific to each required input.
Once the data is valid, send it to Headless Checkout for further processing by calling submit().
Configure the PrimerHeadlessUniversalCheckout.RawDataManager and conform to its delegate
Assuming that the payment method contains .rawData in the paymentMethodManagerCategories, create your raw data manager, and set its delegate.
Build a form
Build your own form to let the users enter their data. You can use the requiredInputElementTypes of the PrimerHeadlessUniversalCheckout.RawDataManager object to get informed about what input fields you have to render.
The requiredInputElementTypes is an array that can contain any of the following:
.cardNumber.expiryDate.cvv.cardholderName.phoneNumber.retailer
Build and validate your raw data
Use the class type that has been provided in the requiredInputDataClass of the payment method to build the captured data, and pass it to the manager. Here is an example for card payments:
When you set set the data on the raw data manager, the manager validates it and notifies you via the delegate functions. You can then change the state of your submit button based on the validation changes.
The delegate also provides a function that will notify you of metadata updates, e.g. that the card type was detected.
Submit the form’s data
Once the data has been validated, call the manager’s submit() function.
When the function submit() is called, the SDK will attempt to create a payment. The payment’s data will be returned on primerHeadlessUniversalCheckoutDidCompleteCheckoutWithData configured in Step 1.
Step 4: Handle errors
Some functions can throw and they will fail immediately. All other errors will end up in the SDK’s optional delegate function func primerHeadlessUniversalCheckoutDidFail(withError:checkoutData:), where you can handle them accordingly.
Advanced Configuration
For more customization on your needs, you can listen to all events posted by Headless Universal Checkout and react to them. Visit the API reference for a full list of the delegate functions.
Prepare 3DS
- In order to make the SDK lightweight, 3DS requires the addition of the Primer 3DS library. Check out our guide on how to add the Primer 3DS library to your iOS app.
- When the user pays by card, the Workflow will decide whether or not a 3DS challenge is required. If so, Headless Universal Checkout will automatically render the 3DS challenge.
- To improve 3DS success rates, it is recommended to pass the following elements in the Client Session:
| Field | Description |
|---|---|
| customer ↳ emailAddress | The customer’s email address |
| customer ↳ billingAddress | The customer’s billing address |
Learn more about how to configure 3DS!
Did It Work?
If everything went well, you should be able to see the payment you just created on your Dashboard under the Payments menu.
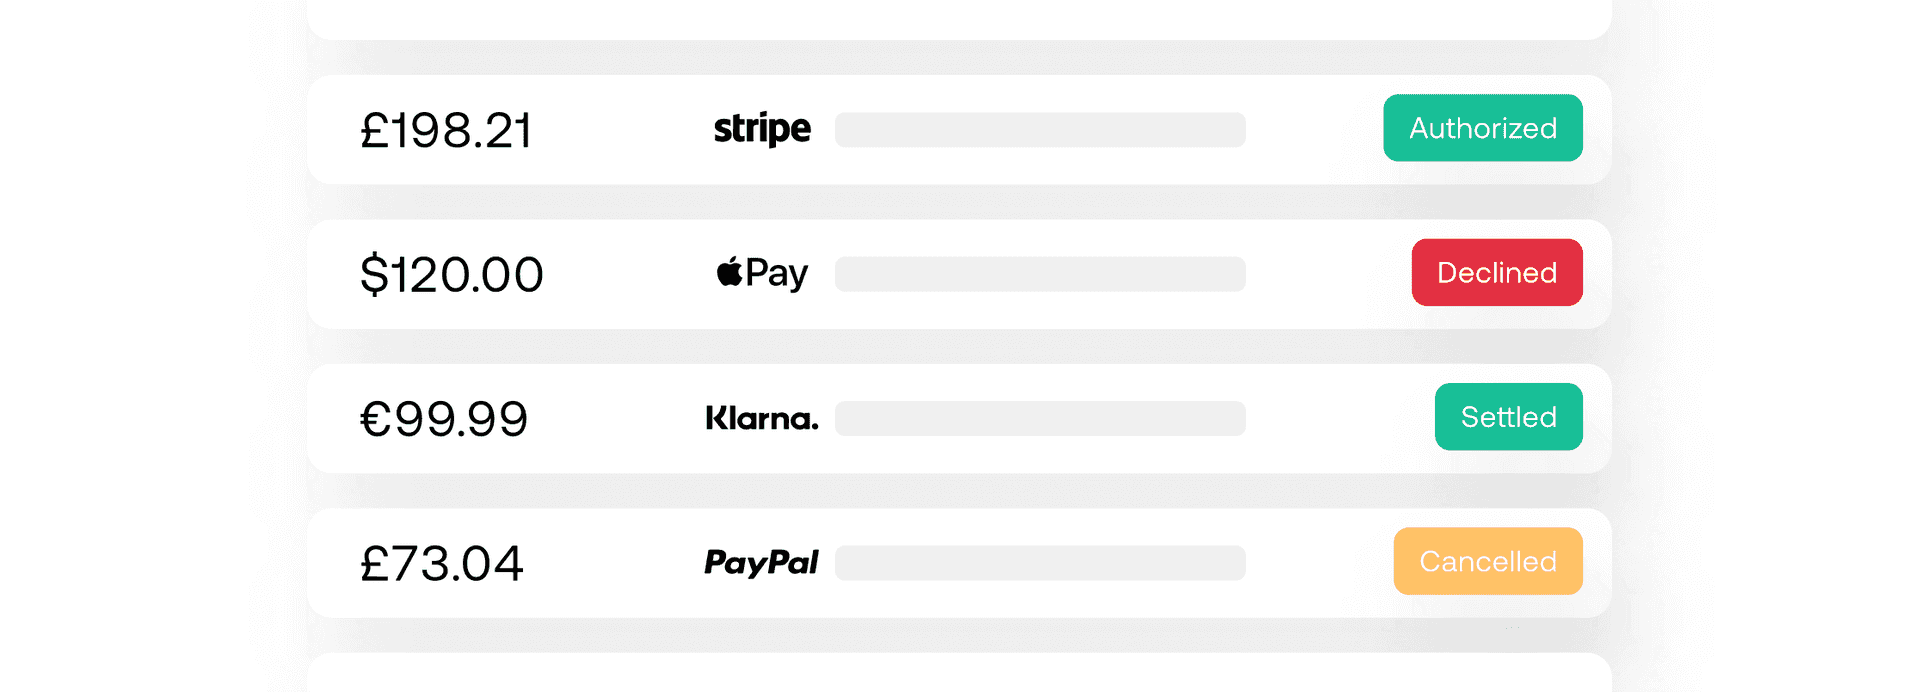
Payment list
Backend API V2.4 enhances reliability and minimizes synchronization issues with external processors by significantly extending payment timeouts. This longer timeout accommodates external processor limits and internal operations, ensuring more reliable transaction handling. These improvements are fully supported starting with Primer Android SDK 2.35.0, so upgrading your app to use the newest SDK version is highly recommended when creating client sessions with API V2.4.
Install the SDK
Add the following to your app/build.gradle file:
For more details about SDK versions, please see our changelog.
It is highly recommended adding the following settings to your app/build.gradle file:
Step 1: Prepare the Headless Universal Checkout Listener
Prepare the PrimerHeadlessUniversalCheckoutListener that will handle callbacks that happen during the lifecycle of the payment methods and the payment.
Import the PrimerHeadlessUniversalCheckout SDK and set its listener as shown in the example below.
onAvailablePaymentMethodsLoaded is invoked when Headless Universal Checkout is started with your provided client token. It returns a list of payment methods to render.
Each returned payment method contains the following:
paymentMethodType
a unique string identifier for the payment method (e.g.ADYEN_IDEAL)paymentMethodManagerCategories
a list which defines the payment method managers that can be used with this payment method (i.e.NATIVE_UIorRAW_DATA).supportedPrimerSessionIntents
a list ofPrimerSessionIntentwhich defines what intents can be used with this payment method (i.e.CHECKOUTorVAULT).- [Optional]
requiredInputDataClass
the class type that should be used with the raw data manager.
Step 2: Start Headless Universal Checkout
Once you have a client token, you can initialize Primer’s Headless Checkout by calling PrimerHeadlessUniversalCheckout.current.start(…)
Once Primer’s Headless Universal Checkout is configured, its listener functions will notify you about Headless Universal Checkout events.
On the PrimerHeadlessUniversalCheckout.current.start you can optionally pass custom settings and/or add the PrimerHeadlessUniversalCheckoutUiListener to listen to UI events.
Additionally, you can set the listener by calling
PrimerHeadlessUniversalCheckout.current.setListener(listener)
Check the SDK reference here to customize your SDK settings.
Step 3: Render available payment methods UI
When the checkout is done initializing, the onAvailablePaymentMethodsLoaded method will be invoked.
Use this event to show the list of payment methods to the user.
You can render your own UI for each payment method, or take advantage of the PrimerHeadlessUniversalCheckout.AssetsManager helper to get access to payment methods’ resources.
PrimerPaymentMethodAsset
The payment method asset contains the following:
paymentMethodType
a unique string identifier for the payment methodpaymentMethodName
a user friendly English localized string identifier for the payment method (e.g.Google Pay)paymentMethodLogo
an instance of thePrimerPaymentMethodLogopaymentMethodBackgroundColor
an instance of thePrimerPaymentMethodBackgroundColor
The PrimerPaymentMethodLogo holds Drawable objects for different scenarios:
- [Optional]
colored
aDrawableto be used anywhere - [Optional]
dark
aDrawableto be used on dark mode - [Optional]
light
aDrawableto be used on light mode
The PrimerPaymentMethodBackgroundColor holds @ColorInt values for different scenarios:
- [Optional]
colored
a@ColorIntto be used anywhere - [Optional]
dark
a@ColorIntto be used on dark mode - [Optional]
light
a@ColorIntto be used on light mode
colored, dark and light variables are all optional, but it is guaranteed that the objects will contain at least on of them.
PrimerPaymentMethodNativeView
Using the provided payment method views is required for certain payment methods, such as Google Pay. The Primer SDK ensures these views are seamlessly integrated and configured based on the PrimerPaymentMethodOptions and your client session details, where applicable.
With the above images and colors you can build your own payment methods UI 💪
Step 4: Implement a payment method manager
Now that your UI presents the available payment methods, use the payment method managers to allow users to go through the payment method flow.
A payment method manager is a class abstracting the state and UI of a given payment method. Currently there are 3 payment methods managers responsible for a different payment method category:
PrimerHeadlessUniversalCheckoutRawDataManager
The raw data manager is responsible for payment methods that need to receive data from the user (e.g. card form).PrimerHeadlessUniversalCheckoutNativeUiManager
The native UI manager is responsible for payment methods that need to present their own UI (e.g. Google Pay).
Bear in mind that a payment method might be able to be implemented by more than one payment method manager. You can check which managers are supported for each payment method in the paymentMethodManagerCategories of the payment method objects received in Step 1.
A manager can only be used after Headless Checkout has been initialized. We consider Headless Checkout to be initialized after the onAvailablePaymentMethodsLoaded is triggered and payment methods for the provided clientToken are returned.
If that’s not the case SDK will throw SdkUninitializedException.
If a payment method manager gets initialized with an unsupported payment method type (i.e. the payment method’s object doesn’t include the manager’s category), the SDK will throw an UnsupportedPaymentMethodException error.
Native UI manager
This manager can be used for any payment method that contains NATIVE_UI in the paymentMethodManagerCategories array.
The native UI manager can be used for any payment method that needs to present its own UI, like Google Pay.
Make sure that the sessionIntent in the showPaymentMethod function is valid and contained in the supportedPrimerSessionIntents array.
If that’s not the case SDK will throw UnsupportedPaymentIntentException.
That’s it! The SDK will present the native UI to the user, and then attempt to create a payment.
The payment’s data will be returned on onCheckoutCompleted configured in Step 1.
Raw Data Manager
This manager can be used for any payment method that contains RAW_DATA in the paymentMethodManagerCategories array.
The raw data manager can be used for payment methods that allow you to pass the data in the SDK (an example would be card data).
With the raw manager, you can use your fully customized UI and still use all of the features that make Primer great.
At any point, you can validate your data by calling setRawData() and by listening to onValidationChanged. Primer will return errors specific to each required input.
Only when the data is valid, you can send it to Primer for further processing by calling submit.
Configure the PrimerHeadlessUniversalCheckoutRawDataManager and subscribe to callbacks
Assuming that the payment method contains RAW_DATA in the paymentMethodManagerCategories, create your raw data manager, and optionally set the onValidationChanged and the onMetadataChanged callbacks.
Listen to the card data validation state and enable your form’s submit button accordingly.
Build a form
Build your own form to let the users enter their data. You can use the getRequiredInputElementTypes
of the PrimerHeadlessUniversalCheckoutRawDataManager object to get informed about what input fields
you have to render. The getRequiredInputElementTypes is a List that can contain any of the following:
CARD_NUMBEREXPIRY_DATECVVCARDHOLDER_NAMEPHONE_NUMBERRETAIL_OUTLET
You can render the form input elements like this:
Build and validate your raw data
Use the class type that has been provided in the requiredInputDataClass of the payment method to build the capture data, and pass it to the manager. Here is an example for card payments:
When you set the data on the raw data manager, the manager validates it and notifies you via the listener functions. You can then change the state of your submit button based on the state of validation.
The listener also provides a function onMetadataChanged that will notify you on metadata updates, e.g. that the card type was detected.
Submit the form’s data
Finally, configure the “on click” listener of the submit button:
When the function submit is called, the SDK will attempt to create a payment.
The payment’s data will be returned on onCheckoutCompleted(checkoutData) configured in Step 1.
Perform cleanup
In order to remove the provided listeners and stop any API calls performed by the manager, make sure to call the cleanup function:
Step 5: Handle Listener Callbacks (Optional)
Handle onPreparationStarted Callback (Optional)
This function will notify you that the tokenization preparation has started. At this point, the SDK has not yet started to communicate with Primer’s backend. It may be useful in case you want to show a loader or notify user about progress in any other way.
Handle onTokenizationStarted Callback (Optional)
This function will notify you that the tokenization API call has been fired. It may be useful in case you want to show a loader or notify user about progress in any other way.
Handle onPaymentMethodShowed Callback (Optional)
This function will notify you that the payment method you requested to show has been presented.
Handle errors
Use the onFailed method to handle any errors emitted by the SDK during the checkout flow.
Advanced Configuration
For more customization on your needs, you can listen to all events posted by Headless Universal Checkout and react to them. Visit the SDK reference for a full list of the listener functions.
Prepare 3DS
- In order to make the SDK lightweight, 3DS requires the addition of the Primer 3DS library. Check out our guide on how to add the Primer 3DS library to your Android app.
- When the user pays by card, the Workflow will decide whether or not a 3DS challenge is required. If so, Headless Universal Checkout will automatically render the 3DS challenge.
- To improve 3DS success rates, it is recommended to pass the following elements in the Client Session:
| Field | Description |
|---|---|
| customer.emailAddress | The customer’s email address |
| customer.billingAddress | The customer’s billing address |
Learn more about how to configure 3DS!
Did It Work?
If everything went well, you should be able to see the payment you just created on your Dashboard under the Payments menu.
Payment list
Backend API V2.4 enhances reliability and minimizes synchronization issues with external processors by significantly extending payment timeouts. This longer timeout accommodates external processor limits and internal operations, ensuring more reliable transaction handling. These improvements are fully supported starting with Primer React Native SDK 2.35.0, so upgrading your app to use the newest SDK version is highly recommended when creating client sessions with API V2.4.
Install the SDK
Add the SDK package
Requirement for iOS
Once you are done, navigate to the /ios folder and run pod install.
For more details about SDK versions, please see our changelog.
Step 1. Prepare Headless Universal Checkout
Firstly, import HeadlessUniversalCheckout from @primer-io/react-native. Then set Headless Universal Checkout callbacks in the headlessUniversalCheckoutCallbacks property of your settings. These callbacks are handled during the checkout’s lifecycle.
Once done, start HeadlessUniversalCheckout with your session’s client token. This will return a list of available payment methods for you to handle.
Each payment method returned contains the following:
paymentMethodType
a unique string identifier for the payment method (e.g.ADYEN_IDEAL)paymentMethodName
a user friendly English localized string identifier for the payment method (e.g.Apple Pay)supportedPrimerSessionIntents
an array ofSessionIntentwhich defines what intents can be used with this payment method (i.e.CHECKOUTorVAULT).paymentMethodManagerCategories
an array which defines the payment method managers that can be used with this payment method (i.e.NATIVE_UIorRAW_DATA).- [Optional]
requiredInputDataClass
theStringrepresenting class type that should be used with the raw data manager.
Step 2: Render available payment methods UI
You should now have the available payment methods for the client session. You can render your own UI for each payment method, or take advantage of the AssetsManager helper to get access to payment methods’ resources.
AssetResource
The payment method asset contains the following:
paymentMethodType
a unique string identifier for the payment method.paymentMethodName
a user friendly English localized string identifier for the payment method (e.g.Apple Pay)paymentMethodLogo
contains the logos’ local URLscolored?: string: Local URL for the colored value of the logodark?: string: Local URL for the dark value of the logolight?: string: Local URL for the light value of the logo
paymentMethodBackgroundColor
contains the background colors hex valuescolored?: string: Color hex value for the colored background colordark?: string: Color hex value for the dark mode background colorlight?: string: Color hex value for the light mode background color
colored, dark and light variables are all optional, but it is guaranteed that the objects will contain at least one of them.
NativeViewResource
paymentMethodType
a unique string identifier for the payment method.paymentMethodName
a user friendly English localized string identifier for the payment method (e.g.Apple Pay)nativeViewName
a string representing the name of the native view. Pass this when renderingNativeResourceView.
The payment method native view resource contains the following:
Using the provided payment method views is required for certain payment methods, such as Google Pay. The Primer SDK ensures these views are seamlessly integrated and configured based on the PrimerSettings and your client session details, where applicable.
With the above URLs and colors you can build your own payment method UI 💪.
Step 3: Implement a payment method manager
Now that your UI presents the available payment methods, let’s use the payment method managers to allow users to go through the payment method flow.
A payment method manager is a class abstracting the state and UI of a given payment method. Currently, there are 3 payment methods managers, each of them responsible for a different payment method category.
PrimerHeadlessUniversalCheckout.NativeUIManager
The native UI manager is responsible for all payment methods that need to present their own UI (e.g. Apple Pay or Google Pay).PrimerHeadlessUniversalCheckout.RawDataManager
The raw data manager is responsible for each payment method that you need to pass some raw data (e.g. card form).
Bear in mind that a payment method might be able to be implemented by more than one payment method manager. You can check which managers are supported for each payment method in the paymentMethodManagerCategories of the payment method objects received in Step 1.
A manager can only be used after Headless Checkout has been initialized. We consider Headless Checkout to be initialized after the onAvailablePaymentMethodsLoad is triggered and payment methods for the provided clientToken are returned.
If that’s not the case SDK will throw a uninitialized-sdk-session error.
If a payment method manager gets initialized with an unsupported payment method type (i.e. the payment method’s object doesn’t include the manager’s category), it will throw an unsupported-payment-method-type error.
Native UI manager
This manager can be used for any payment method that contains NATIVE_UI in the paymentMethodManagerCategories array.
The native UI manager can be used for any payment method that needs to present its own UI, like Apple Pay.
Make sure that the intent in the showPaymentMethod function is valid and contained in the supportedPrimerSessionIntents array.
That’s it! The SDK will present the native UI to the user, and then attempt to create a payment.
The payment’s data will be returned on the onCheckoutComplete that we configured in Step 1.
Raw Data Manager
This manager can be used for any payment method that contains RAW_DATA in the paymentMethodManagerCategories array.
The raw data manager can be used for payment methods that allow you to pass the data in the SDK (an example would be card data).
With the raw manager, you can use your fully customized UI and still use all of the features that make Primer great.
At any point, you can validate your data by calling setRawData() and by listening to onValidation. Primer will return errors specific to each required input.
When the data is valid, you can send it to Primer for further processing by calling submit().
Configure the RawDataManager
Assuming that the payment method contains RAW_DATA in the paymentMethodManagerCategories, create your raw data manager, and optionally set its delegate.
Build a form
Build your own form to let the users enter their data. You can use the getRequiredInputElementTypes() object to get informed about what input fields you have to render. It returns an array that can contain any of the following:
- “CARD_NUMBER”,
- “EXPIRY_DATE”,
- “CVV”,
- “CARDHOLDER_NAME”,
- “PHONE_NUMBER”
Build and validate your rawData
Then use the class type that has been provided in the requiredInputDataClass in the payment method to build your raw data. Let’s say that you’re building card data, then you would do the following:
Each time you set the data on the raw data manager, the manager will validate them and notify you via the callback onValidation. You can then change the state of your submit button based on the validation changes.
You can also listen to the onMetadataChange that will notify you of metadata updates, e.g. that the card type was detected.
Submit the form’s data
Once the data has been validated, call the manager’s submit() function.
That’s it! When the function submit() is called, the SDK will attempt to create a payment.
The payment’s data will be returned on the onCheckoutComplete configured in Step 1.
Handle errors
Use the onError callback of the HeadlessUniversalCheckout options to handle any errors emitted by the SDK during the checkout flow.
Advanced Configuration
For more customization on your needs, you can listen to all events posted by Headless Universal Checkout and react to them. Visit the API reference for a full list of the listener functions.
Prepare 3DS
- In order to make the SDK lightweight, 3DS requires the addition of the Primer 3DS library. Check out our guide on how to add the Primer 3DS library to your iOS app.
- When the user pays by card, the Workflow will decide whether or not a 3DS challenge is required. If so, Headless Universal Checkout will automatically render the 3DS challenge.
- To improve 3DS success rates, it is recommended to pass the following elements in the Client Session:
| Field | Description |
|---|---|
| customer.emailAddress | The customer’s email address |
| customer.billingAddress | The customer’s billing address |
Learn more about how to configure 3DS!
Did It Work?
If everything went well, you should be able to see the payment you just created on your Dashboard under the Payments menu.
Payment list