This guide outlines how to configure Primer Checkout with all the payment methods and features you need.Make sure to follow these steps before integrating Primer Checkout into your website or mobile application.
Configure your checkout
Step 1. Connect a payment method to Primer
Payment methods are at the core of Primer Checkout’s capabilities. They collect and pass information from the customer to the processor for the payment to be processed.Check our Payment methods overview page to learn more about payment methods and processors.
- For card payments
You are already all set! - For Apple Pay and Google Pay
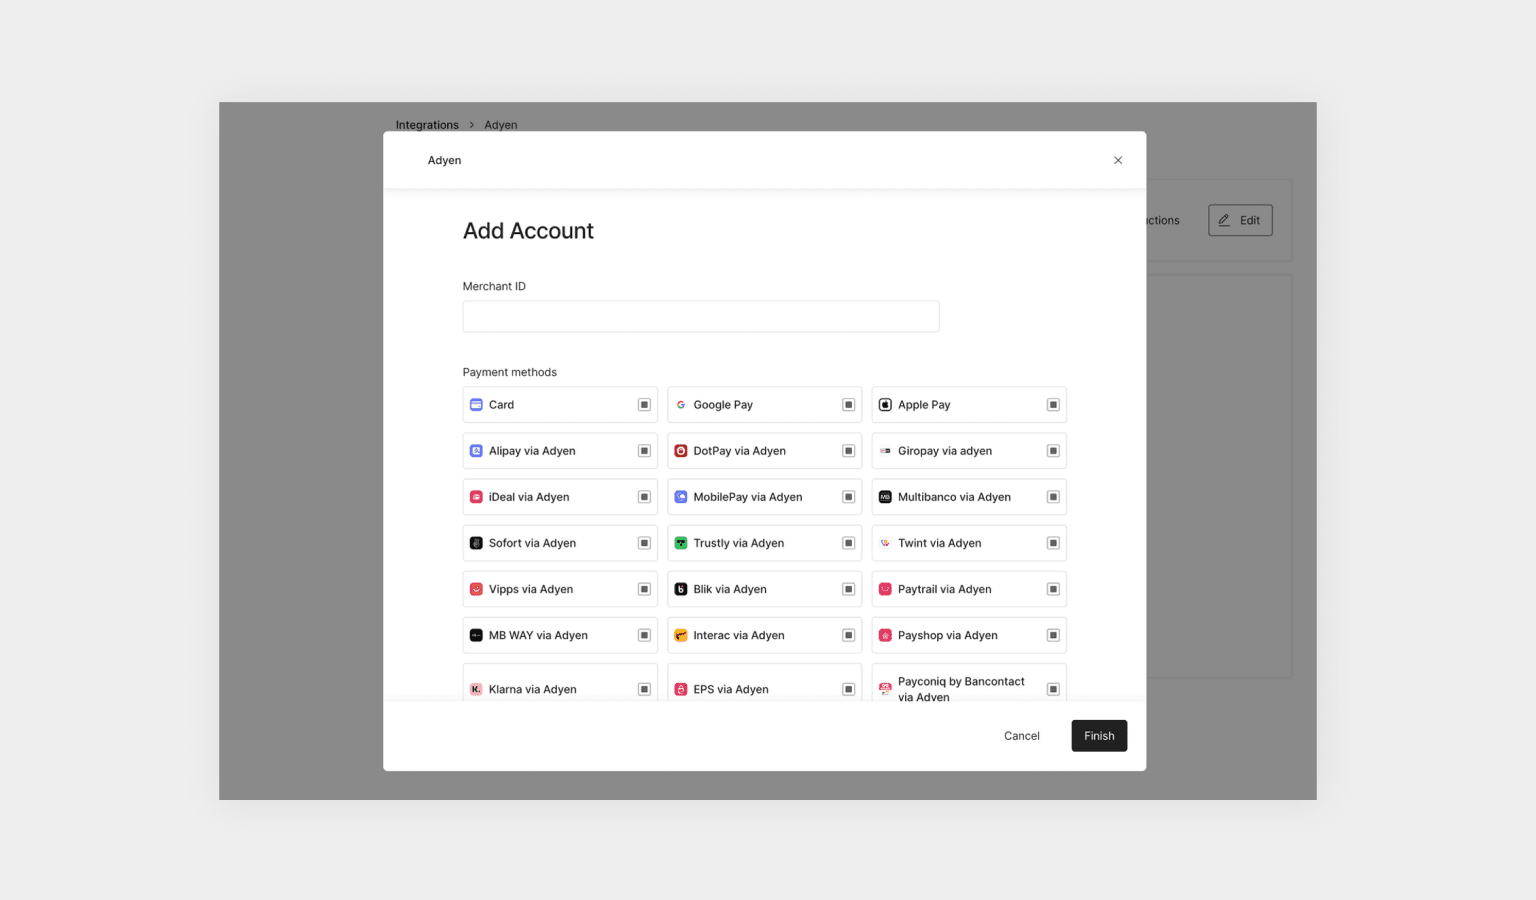
Click on ”+ New Integration”, search for Apple Pay or Google Pay, and follow the instructions. - For payment methods that are also processors (e.g. PayPal, Klarna, …)
Click on ”+ New Integration”, search for the processor, and follow the instructions. - For payment methods that come bundled with a processor
Click on “New integration”, search for the processor - such as PayPal or Buckaroo - and follow the instructions. Then, select the payment methods you want to use via Primer.
Step 2. Configure your checkout
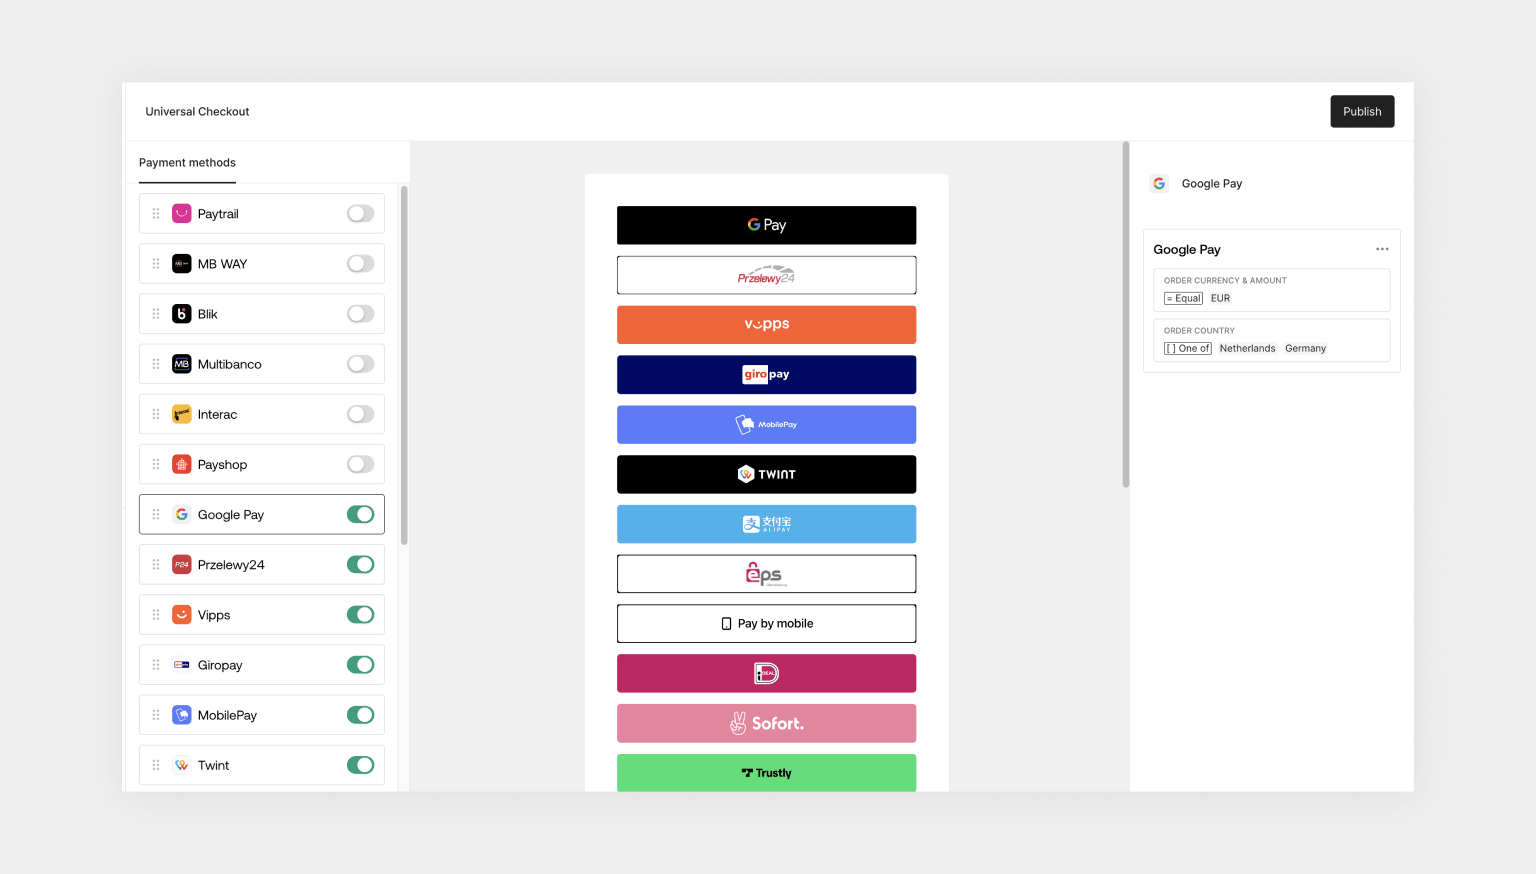
Now that your payment methods are properly connected to Primer, head over to the Checkout section of the Dashboard to configure the Primer Checkout. This section enables you to:- Create conditions that determine which payment methods to display
- Reorder the payment methods
- Activate checkout modules such as capturing the billing address
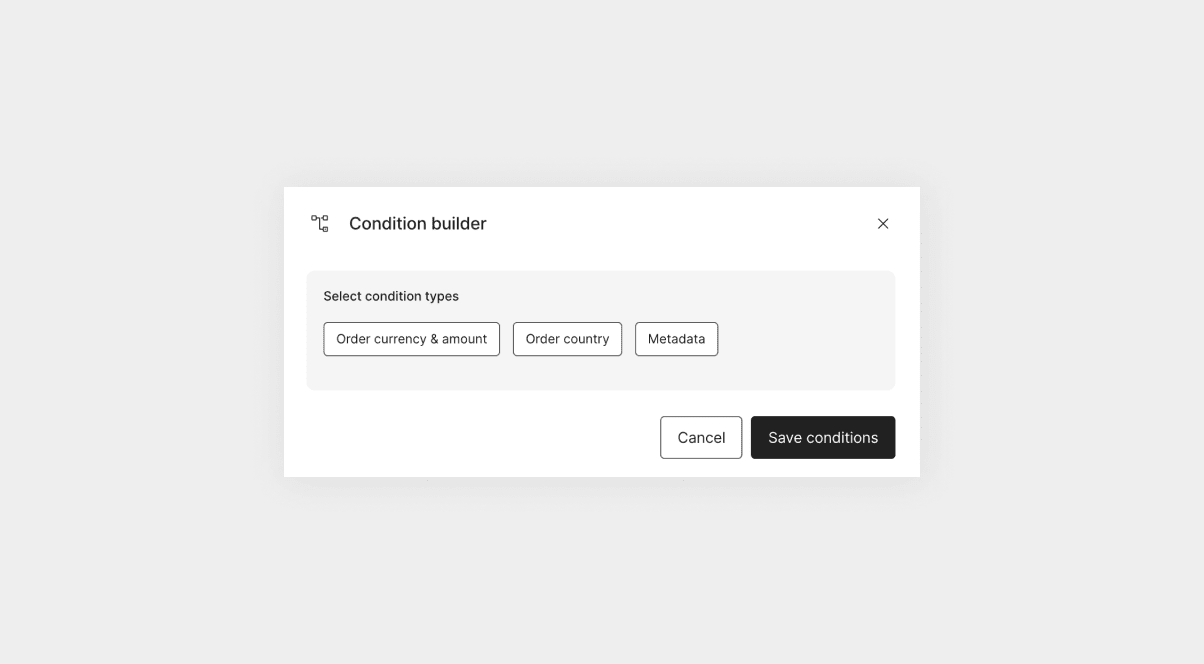
Create payment method conditions
First, activate the payment method by toggling it on.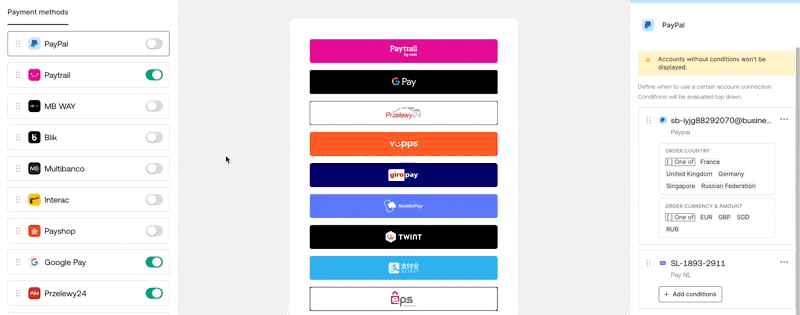

- It evaluates these conditions in order from top to bottom and selects the first processor that matches the client session. Feel free to reorder the processors to better suit your use case.
- If no processor has matched, the processor specified in the “All other conditions” section is used.
- If no processor is specified in the “All other conditions” section, the payment method is not presented to the user. This enables you to show a given payment method with certain conditions.
Reorder payment methods
The Dashboard enables you to specify the order used to present the payment methods to your customer. You can reorder the payment methods on the left panel by simply dragging and dropping to better suit your needs.Step 3. Publish your checkout configuration
Click on the “Publish” button to immediately make your checkout configuration available to all users.