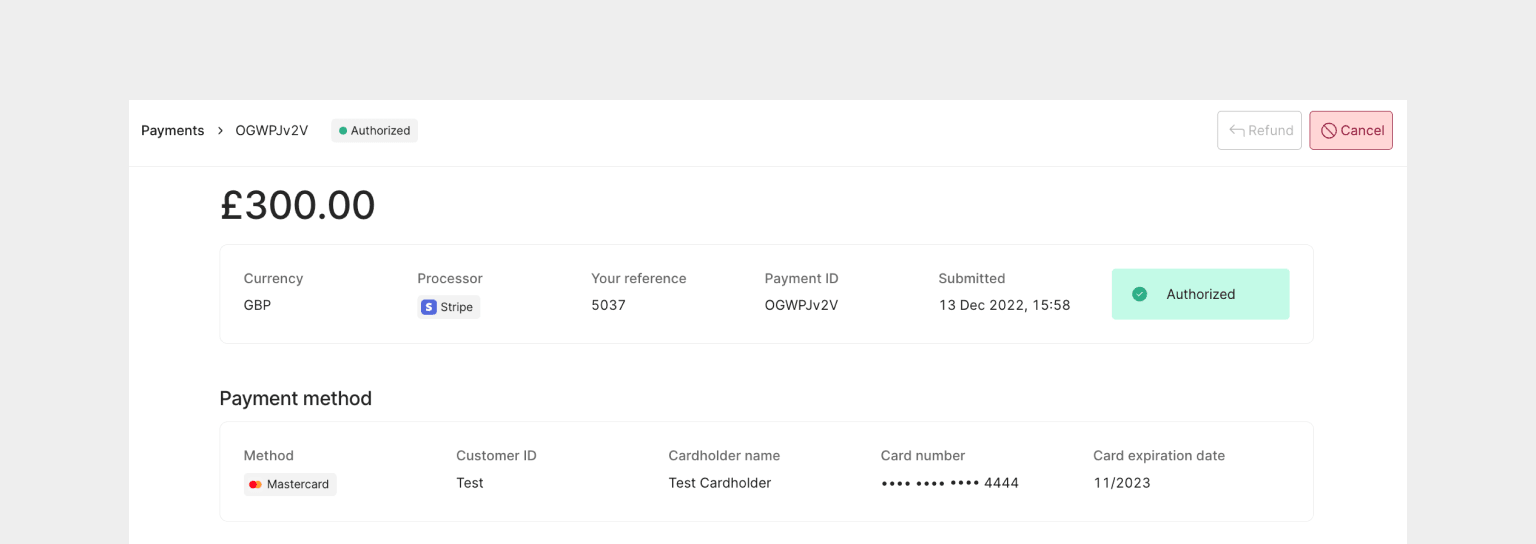
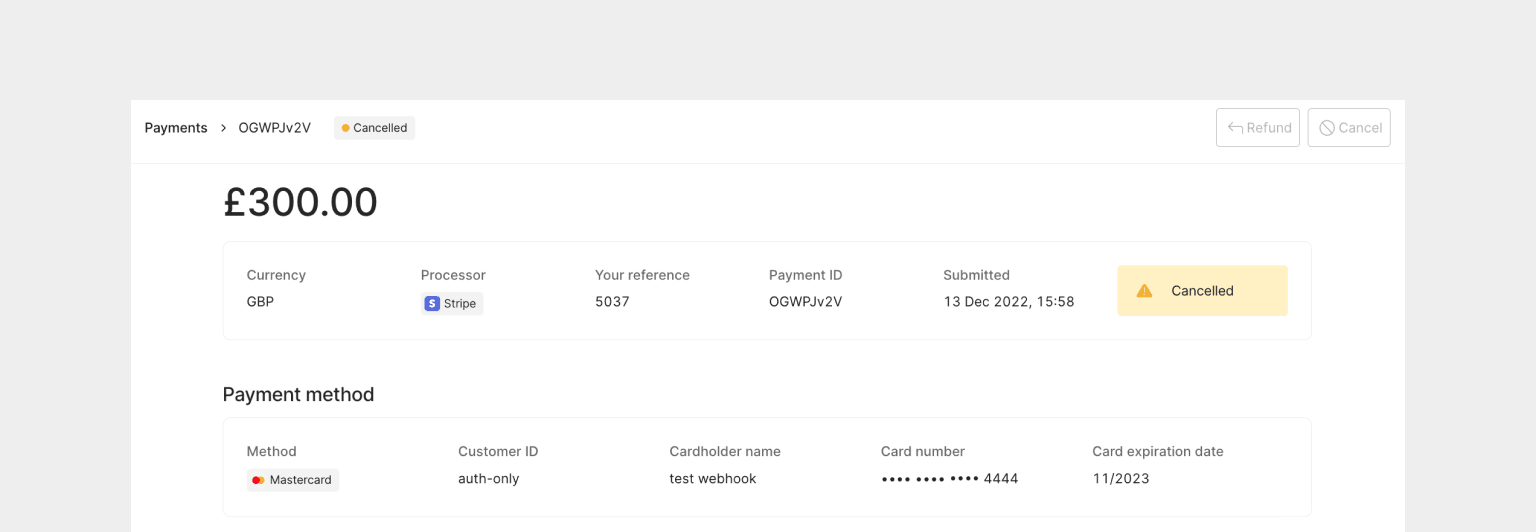
How to cancel a payment
Primer enables you to cancel a payment across all your processors in a unified way. By cancelling a payment, the authorization is voided and the hold on customer funds is released. In order to cancel a payment, the payment must not have reached status. Once the payment is cancelled, the payment can no longer be captured. All cancel requests are sent to the processor used in the authorization request. To check the status of the payment, you can use:- the payments timeline in the Primer Dashboard
- payment webhooks to receive status updates
- the API call
Payments timeline
Manually cancel a payment from an easy-to-use dashboard.
Workflows
Automate sophisticated payment flows to cancel your payments.
Payments API
Programmatically cancel your payments via API based on your business logic.
Cancel a payment via the Payments Timeline
This is useful to enable your team to cancel payments directly from within the dashboard.
Cancel a payment via Workflows
Use Workflows to set up business logic on when and how to cancel a payment - without writing a single line of code. Simply add the “Cancel payment” action from the Primer Payments app to a workflow. You can configure any additional business flows in between your “Authorize payment” and “Cancel payment” actions, creating powerful payment flows that suit your needs. For example, you may want to validate that the processor CVV and AVS checksMATCHED and, if not, cancel the payment - this becomes very easy with Primer.

Cancel a payment via Payments API
Cancel a payment using the Payments API - see the API reference for the details.BASH
reason in the payload for your own records.