What does this Action do?
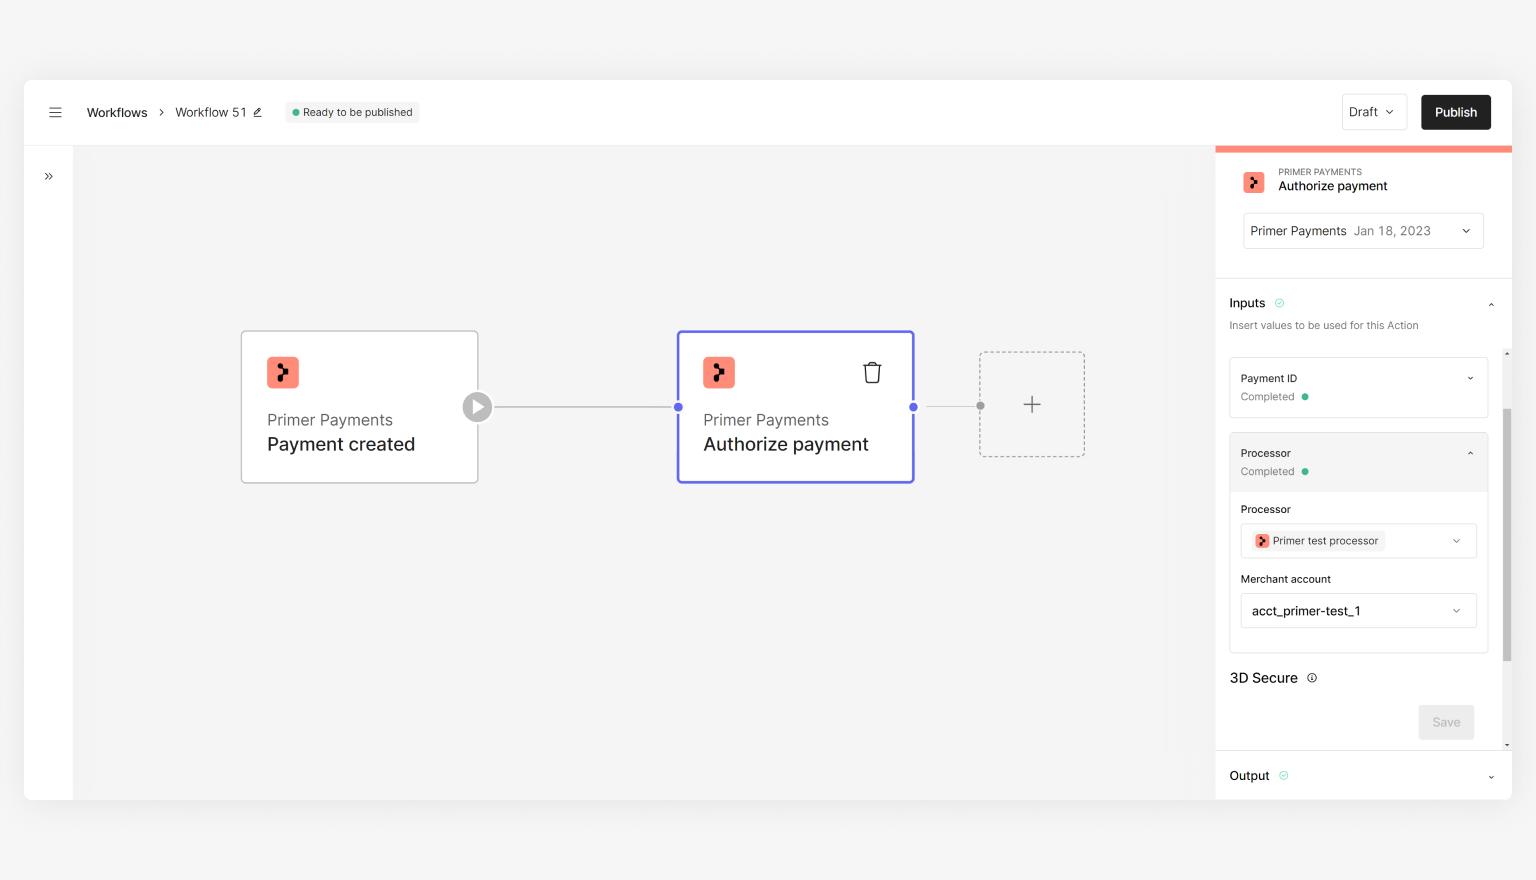
The “Authorize payment” Action is responsible for sending the authorization request. It enables you to configure exactly how you want to route the payment, along with other payment services you can configure, such as 3D Secure and fallbacks.
Learn more about processing payments here.
How to use the Action
- Create a workflow with the “Payment created” Trigger
- Assign a
payment ID - this will usually be the “Payment ID” from the “Payment created” Trigger output
- Select your processor and associated merchant account you want to process the payment with
- Choose the 3D Secure option - see more here on the differences between the 3DS options
- [Optional] Configure a fallback processor - learn more here
Now your “Authorize payment” Action is set up, use the output to continue building your workflow to handle the response or create a new workflow using the “Payment status updated” Trigger to handle your payment after the authorization request.
Use cases
All your initial payment flows will need to include the “Authorize payment” Action. Based on your needs, you can utilize this Action in a few ways. Below are some examples for inspiration:
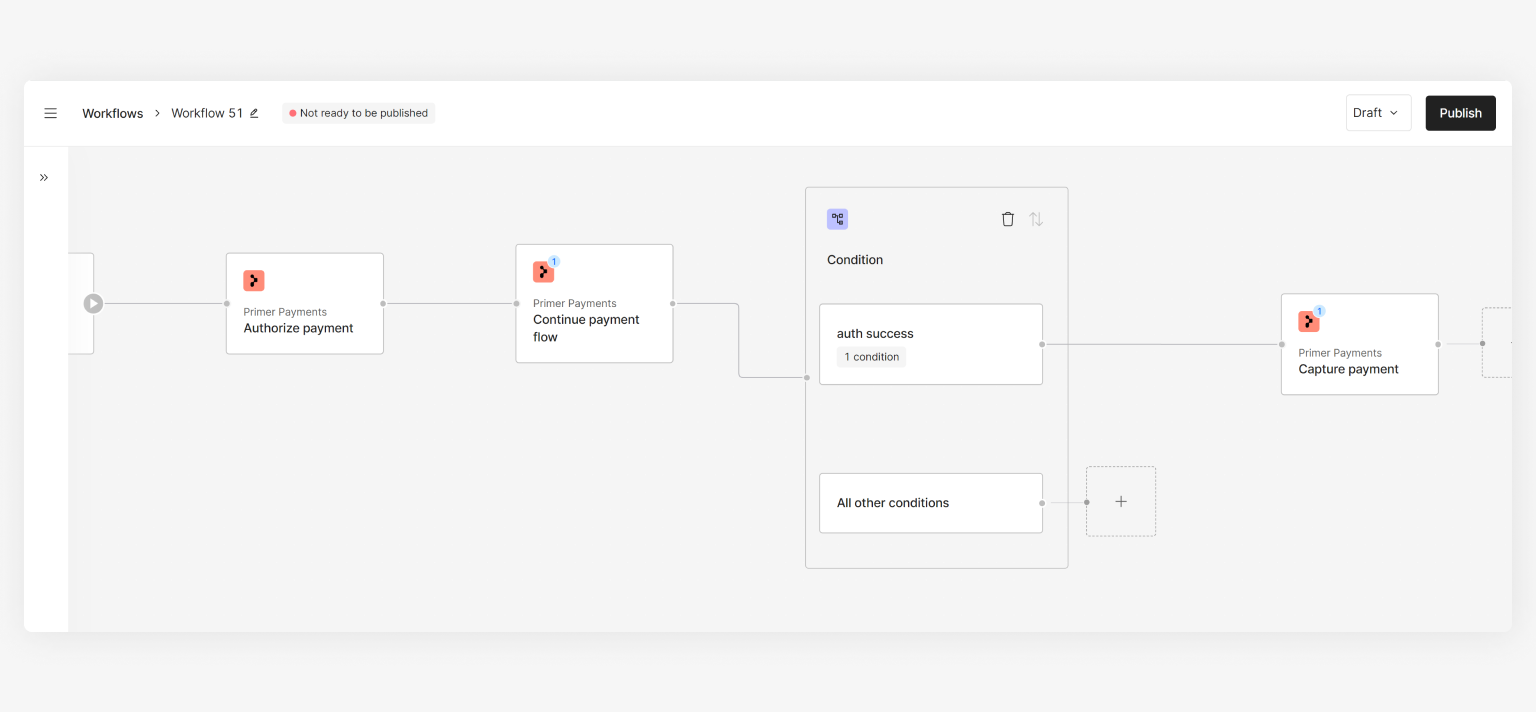
Simple payment flow that if authorized, shows the success screen then captures, else it only shows the failure screen to the customer.
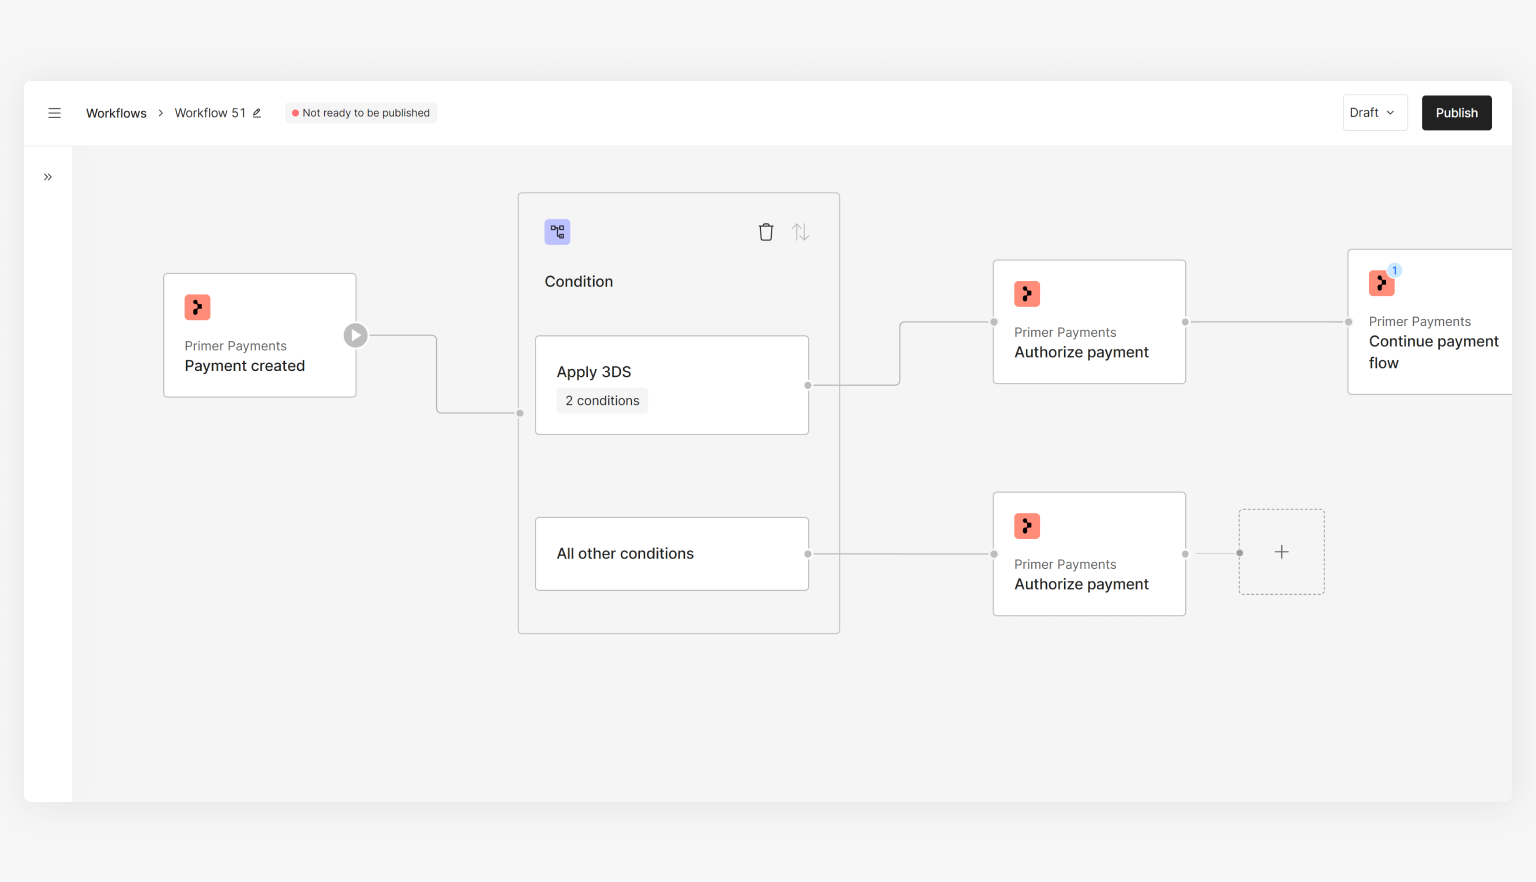
Two “Authorize payment” Actions split by conditional logic that determines whether to authorize payments with 3DS or not.
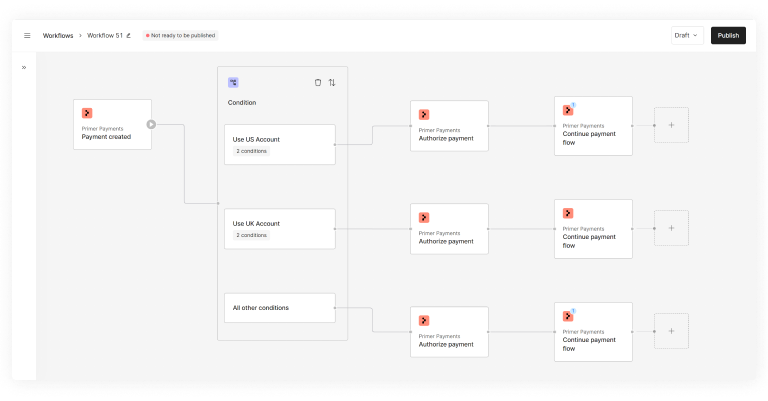
Two “Authorize payment” Actions split by conditional logic that determines which processor merchant account to authorize payments with.
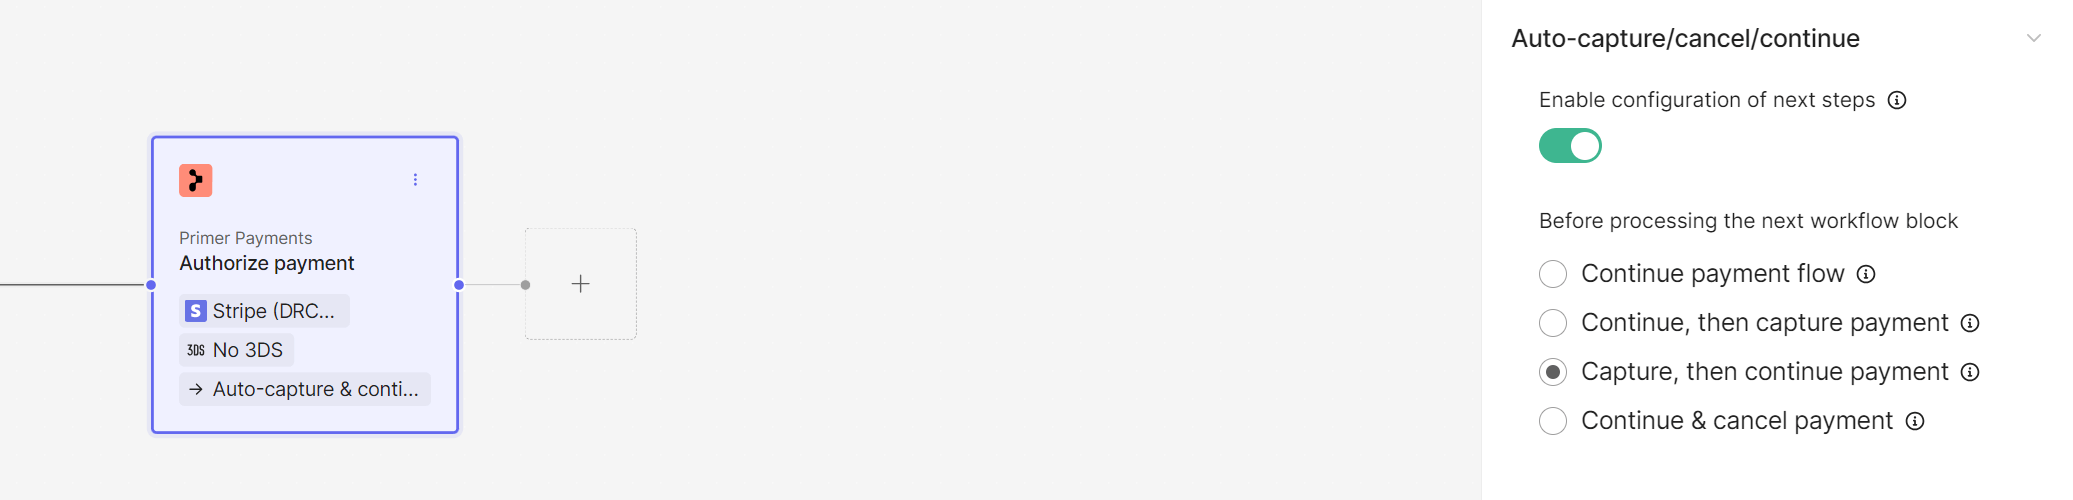
Auto capture/cancel/continue
We have added new options to allow you to simplify your routes by automatically enabling capture or cancel on success, and other options.
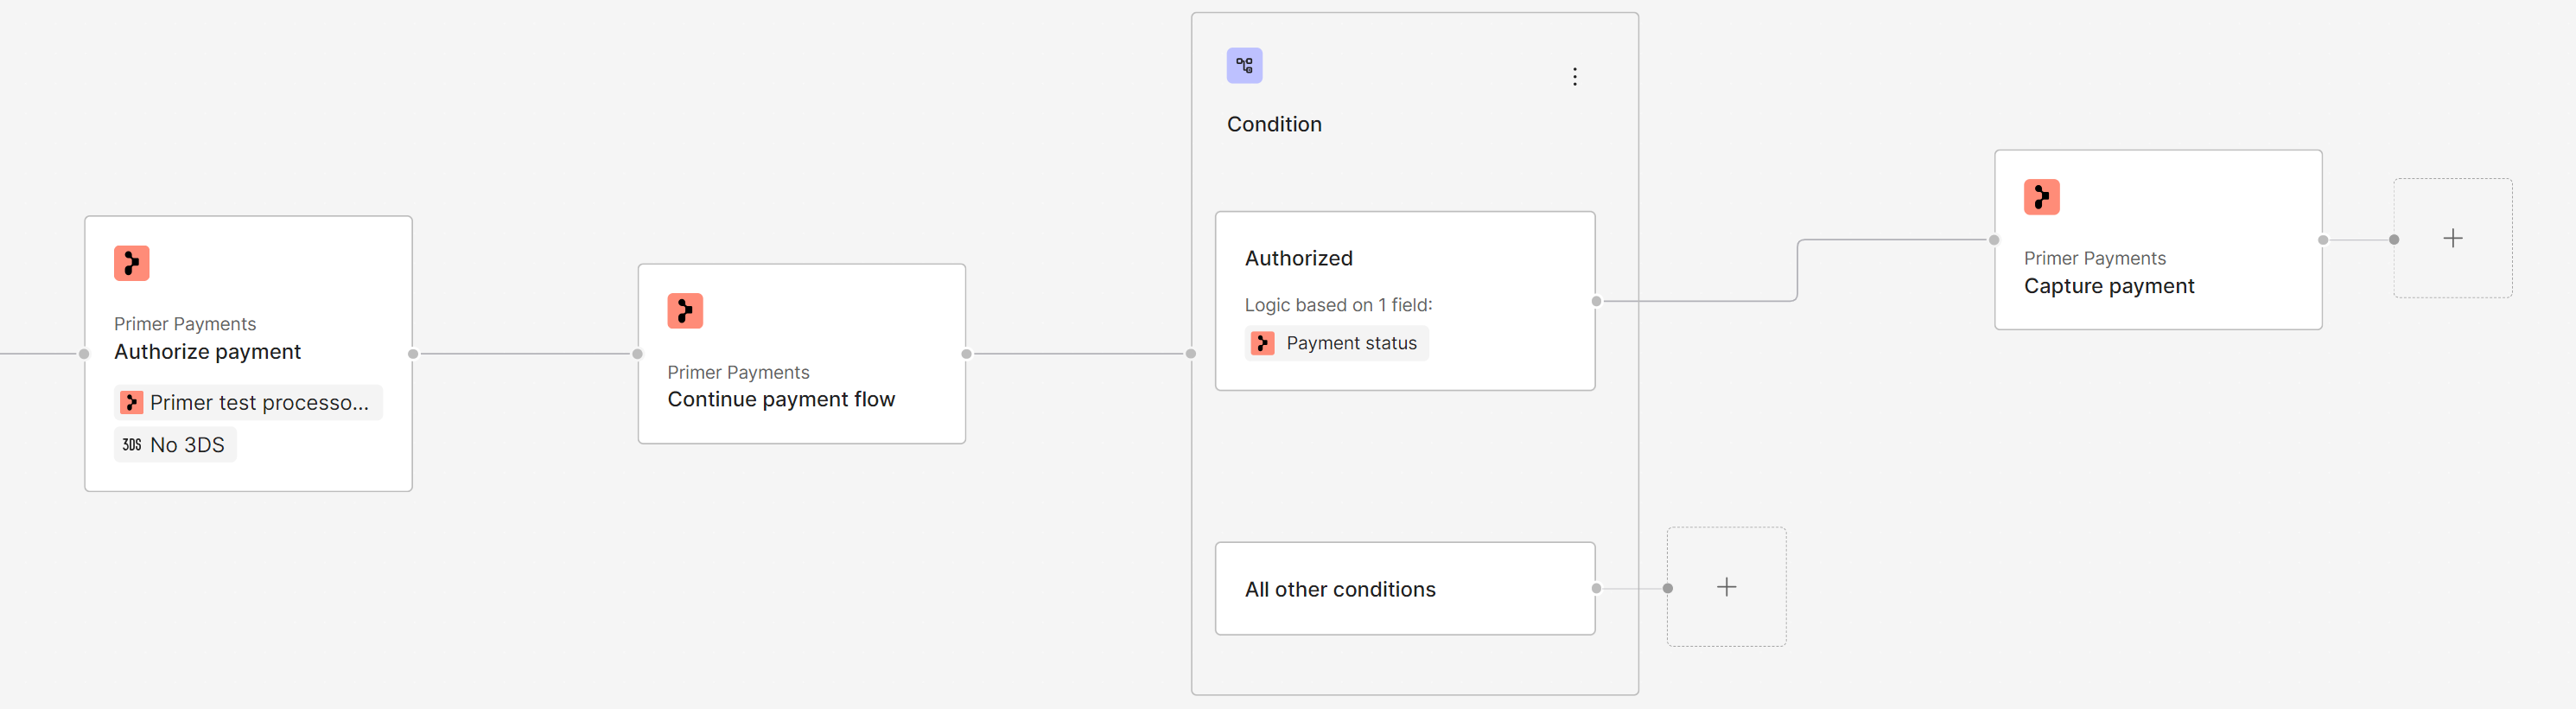
Without this setting, when you want to automatically capture payments from within the workflow, you have to add another condition block on each route to check for the payment status, like this:
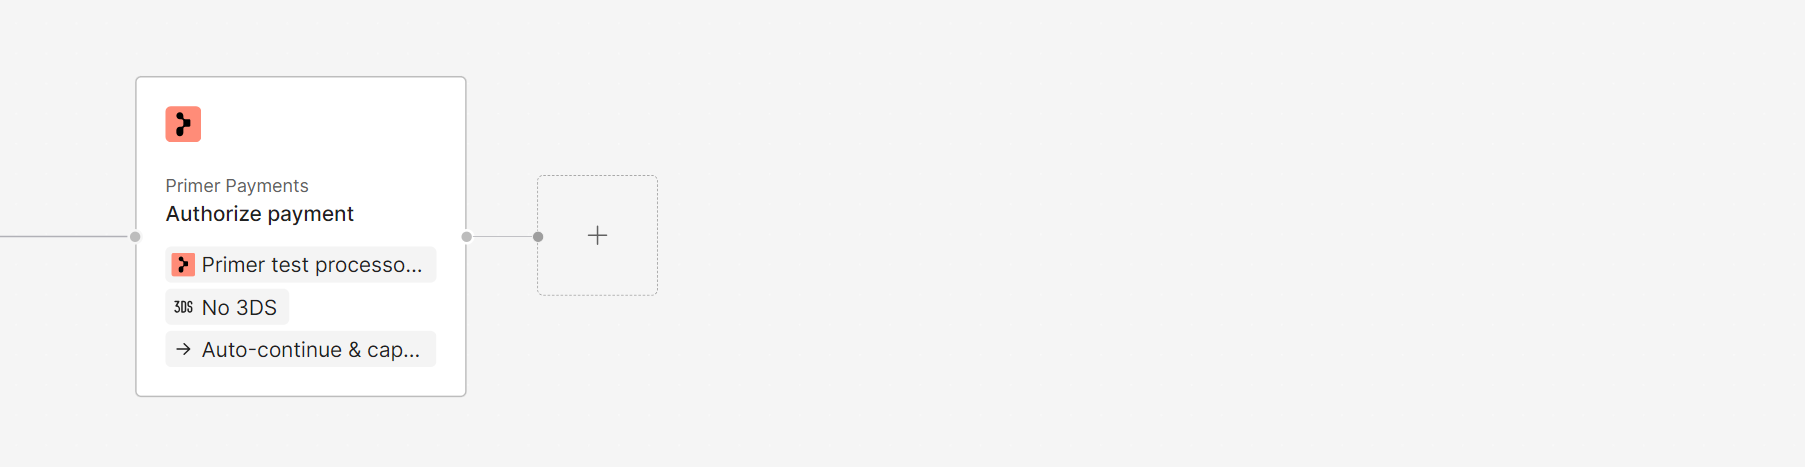
With the new options you can simplify your workflow routes to look like this:
How these settings work
The settings replace the need for some of the manual block placement, but do not change the behavior of payment app. Webhooks will still be sent and each individual action will show on the payment timeline.
-
Continue payment flow:
- This option removes the need for a dedicated continue block on this route.
-
Continue, then capture payment:
- This option removes the need for dedicated continue, status-check condition, and capture blocks on this route.
- While the “Continue payment flow” is always executed, a capture request is only sent when the authorization attempt(s) result in an authorized payment. The request is skipped for failed, declined, settling, or already settled payments.
- Note: this is the preferred way to automatically capture, as the time taken by the capture request will not impact the customer journey.
-
Capture, then continue payment:
- This option removes the need for dedicated continue, status-check condition, and capture blocks on this route.
- A capture request is only sent when the authorization attempt(s) result in an authorized payment. The request is skipped for failed, declined, settling, or already settled payments. The “Continue payment flow” is always executed.
- Note: using this option adds the time taken by the capture request to the customer journey, but this may be needed for some routes or some integrations.
-
Continue & cancel payment:
- This option removes the need for dedicated continue, status-check condition, and cancel blocks on this route.
- While the “Continue payment flow” is always executed, a cancel request is only sent when the authorization attempt(s) result in an authorized payment. The request is skipped for failed, declined, settling, or already settled payments.