Apple Pay: Drop In Guide
Let customers securely make payments using Apple Pay on your website or mobile application.
Before you begin
This guide assumes that you know how to
Accept payments with Apple Pay
Prepare the client session
Apple Pay leverages the following parameters to process a payment.
Pass them when creating the client session.
Parameter Name | Required | Description |
---|---|---|
currencyCode | ✓ | 3-letter currency code in ISO 4217 format, e.g. USD for US dollars |
order ↳ lineItems | ✓ | Details of the line items of the order |
order ↳ countryCode | ✓ | The country in which the order is created |
paymentMethod ↳ options ↳ APPLE_PAY ↳ merchantName | For payments using the Apple Pay payment method, use this field to override the default merchant name for the Primer account from showing on the Apple Pay flow. For example, if your merchant name on your account is “Company X” but you want to display a specific store name on the Apple Pay flow, you can set the merchantName to “Store name A”. | |
paymentMethod ↳ options ↳ APPLE_PAY ↳ recurringPaymentRequest | Required for recurring payments. Include to specify that the payment is a recurring payment, typically for subscriptions. | |
paymentMethod ↳ options ↳ APPLE_PAY ↳ deferredPaymentRequest | Required for deferred payments. Include to specify that payment will be charged at a future date, such as hotel bookings or pre-orders. | |
paymentMethod ↳ options ↳ APPLE_PAY ↳ automaticReloadRequest | Required for automatic reload payments. Include to enable automatic top-ups when account balance falls below a threshold, such as transit cards or loyalty programs. |
Apple Pay MPAN Configuration
Apple Pay Merchant Tokens (MPANs) provide better payment continuity across devices compared to Device Primary Account Numbers (DPANs). Primer enables you to request MPANs from Apple Pay according to Apple’s guidelines, though Apple Pay may still return DPANs if the issuer doesn’t support MPAN generation.
For stored payment methods (vaultOnSuccess: true
):
Use the appropriate MPAN request configuration based on your payment use case.
firstPaymentReason | MPAN Request Type | Use Cases | Required |
---|---|---|---|
Recurring | Recurring Payments | Subscriptions, memberships, scheduled billing | recurringPaymentRequest |
Unscheduled | Deferred Payments | Buy-now-pay-later, layaway, delayed billing | deferredPaymentRequest |
Unscheduled | Automatic Reload | Wallet top-ups, account reloads | automaticReloadRequest |
For one-time payments (vaultOnSuccess: false
):
- Standard Apple Pay flow is used
- No MPAN request configuration needed since tokens aren’t stored
For detailed configuration examples and parameter references, see the Apple Pay API reference.
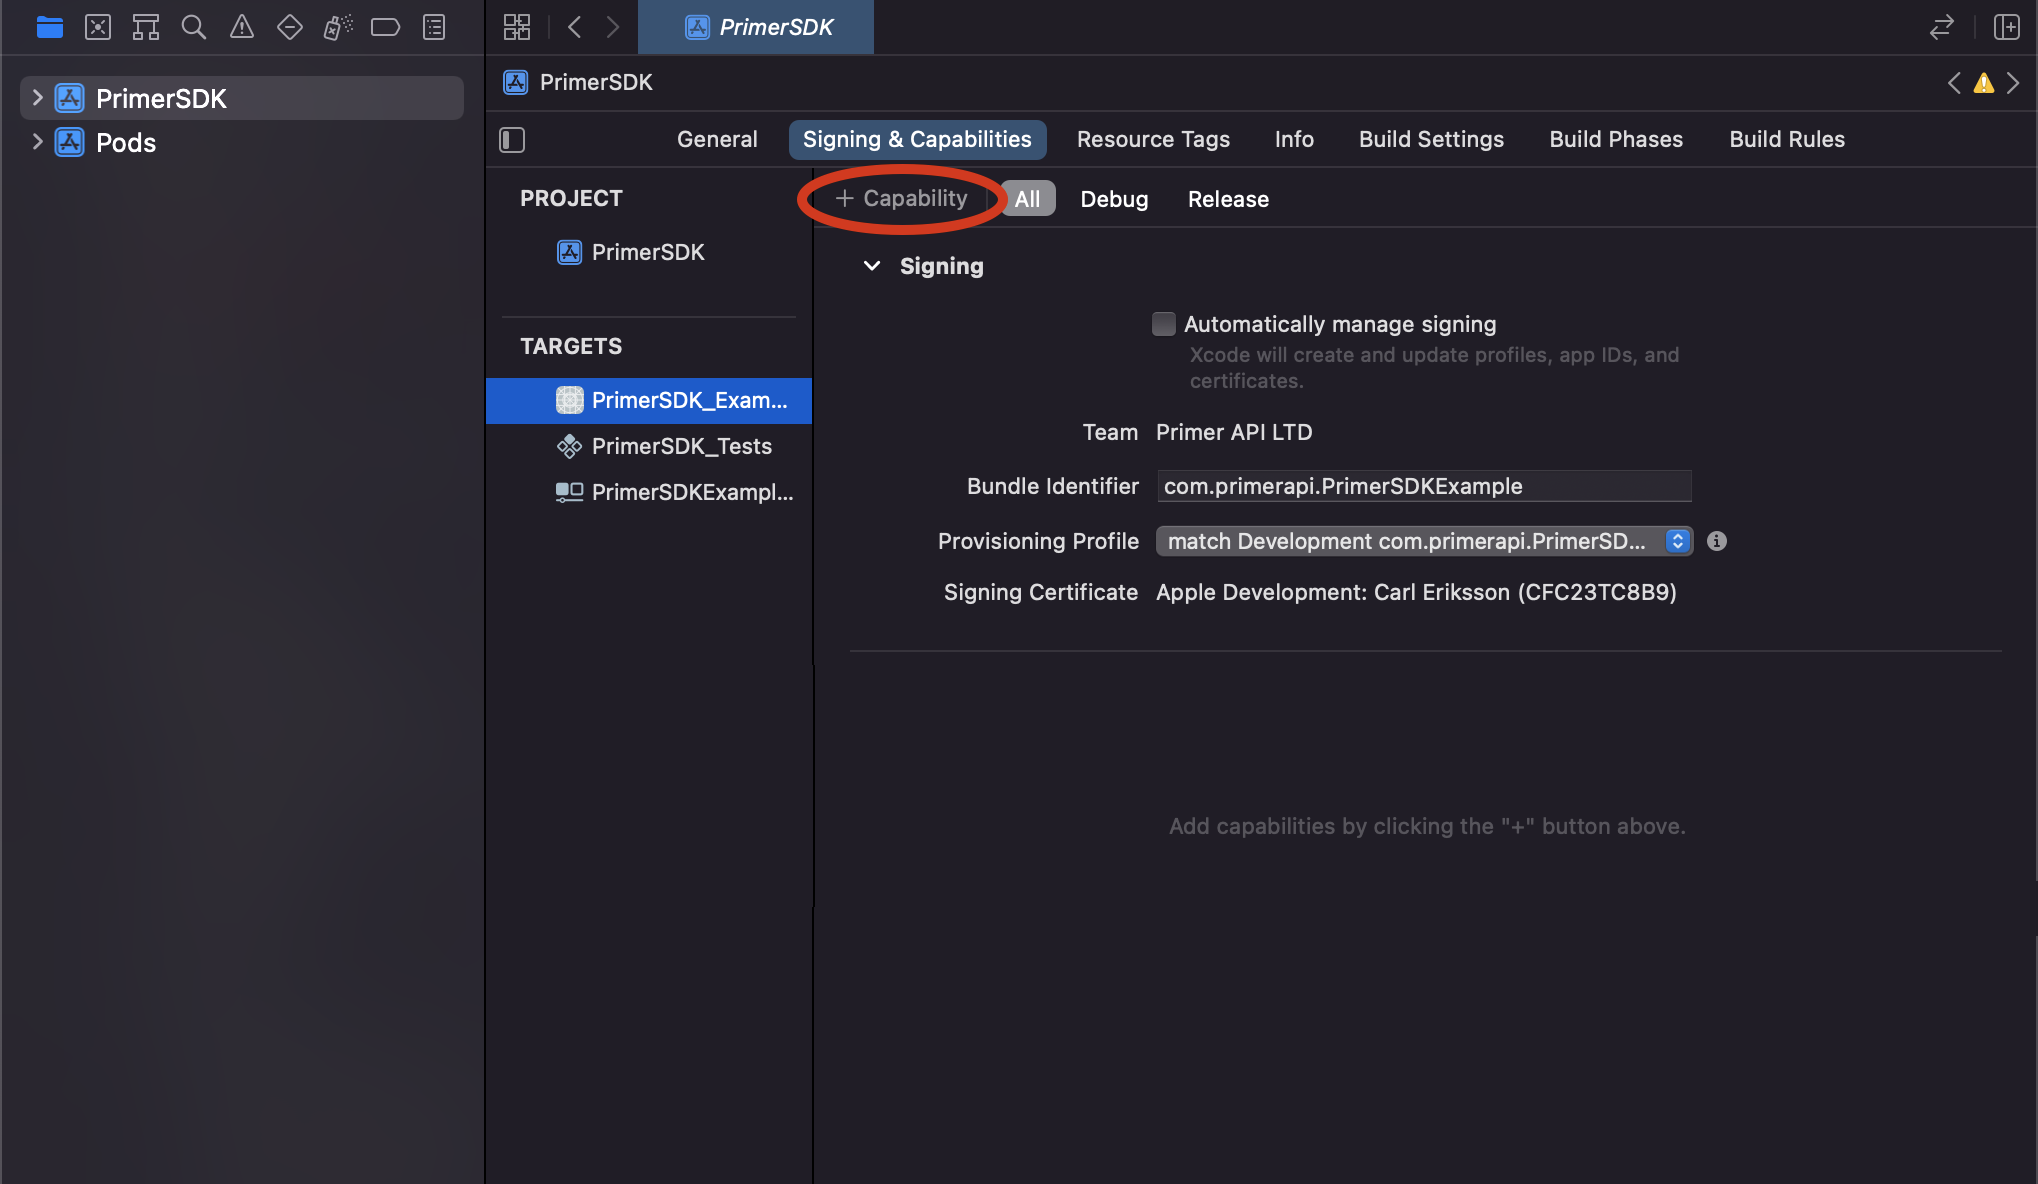
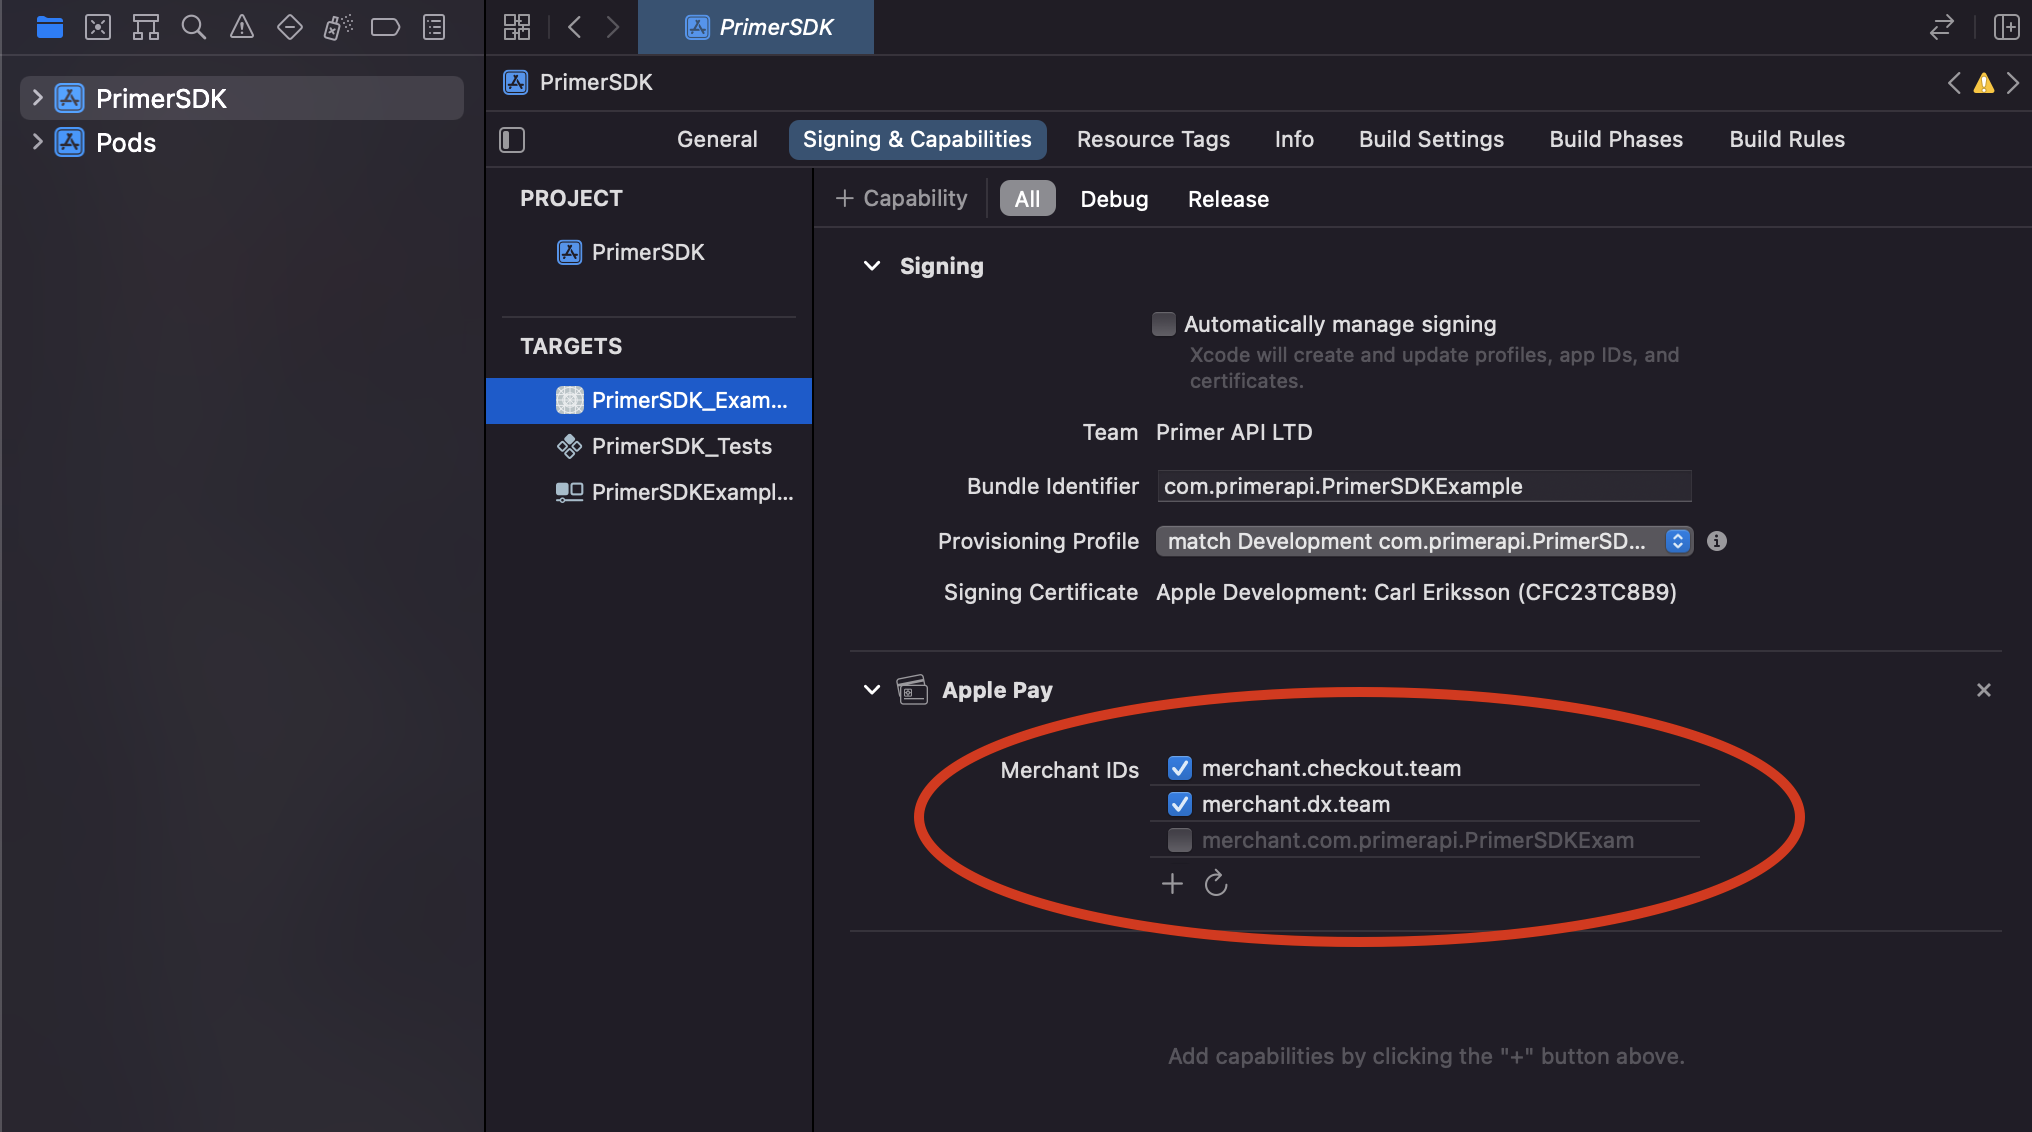
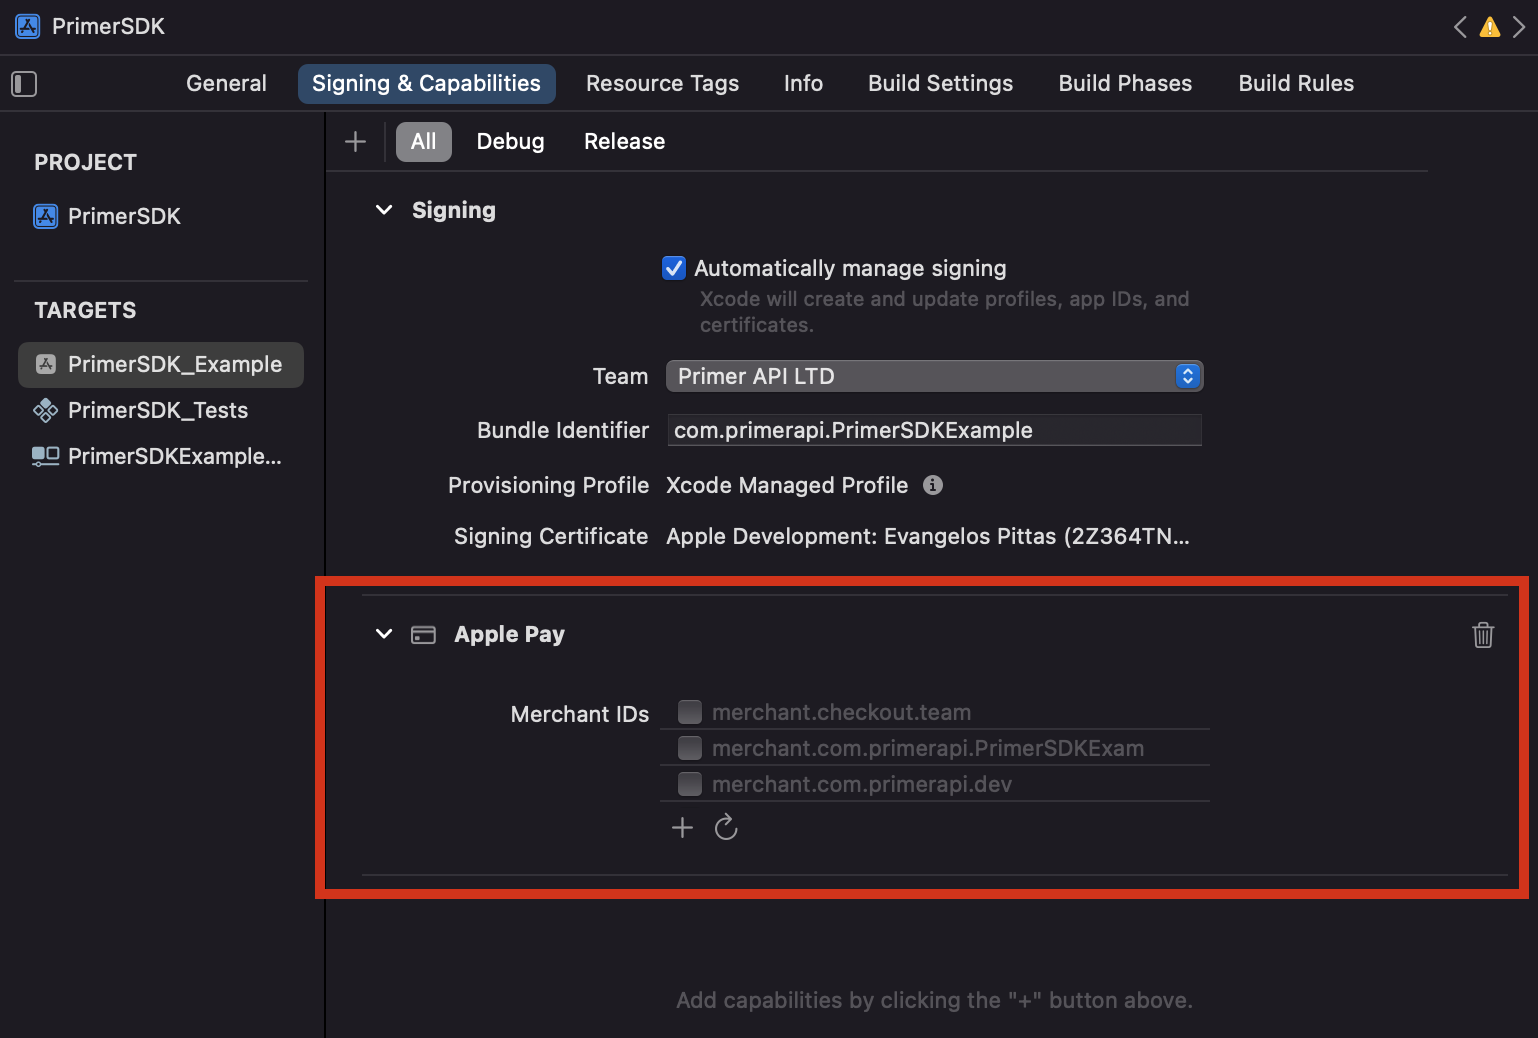
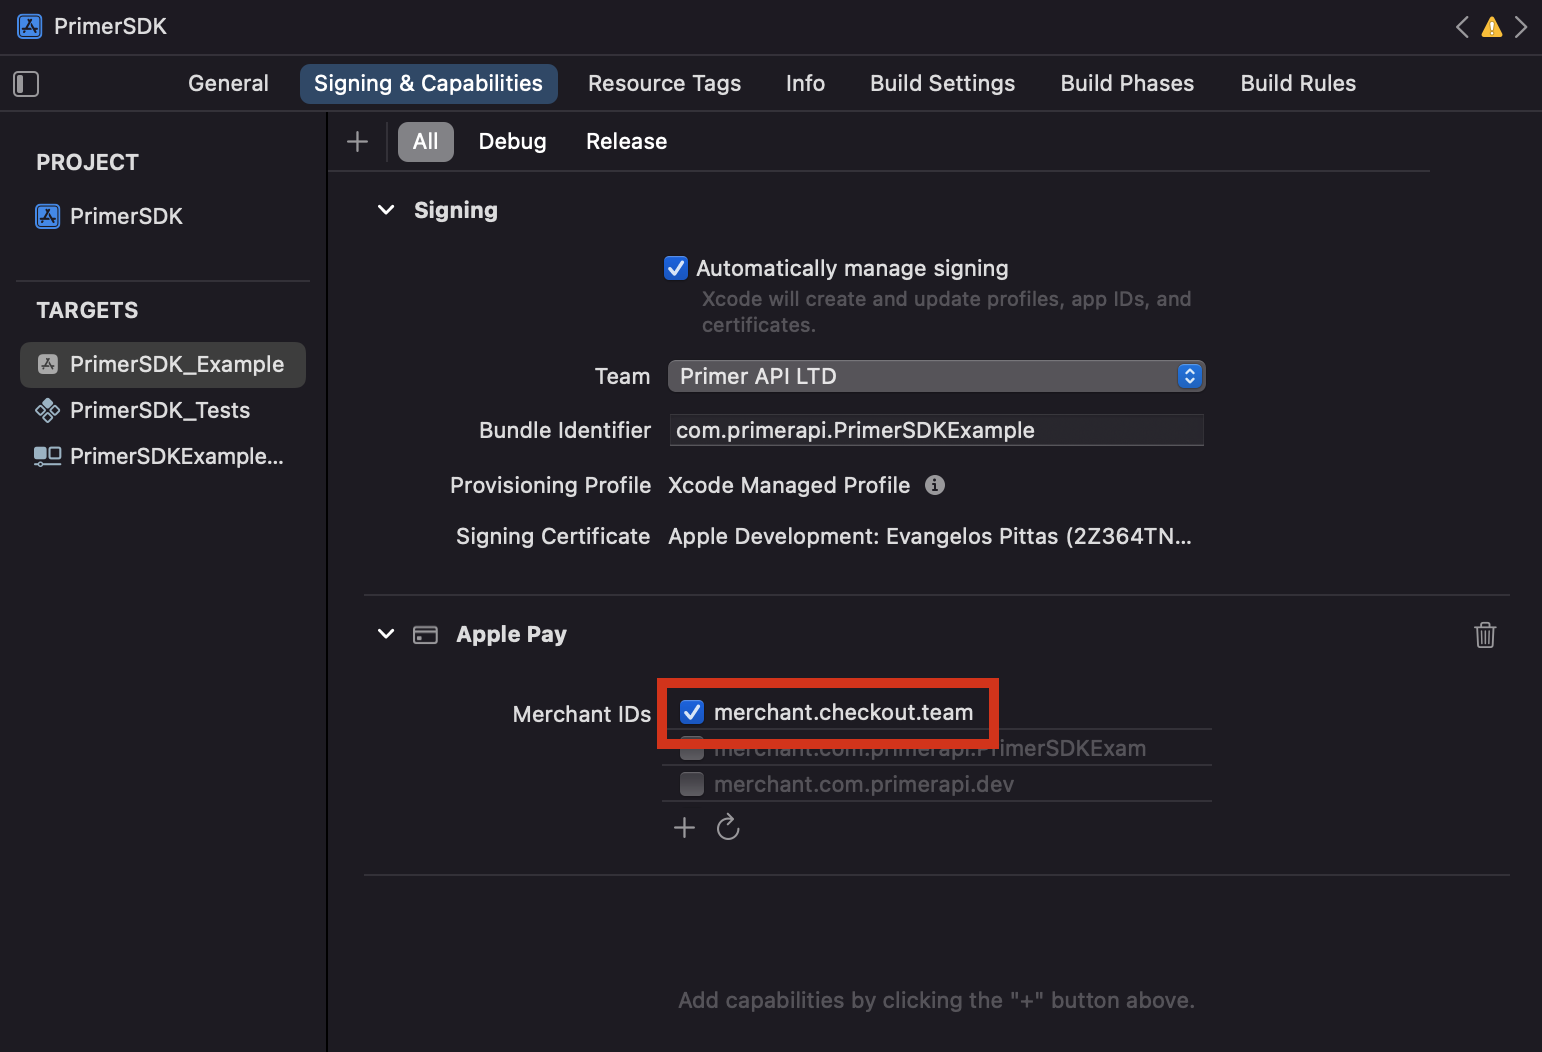
Prepare the SDK for payments
Show Universal Checkout
Apple Pay is automatically presented to the customer when calling Primer.showUniversalCheckout
.
Customization
Check the Customization Guide to learn how to customize payment method buttons.
Additionally, you can style the Apple Pay button by passing the following options:
Capture billing address
By default, Apple Pay does not capture the user’s billing address.
You can ask to capture the billing address by setting the option captureBillingAddress
. The billing address is added to the client session before the payment is made.
Limitations
- Apple Pay is only supported on Apple Devices and Safari Browser. For more info take a look at the Apple support page.
- Until iOS 16, Apple Pay does not appear on in-app webviews.
- Apple Pay only appears if the website is using HTTPS.
- Our current implementation of Apple Pay does not support the card networks
mir
,girocard
,bancomat
, andbancontact
.
Troubleshooting
Apple Pay button is not presented
If the Apple Pay button is not presented, check that:
- The browser is Safari
- The website is using HTTPS
- The domain has been registered in the Dashboard
- The order details and country code have been passed to the client session
Pre-requisites
-
Select the Signing and Capabilities tab in your target’s settings.
-
Tap the + Capability button on the top left, and select Apple Pay from the list.

- When added, add your merchant identifier (the one that was added on Apple Developer Portal when creating the Apple Pay certificate).

- Construct your
PrimerApplePayOptions
with yourmerchantIdentifier
and themerchantName
, and set it as yoursettings.paymentMethodOptions.applePayOptions
.
Show Universal Checkout
Apple Pay is automatically presented to the customer when calling Primer.showUniversalCheckout
.
Customization
Check the customization guide to learn how to customize Universal Checkout.
Limitations
Apple Pay is not compatible with Android. The payment method button will not be presented.
- When used in the simulator, Apple Pay appears but fails to complete the flow. This is due to a limitation of Apple Pay that does not return the correct data when used in the simulator.
- Our current implementation of Apple Pay does not support the card networks
mir
,girocard
,bancomat
, andbancontact
.
Troubleshooting
Error Returned: [unable-to-make-payments-on-provided-networks]
- Make sure you have enabled the Apple Pay capability in Xcode

- Ensure your Apple Pay wallet contains at least one valid credit/debit card.
- The card network (e.g. Visa) of the active card is not supported. Payment networks supported vary on iOS version. Also not all test cards work on development environment.
- Your device has restrictions enabled (e.g. parental controls).
- The hardware of your device doesn’t support Apple Pay.
- Make sure you are not using a jailbroken device.
⭐ How to recover?
- Try on a different (real) device.
- Try with a different card (and also set it as the default wallet card).
System Error Displayed: Apple Pay Is Not Available in “APP NAME”

The merchant identifier(s) configured in Xcode do not match the merchant identifiers of the Apple Pay certificates in your Apple Developer portal.
⭐ How to recover?
Make sure that you have the correct merchant identifier selected in Xcode, as shown in the screenshot below.
A correct merchant identifier must satisfy the following conditions:
- Is present in your Xcode’s merchant identifiers in the Apple Pay capability.
- Is used by a valid Apple Pay certificate in your Apple Portal
- The above mentioned Apple Pay certificate is uploaded in Primer’s dashboard
Error Returned:
[server-error] Server error [404]: No Matching ProcessingCertificate could be found
Even though you are using the correct entitlements in your Xcode project, and there is a valid Apple Pay certificate in your Apple Developer portal, the Apple Pay certificate used by the app does not match the Apple Pay certificate that has been uploaded in your dashboard.
⭐ How to recover?
Upload the correct Apple Pay certificate on Primer’s dashboard.
Error Returned: [payment-cancelled] Payment method APPLE_PAY cancelled or Behaviour: Apple Pay view getting dismissed or not being presented.
The merchant identifier that you’re passing to Primer SDK is not correct, and it isn’t present in Xcode’s capabilities, or you haven’t provided a merchant name.

⭐ How to recover?
Make sure that you have the correct merchant identifier selected in Xcode.
A correct merchant identifier must satisfy the following conditions:
- Is present in your Xcode’s merchant identifiers in the Apple Pay capability.
- Is used by a valid Apple Pay certificate in your Apple Portal
- The above mentioned Apple Pay certificate is uploaded in Primer’s dashboard
Error Returned: [NSErrorDomain:4864] the data couldn't be read because it is not in the correct format
Apple Pay will not work on the simulator, it will arrive to the Apple Pay modal view, then fail with the above error when trying to pay. Try it on a real device with Apple Pay enabled.
⭐ How to recover?
Attempt to complete a payment on a real device.
Pre-requisites
-
Select the Signing and Capabilities tab in your target’s settings.
-
Tap the + Capability button on the top left, and select Apple Pay from the list.

- When added, add your merchant identifier (the one that was added on Apple Developer Portal when creating the Apple Pay certificate).

- Construct your
PrimerApplePayOptions
with yourmerchantIdentifier
and themerchantName
, and set it as yoursettings.paymentMethodOptions.applePayOptions
.
Show Universal Checkout
Apple Pay is automatically presented to the customer when calling Primer.showUniversalCheckout
.
Customization
Check the customization guide to learn how to customize Universal Checkout.
Limitations
- Apple Pay is not compatible with Android. The payment method button will not be presented.
- When used in the simulator, Apple Pay appears but fails to complete the flow. This is due to a limitation of Apple Pay that does not return the correct data when used in the simulator.
- Our current implementation of Apple Pay does not support the card networks
mir
,girocard
,bancomat
, andbancontact
.
Test
Check out Apple Pay’s Sandbox Testing guide to make payments with Apple Pay on sandbox.
Go live
You don’t need to do anything particular to go live — just make sure to use production credentials.