


Apple Pay can be used with Primer's headless SDK integrations.
Before you begin
This guide assumes that you know how to:
Accept payments with Apple Pay
Prepare the API
Apple Pay requires the following data to process a payment successfully. Pass the following data in the client session, or in the payment request (for manual payment creation).
| Parameter Name | Required | Description |
|---|---|---|
3-letter currency code in ISO 4217 format, e.g. USD for US dollars | ||
| Details of the line items of the order | ||
| The country in which the order is created | ||
For payments using the Apple Pay payment method, use this field to override the default merchant name for the Primer account from showing on the Apple Pay flow. For example, if your merchant name on your account is "Company X" but you want to display a specific store name on the Apple Pay flow, you can set the |
Prepare the SDK for payments
Pre-requisites
Step 1: Prepare Apple Pay settings
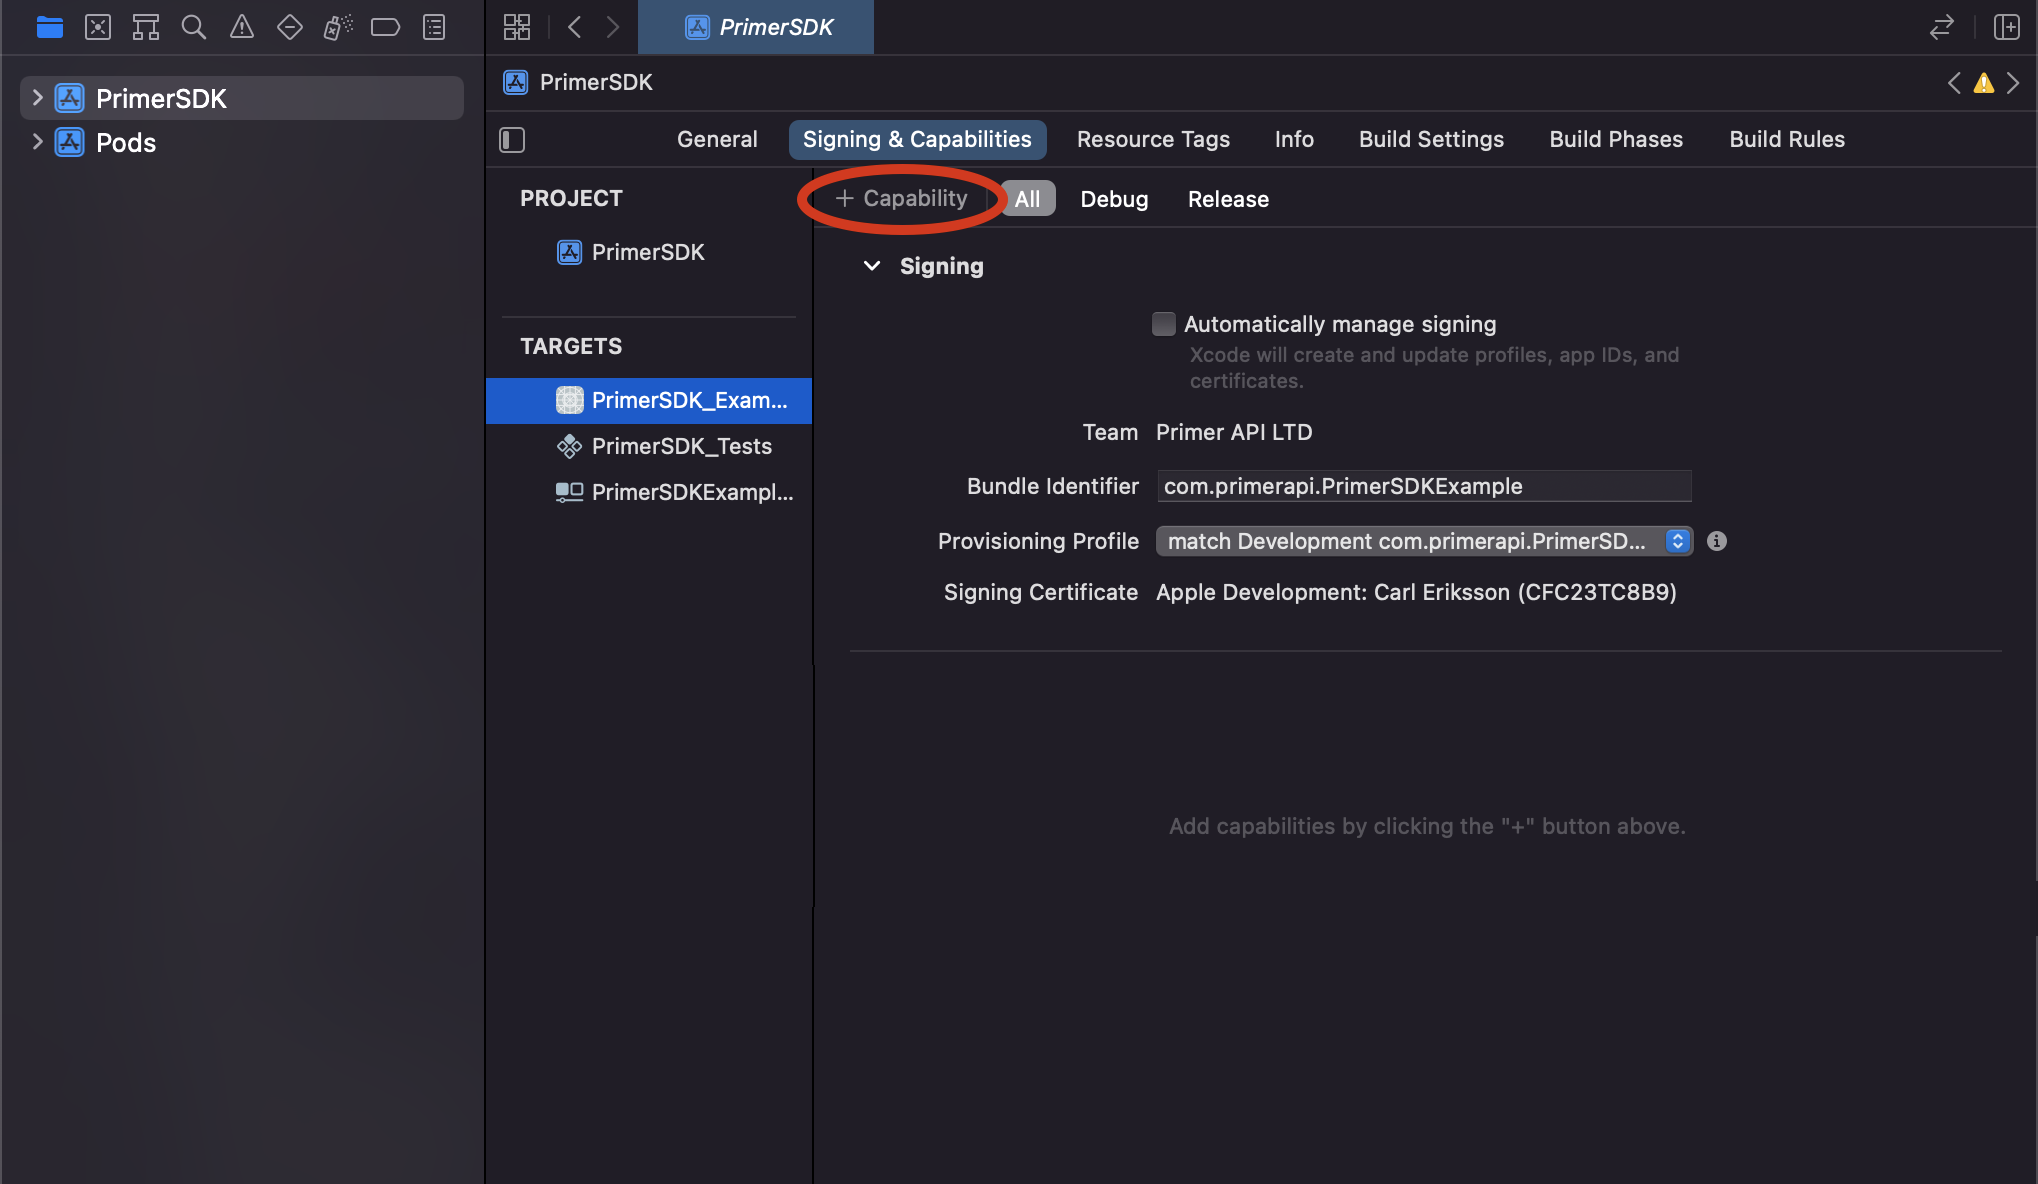
- 1Select the Signing and Capabilities tab in your target’s settings.
- 2Tap the + Capability button on the top left, and select Apple Pay from the list.
1234567891011
let settings = PrimerSettings( // ... paymentMethodOptions: PrimerPaymentMethodOptions( // ... // 👇 Add your Apple Pay options applePayOptions: PrimerApplePayOptions( merchantIdentifier: "merchant.checkout.team", merchantName: "Merchant Name") ), // ...)
Step 2: Get the available payment methods
Provided you have already created a client session, you can start the Headless integration with your client token, and the settings from Step 1.
123
PrimerHeadlessUniversalCheckout.current.start(withClientToken: clientToken, settings: settings, delegate: self, uiDelegate: self, completion: { (availablePaymentMethods, err) in // Get the applePayPaymentMethod, if present in the availablePaymentMethods})
Step 3: Display Apple Pay button
Assuming that the availablePaymentMethods do contain Apple Pay, you can build your button by making use of the PrimerAsset.
12345678910111213141516171819
class MyViewController: UIViewController {
    // ...         func renderApplePayButton() {        do {            let paymentMethodAsset = try PrimerHeadlessUniversalCheckout.AssetsManager.getPaymentMethodAsset(for: applePayPaymentMethod.paymentMethodType)            let applePayButton = UIButton()                        // 👇 Use the asset's properties to style your button. You can also use the dark propery for dark mode            applePayButton.backgroundColor = paymentMethodAsset.paymentMethodBackgroundColor.light // You can also get the same logo for dark mode            applePayButton.setImage(paymentMethodAsset.paymentMethodLogo.light, for: .normal)                        // Add Apple Pay button on your view                    } catch {            // Handle error        }    }}
Handle payment method
12345678
func applePayButtonTapped() { do { let redirectManager = try PrimerHeadlessUniversalCheckout.NativeUIManager(paymentMethodType: applePayPaymentMethod) try redirectManager.showPaymentMethod(intent: .checkout) } catch { // Handle error }}
Limitations
- When used in the simulator, Apple Pay appears but fails to complete the flow. This is due to a limitation of Apple Pay that does not return the correct data when used in the simulator.
- Our current implementation of Apple Pay does not support the card networks
mir,girocard,bancomat, andbancontact.
Troubleshooting
Error Returned: [unable-to-make-payments-on-provided-networks]
- Make sure you have enabled the Apple Pay capability in Xcode
- Ensure your Apple Pay wallet contains at least one valid credit/debit card.
- The card network (e.g. Visa) of the active card is not supported. Payment networks supported vary on iOS version. Also not all test cards work on development environment.
- Your device has restrictions enabled (e.g. parental controls).
- The hardware of your device doesn’t support Apple Pay.
- Make sure you are not using a jailbroken device.
How to recover?
- Try on a different (real) device.
- Try with a different card (and also set it as the default wallet card).
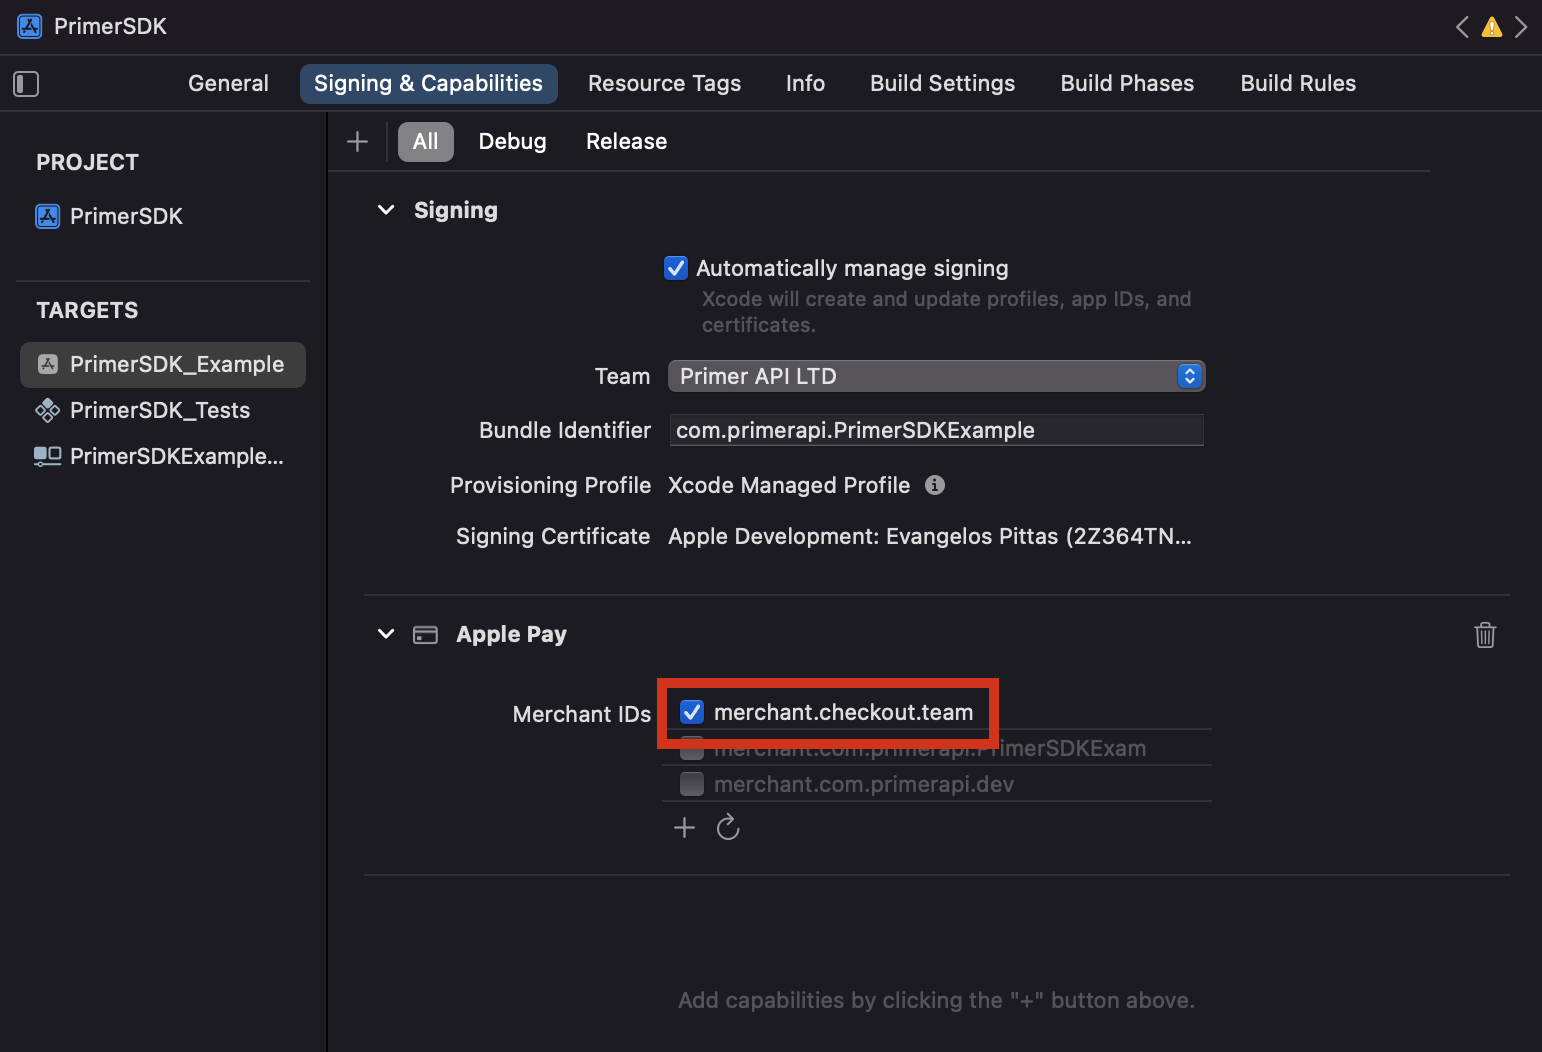
System Error Displayed: Apple Pay Is Not Available in “APP NAME”
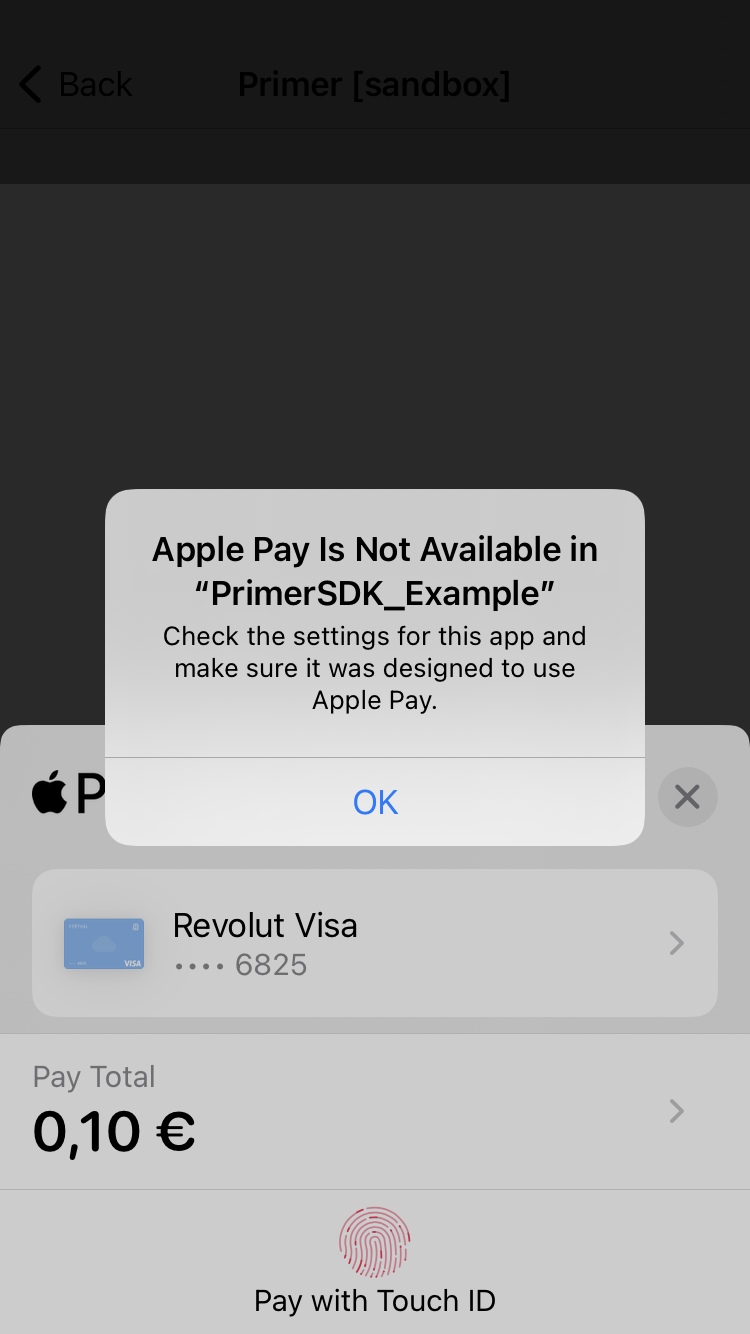 The merchant identifier(s) configured in Xcode do not match the merchant identifiers of the Apple Pay certificates in your Apple Developer portal.
How to recover?
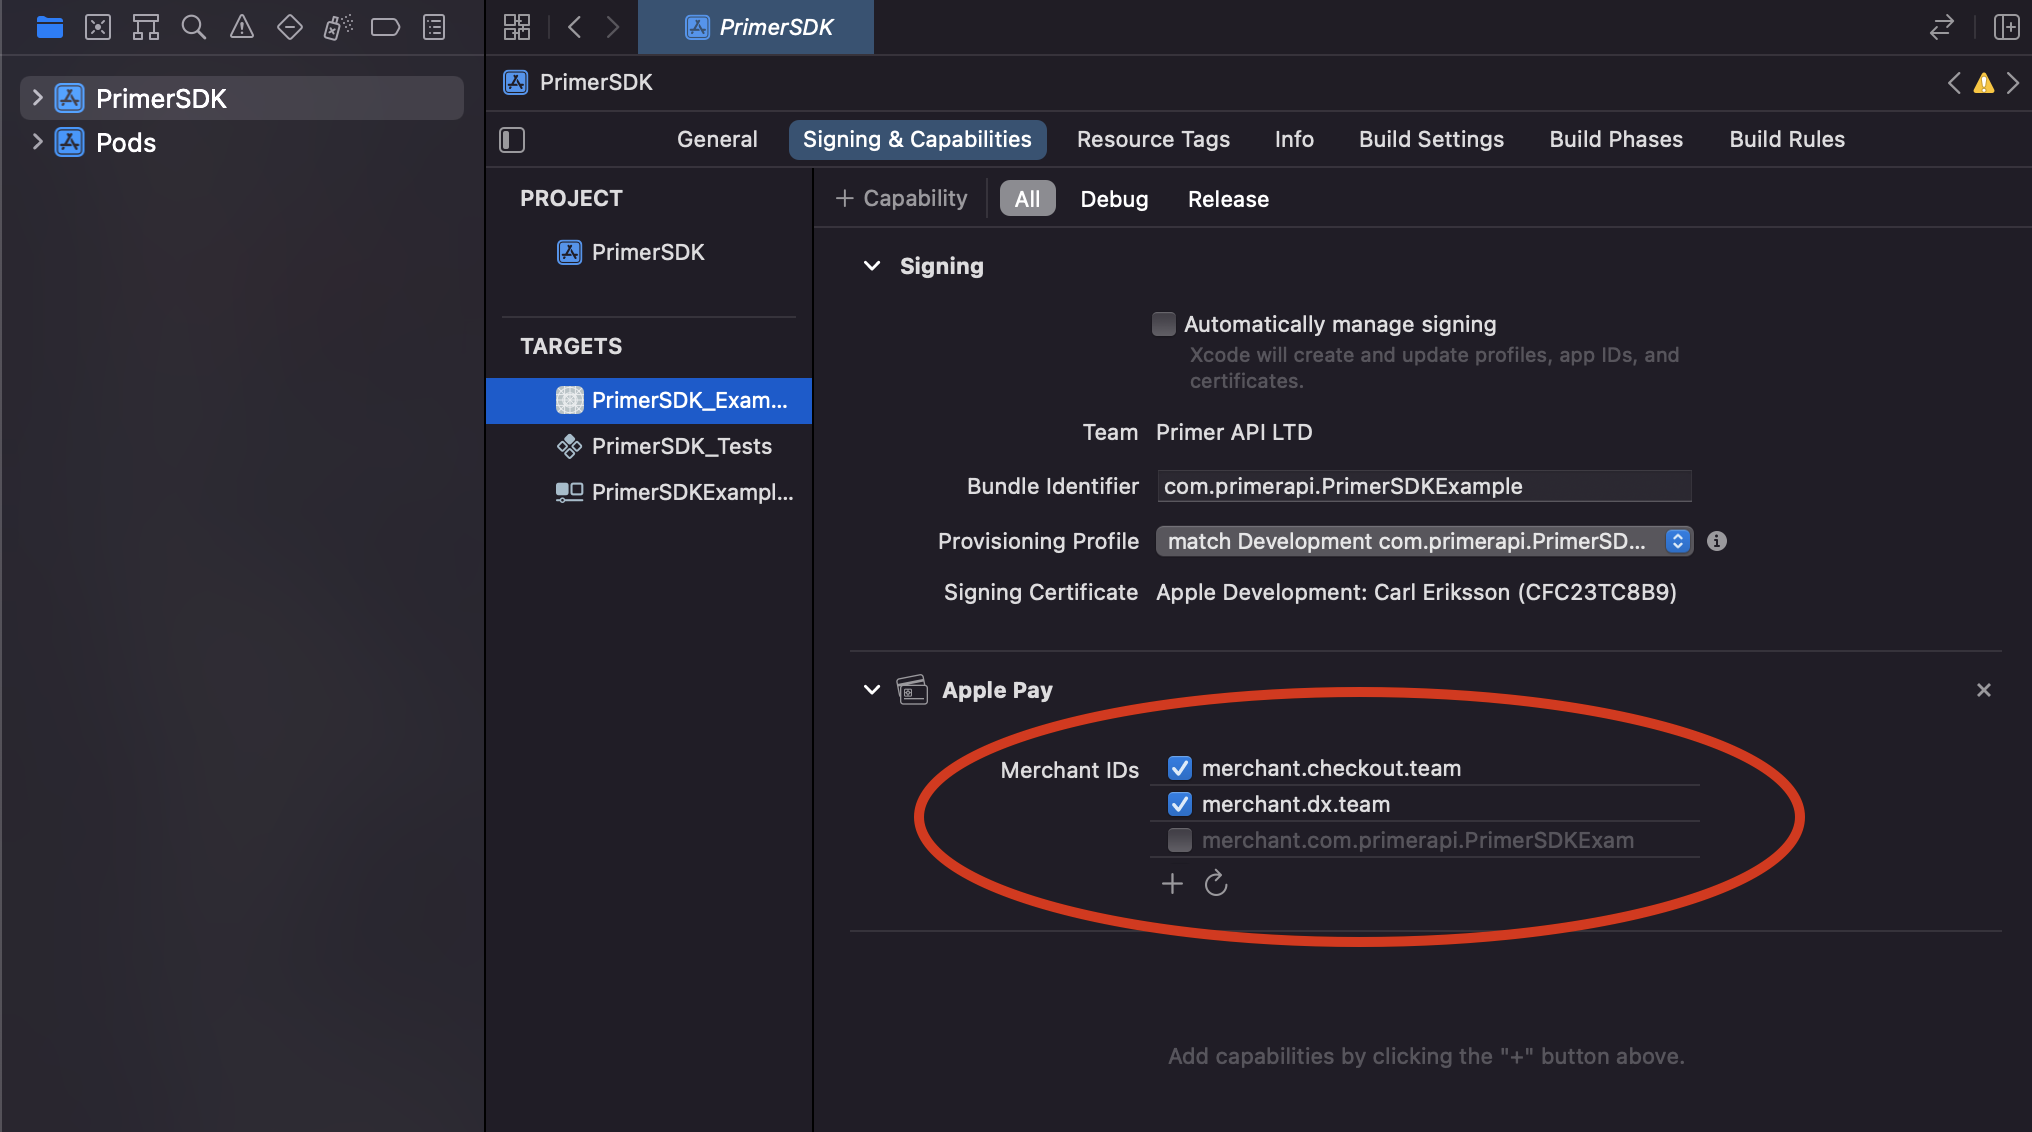
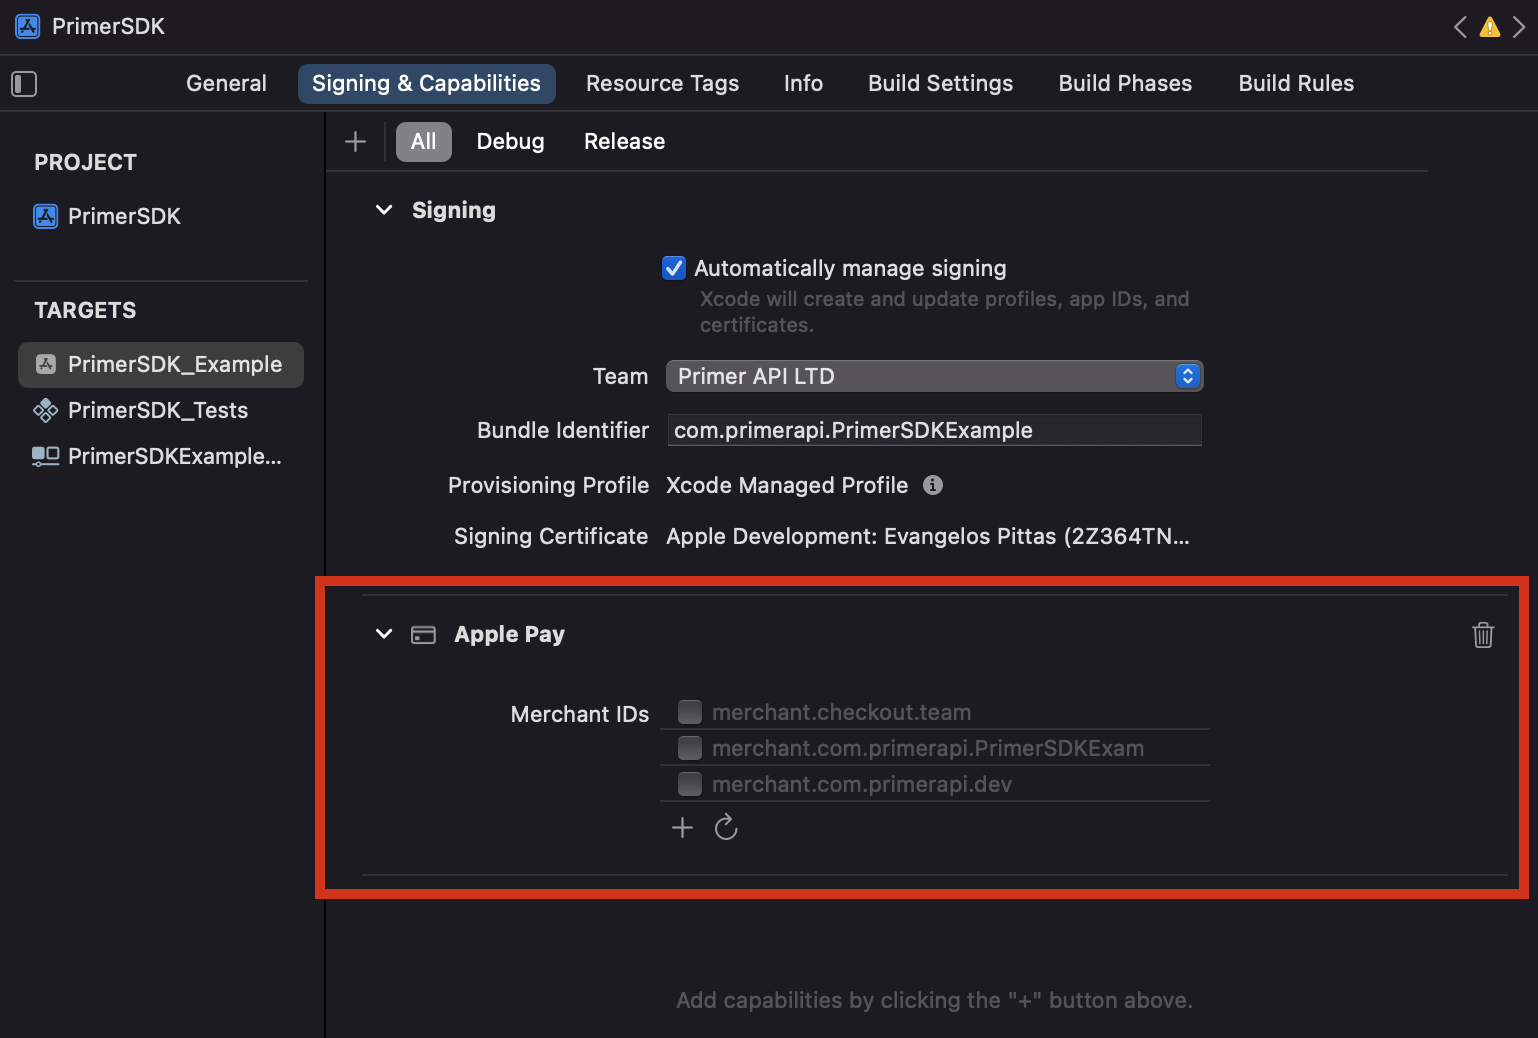
Make sure that you have the correct merchant identifier selected in Xcode, as shown in the screenshot below.
A correct merchant identifier must satisfy the following conditions:
- Is present in your Xcode’s merchant identifiers in the Apple Pay capability.
- Is used by a valid Apple Pay certificate in your Apple Portal
- The above mentioned Apple Pay certificate is uploaded in Primer’s dashboard
Error Returned: [server-error] Server error [404]: No Matching ProcessingCertificate could be found
Even though you are using the correct entitlements in your Xcode project, and there is a valid Apple Pay certificate in your Apple Developer portal, the Apple Pay certificate used by the app does not match the Apple Pay certificate that has been uploaded in your dashboard.
How to recover?
Upload the correct Apple Pay certificate on Primer’s dashboard.
Error Returned: [payment-cancelled] Payment method APPLE_PAY cancelled
or
Behaviour: the Apple Pay view getting dismissed or not being presented.
The merchant identifier that you’re passing to Primer SDK is not correct, and it isn’t present in Xcode’s capabilities, or you haven’t provided a merchant name.
How to recover?
Make sure that you have the correct merchant identifier selected in Xcode.
A correct merchant identifier must satisfy the following conditions:
- Is present in your Xcode’s merchant identifiers in the Apple Pay capability.
- Is used by a valid Apple Pay certificate in your Apple Portal
- The above mentioned Apple Pay certificate is uploaded in Primer’s dashboard
Error Returned: [NSErrorDomain:4864] the data couldn't be read because it is not in the correct format
Apple Pay will not work on the simulator, it will arrive to the Apple Pay modal view, then fail with the above error when trying to pay. Try it on a real device with Apple Pay enabled.
How to recover?
Attempt to complete a payment on a real device.
Go live
You don’t need to do anything particular to go live — just make sure to use production credentials.