> ## Documentation Index
> Fetch the complete documentation index at: https://primer.io/docs/llms.txt
> Use this file to discover all available pages before exploring further.
# Best practices
export const ColorTag = ({text, sentiment = 'neutral'}) => {
function getSentimentStyles(sentiment) {
switch (sentiment?.toLowerCase()) {
case 'positive':
case 'success':
return {
backgroundColor: '#ecfdf5',
color: '#065f46'
};
case 'negative':
case 'error':
return {
backgroundColor: '#fef2f2',
color: '#991b1b'
};
case 'warning':
return {
backgroundColor: '#fffbeb',
color: '#92400e'
};
case 'info':
return {
backgroundColor: '#eff6ff',
color: '#1e40af'
};
case 'neutral':
default:
return {
backgroundColor: '#f0f0f0',
color: '#7c7c7c'
};
}
}
;
const baseStyle = {
display: 'inline-block',
padding: '2px 8px',
margin: '2px 4px 2px 0',
borderRadius: '6px',
fontSize: '0.875em',
lineHeight: '1.5',
fontFamily: 'monospace',
fontWeight: 500,
whiteSpace: 'nowrap'
};
const tagStyle = {
...baseStyle,
...getSentimentStyles(sentiment)
};
if (!text) {
return null;
}
return {text};
};
export const TxnTag = ({status}) => {
const getStyles = status => {
const baseStyle = {
display: 'inline-block',
padding: '4px 8px',
borderRadius: '4px',
fontSize: '13px',
fontWeight: '400'
};
switch (status) {
case "PENDING":
return {
...baseStyle,
backgroundColor: '#ececec',
color: '#9f9f9f'
};
case "AUTHORIZED":
return {
...baseStyle,
backgroundColor: '#ecfdf5',
color: '#047857'
};
case "SETTLED":
case "PARTIALLY_SETTLED":
return {
...baseStyle,
backgroundColor: '#ecfdf5',
color: '#047857'
};
case "DECLINED":
case "FAILED":
return {
...baseStyle,
backgroundColor: '#fef2f2',
color: '#dc2626'
};
case "CANCELLED":
return {
...baseStyle,
backgroundColor: '#fefce8',
color: '#d78203'
};
case "SETTLING":
return {
...baseStyle,
backgroundColor: '#e0f2fe',
color: '#0c4a6e'
};
default:
return {
...baseStyle,
backgroundColor: '#f3f4f6',
color: '#374151'
};
}
};
return {status};
};
Automating your use cases with Primer is very powerful, and flexible. You can build almost anything without a line of code. Like any open tool, Automation comes with its own set of dos and don’ts. Mastering them will make your workflows **more resilient, more efficient, and easier to maintain.**
Our recommendations on how to set up Workflows in the most efficient way possible depend greatly on your use cases.
This page introduces some of what we consider best practices when building workflows - and outlines why we think these proposals are more beneficial than the alternative.
## Create more granular workflows
With all the tools available to create sophisticated workflows, you might be tempted to create big workflows achieving many tasks in one go. While this is technically possible, it will become cumbersome to maintain and potentially introduces a lot of redundancy when you have to repeat certain steps.
Workflows give you many tools to have more granular workflows based on use cases:
* [Apps](/docs/workflows/apps/overview) will emit events as [Triggers](/docs/workflows/apps/overview#triggers) which you can react to in a workflow.
* When you create multiple workflows based on the same Trigger, the [Trigger Conditions](./utilities/conditions-block#trigger-conditions-define-when-to-start-a-workflow) can ensure only certain conditions actually start a workflow.
### Reduce redundancy
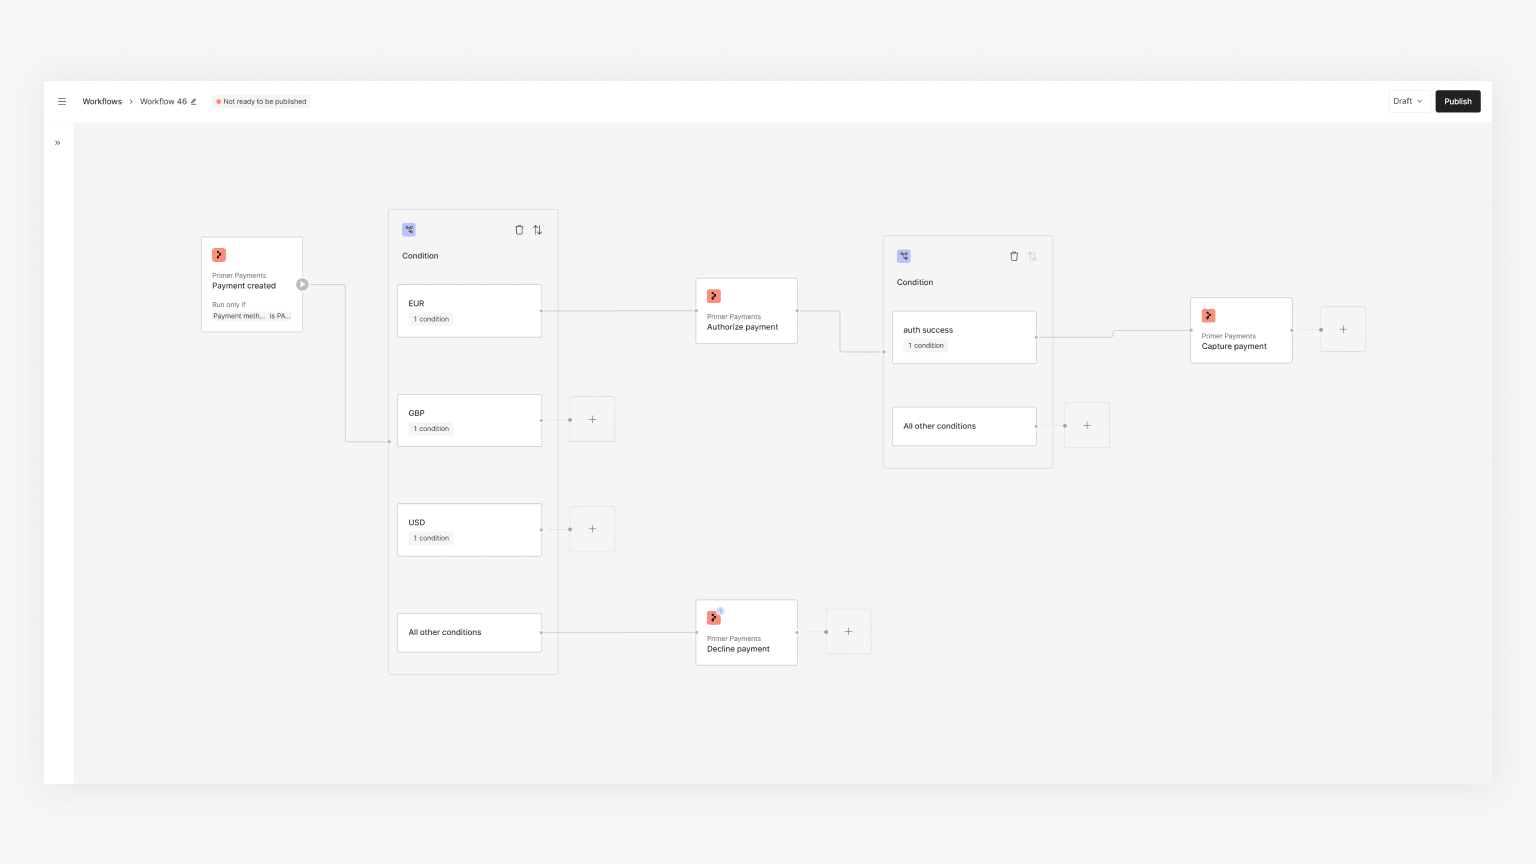
When you set up a payment flow that includes [multiple routes](/docs/workflows/utilities/conditions-block), every time you authorize a payment for that route, you can set the “Authorize payment” action up in the best way possible to ensure payment success.
However, once the action performed its assigned task, then you would need to check if the payment was authorized or declined before adding the “Capture payment” action.
This can be simplified by splitting the workflow into two:
1. one workflow to authorize payments
2. and one to capture payments that have been authorized
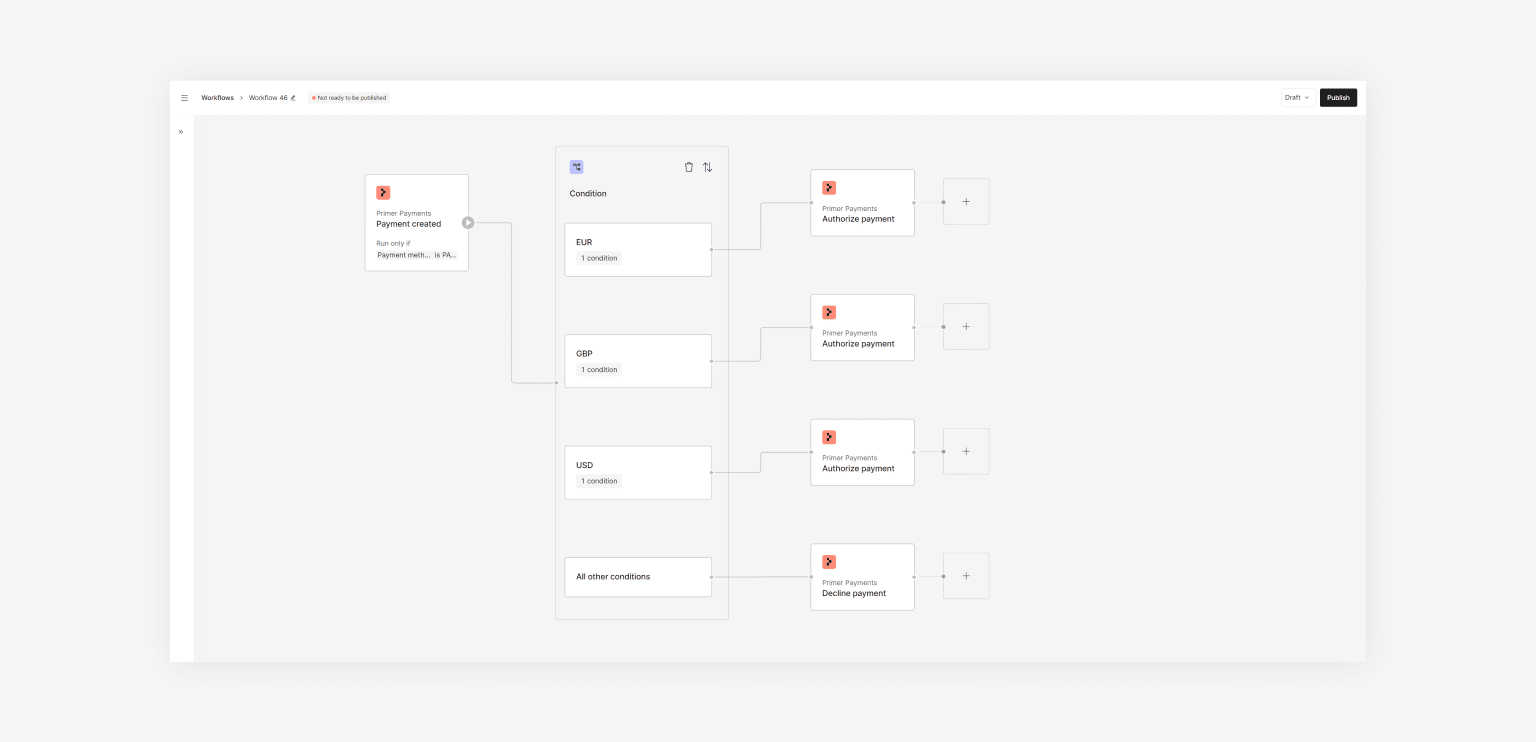
**Authorize payments:** Use the [Conditions Utility](/docs/workflows/utilities/conditions-block) to route to the required processor.
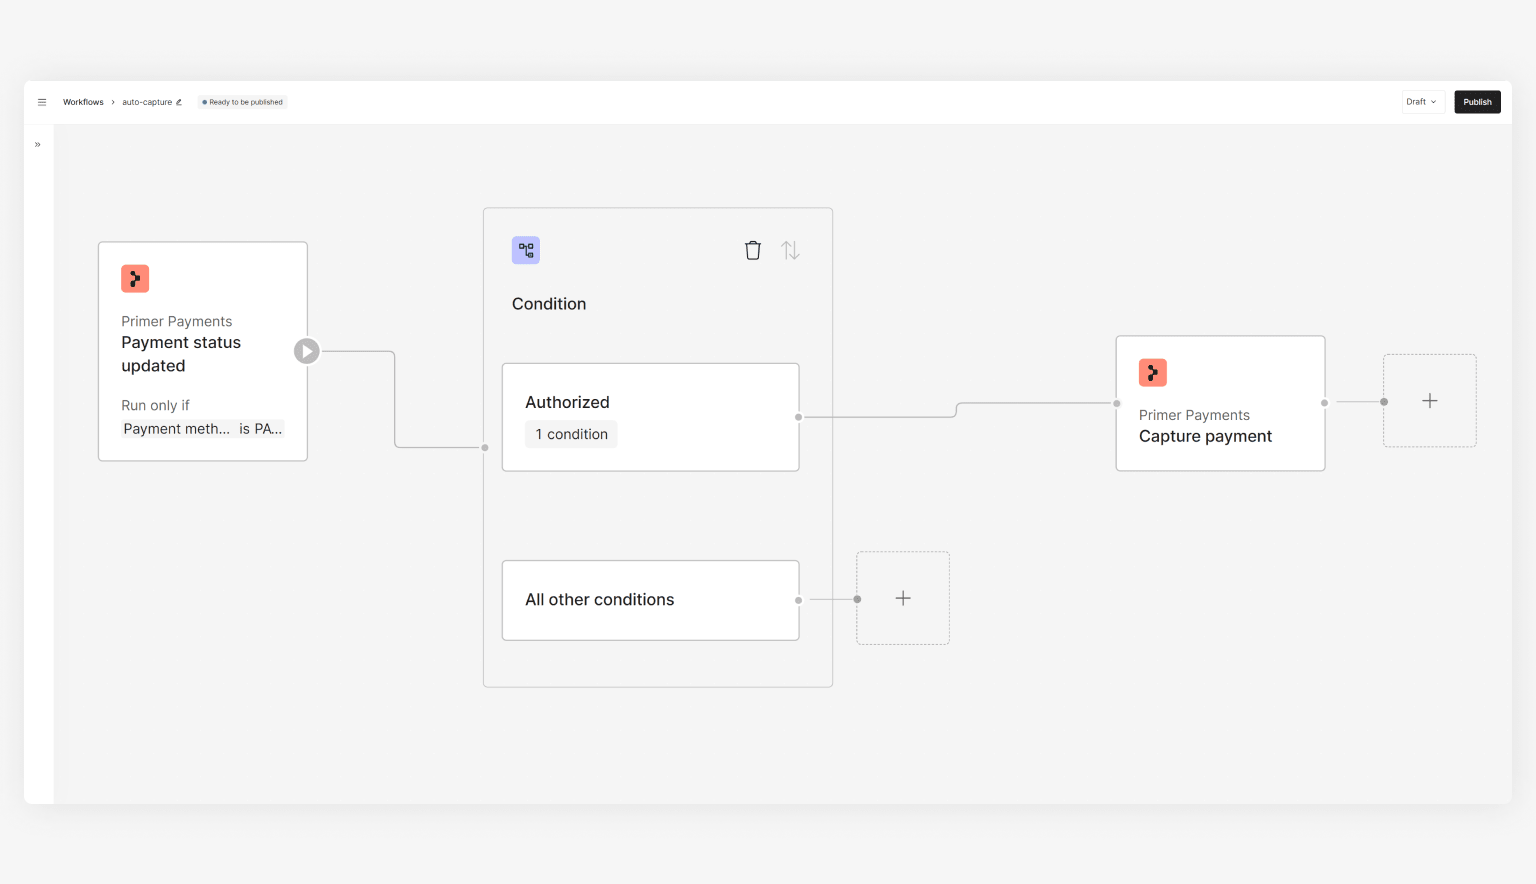
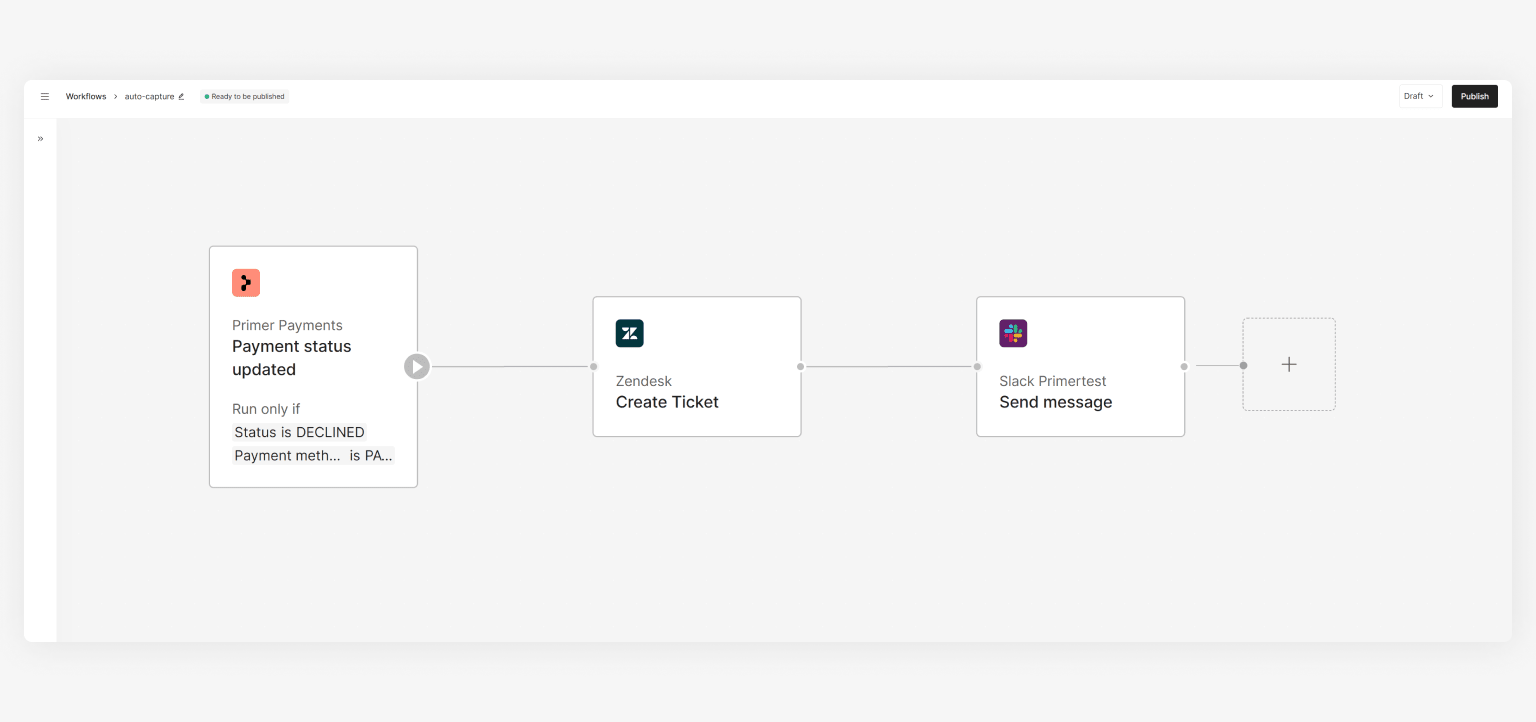
Then create a workflow based on the “Payment status updated” trigger. Here there are **two** options to react to the payment status update to capture the payment if the status is :
**1: Adding the Conditions Utility** to check for “Payment Status = " before adding the “Capture Payment” block.
If you don't check for , then a capture attempt would be made for any payment status change, of which there are many.
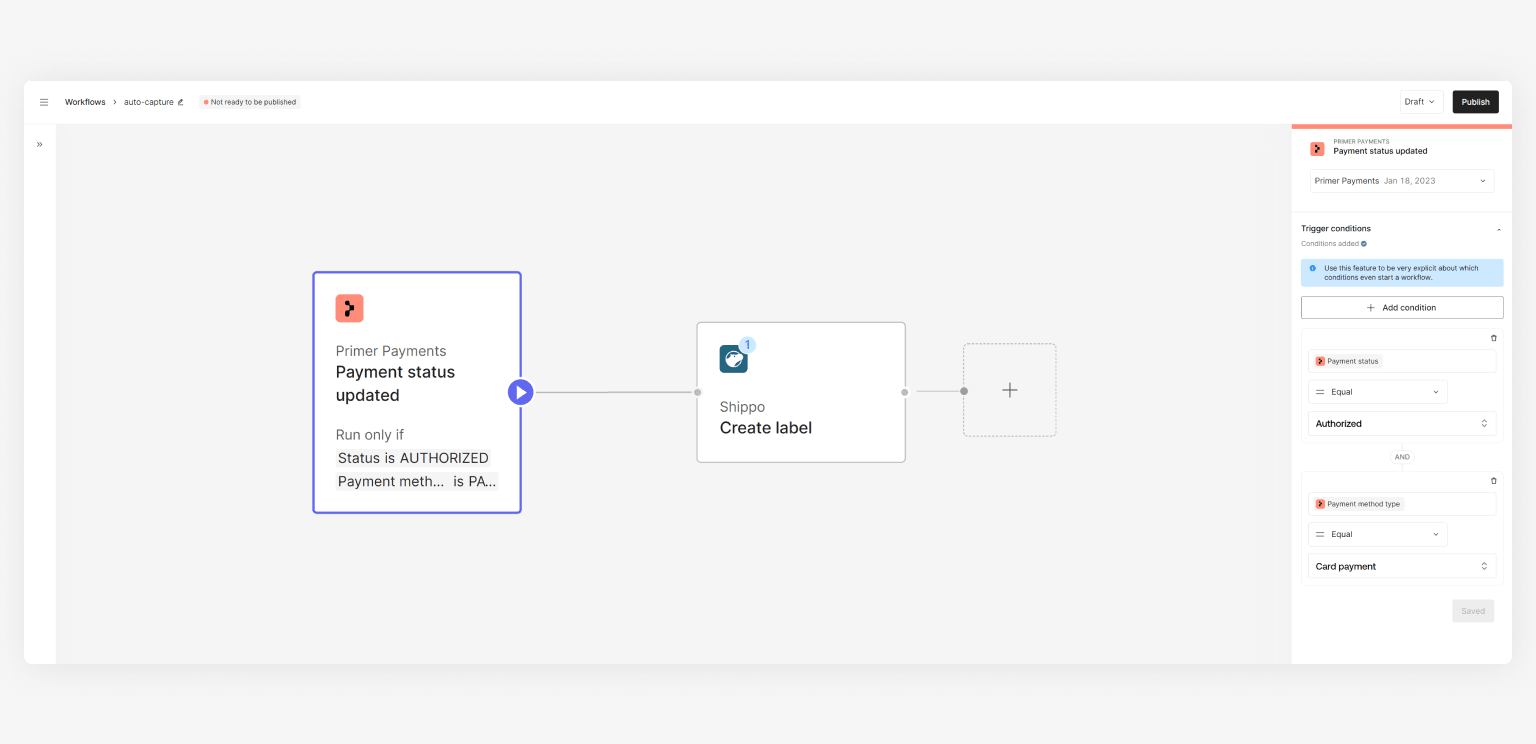
**or 2: Using the Trigger Conditions**
The Trigger Conditions allow you to set conditions that determine if a workflow should even be started. Only if the triggering event and the conditions that were set on the Trigger are met your workflow will start executing.
This needs to be done very carefully, as otherwise you are risking starting more than one workflow if the set-up is not explicit enough, or no workflows if the set-up is too restrictive.
Set the trigger up with a condition for “Payment status = ” and add “Capture payment” as the first and only block. This will now capture every payment that was authorized.
These principles apply for non-payment workflows as well. If you react to an order being created, you could react to a specific flag only, or create multiple conditions within the workflow if you want to handle more than one use case.
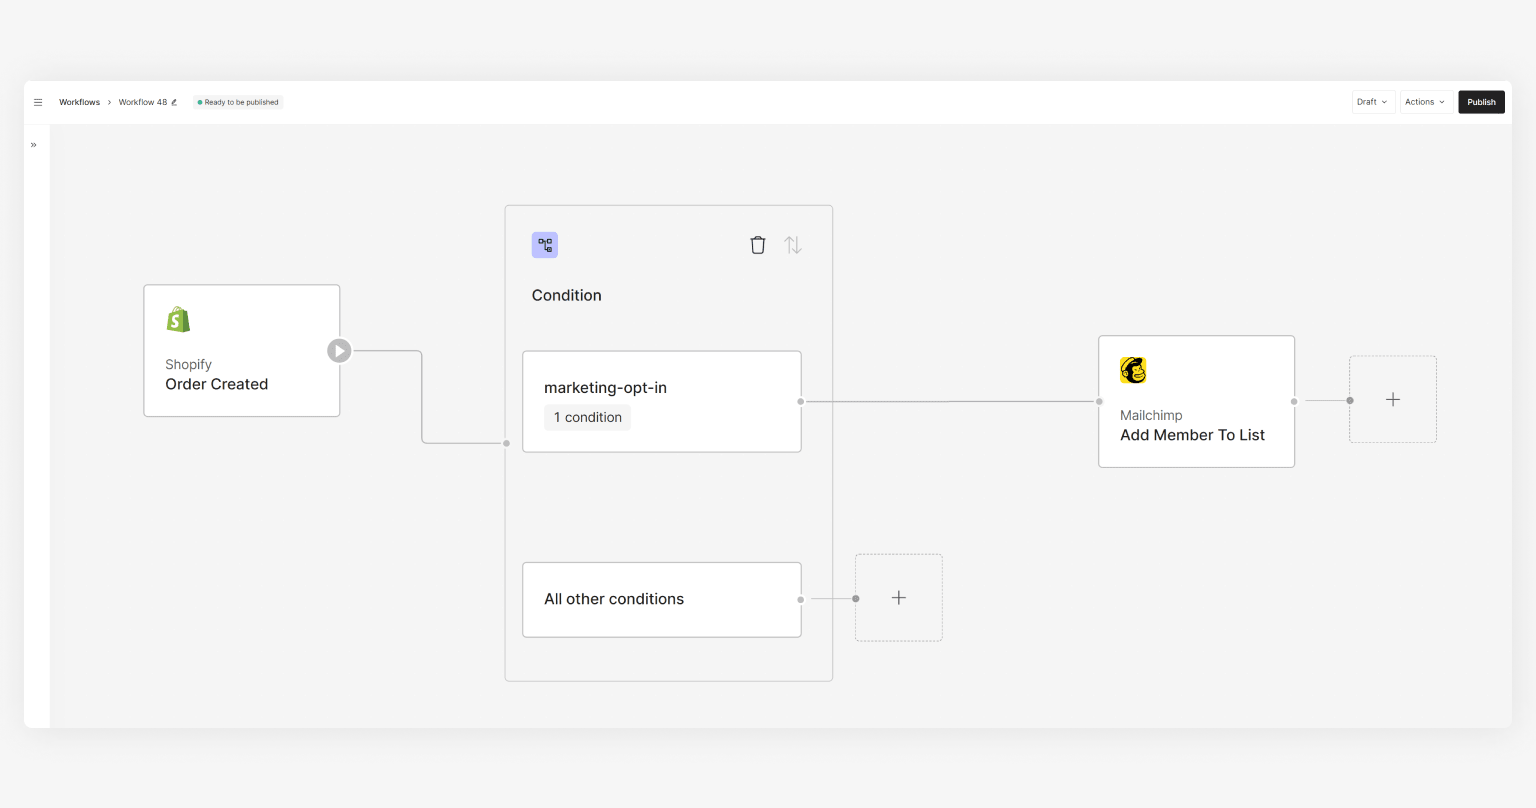
### Flexibility
The aforementioned examples are not mutually exclusive, but can be combined based on use cases to allow for greater flexibility.
An example would be if you want to create a support ticket for declined payments, **and** post failed payments into a Slack channel. Here you can either create two workflows, one with a Trigger Condition each (”Status=”, “Status=”) **or** combine them into one workflow for “*Error handling*” with the Trigger Condition being “Status one of , ".
If you do the latter, then you can still add the condition builder and create one route for “Status = ", and one route for “Status = ". It's best to keep the conditions explicit like that, and just keep the “all other conditions” block unmapped for better readability of the workflow.
## Handle third-party issues
Let’s consider a workflow using the “Post message to channel” action from Slack. During the execution of the workflow, anything **but** Slack successfully posting the message will result in a stop of the workflow execution at this block and result in a [Workflow Run](/docs/workflows/monitor-workflows/overview).
In case of failures, the Workflow Runs can be used to troubleshoot. Actions do not return a response status in the Outputs, which means that we assume that all Actions are running without issue.
If Slack did not post the message successfully then you can look at the Workflow Runs. Within the timeline you will be able to identify if the action was not successful due to invalid credentials, or any other possible configuration issue by opening the details for each event. See [monitor workflows](/docs/workflows/monitor-workflows) for more details on the Workflow Run details.
The assumption of an action being successful will allow you to chain multiple actions together, for example in a flow like this, where a ticket is created via Zendesk and then posted to Slack:
If the “Create ticket” action fails, the whole Workflow Run will be marked as and no Slack message will be posted.
### Workflow vs object status
Keep in mind that an app action can manipulate objects, for example the “Authorize payment” action can lead to a new payment status, whereas third-parties can avail actions to manipulate their objects, for example:
* “Update customer” action updating a customer status from `PENDING_REVIEW` to `APPROVED`
* “Update order” action updating an order status from `DISPATCHED` to `FULFILLED`
* “Confirm shipping” action returning an updated shipping status of `CONFIRMED`
These statuses can be used to create subsequent workflows on the back of them, just like continuing different workflows based on payment status or .
## Avoid infinite loops
Certain combinations of triggers & actions can lead to an infinite loop of workflows being triggered. This must be avoided when building a workflow.
If you combine the Zendesk trigger "Ticket created" with the Zendesk action "Create ticket", that would result in an infinite loop:
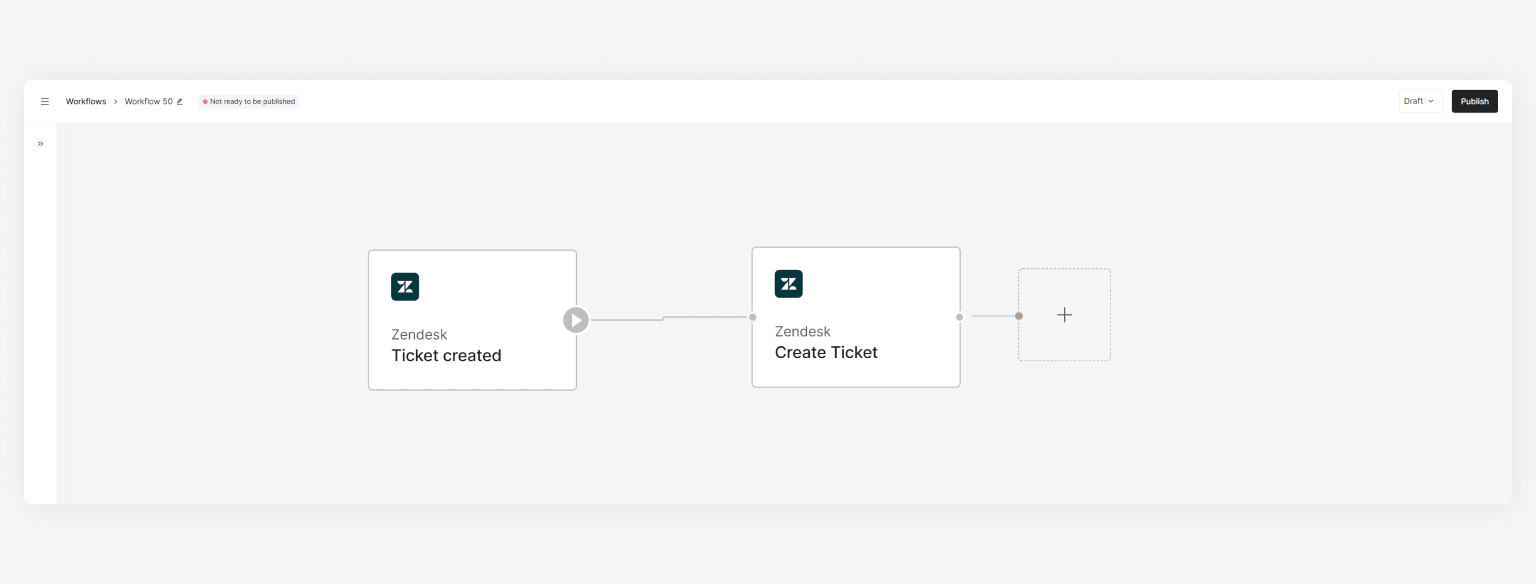
We recommend setting up the Trigger accordingly, or putting [Conditions](/docs/workflows/utilities/conditions-block) in place to prevent an infinite loop.
If you accidentally create an infinite loop, Primer has technical mitigations in place to terminate workflow execution for the affected workflows and alert the product support team.
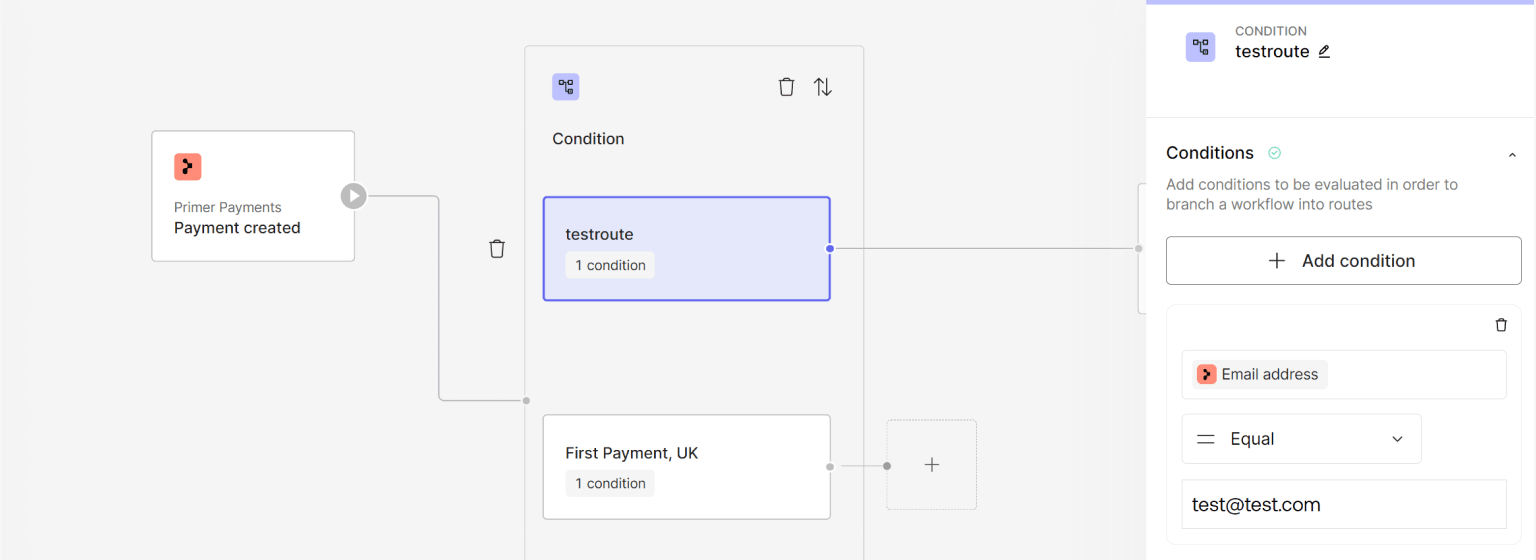
## Creating test routes
The Conditions Utility allows you to reference any data point from a previous block, such as the Output of a Trigger or an action.
During your integration you might want to create different routes to get familiar with branching logic. You could create different routes based on amount, currency, down to the individual e-mail address. This capability also allows you to create very specific test routes:
## Start automating
* Now that you know the best practices, why not put the concepts to a test and [start building workflows](/docs/get-started/create-workflow)?
* In case your new workflows do not work as intended, check our [monitor workflows](/docs/workflows/monitor-workflows) guide to troubleshoot your workflows