> ## Documentation Index
> Fetch the complete documentation index at: https://primer.io/docs/llms.txt
> Use this file to discover all available pages before exploring further.
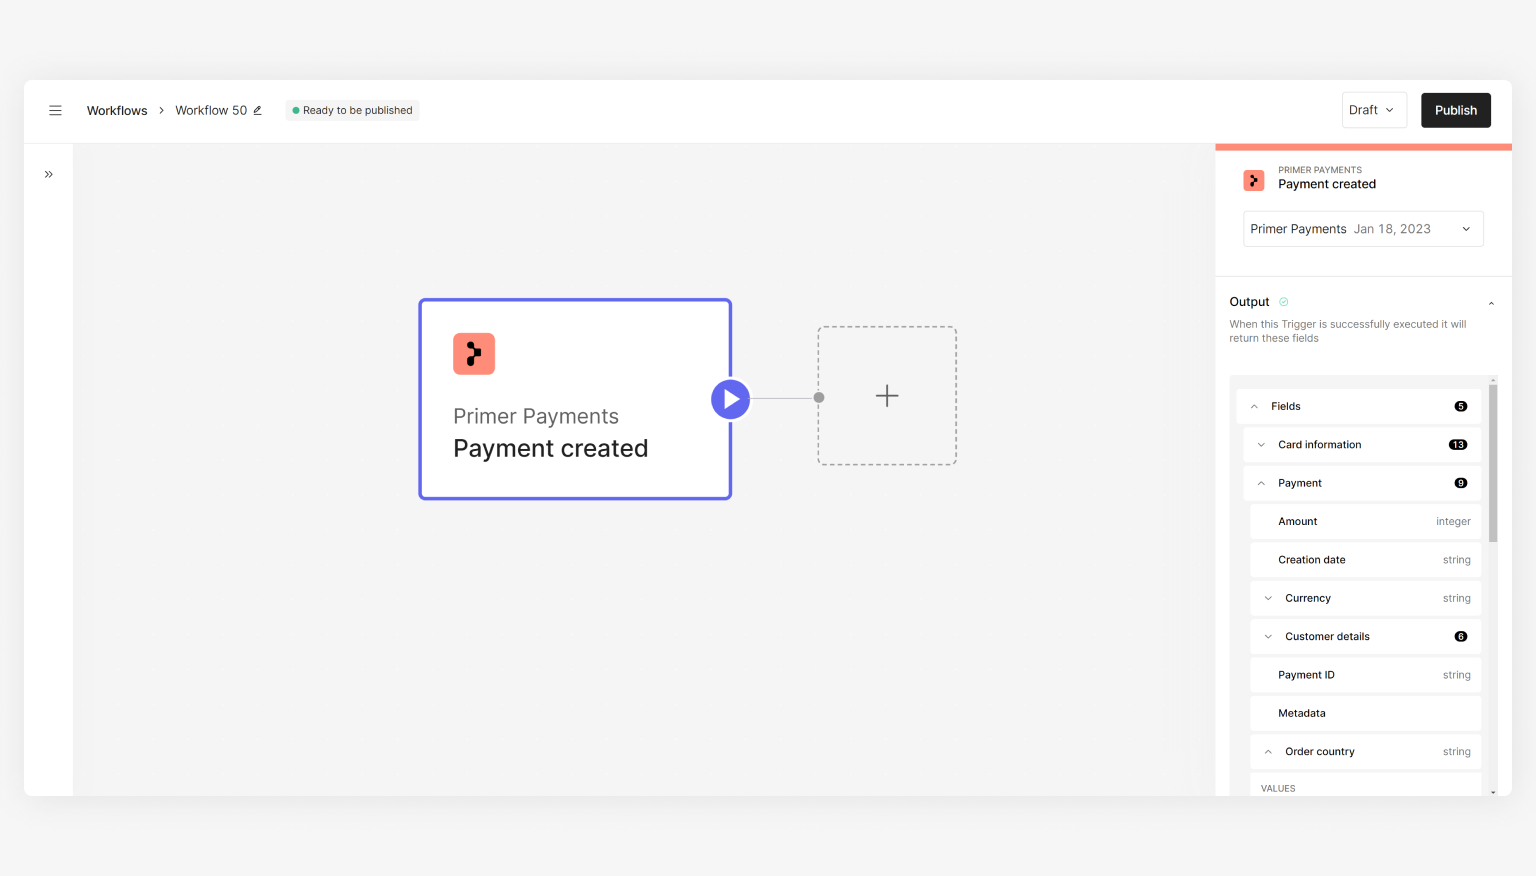
# Payment created Trigger
## When is it triggered?
The "Payment created" Trigger is the starting point for your payment workflows. The "Payment created" Trigger will listen for payment creation requests and, once received, will start the workflow. This includes:
* payments created via Universal Checkout and via the Payments API. Learn more about creating payments [here](/docs/get-started/set-up-a-checkout#step-3-set-up-universal-checkout)
* both customer-initiated payments (CITs) and merchant-initiated payments (MITs)
 You must have at least one workflow that has the "Payment created" Trigger in order to process payments - see the [Process payments](/docs/get-started/create-workflow#step-2-set-up-a-workflow) guide to learn more.
## Use cases
All your initial payment flows will need to start with the "Payment created" Trigger. Based on your needs, you can utilize it in a few ways. Below are some examples for inspiration:
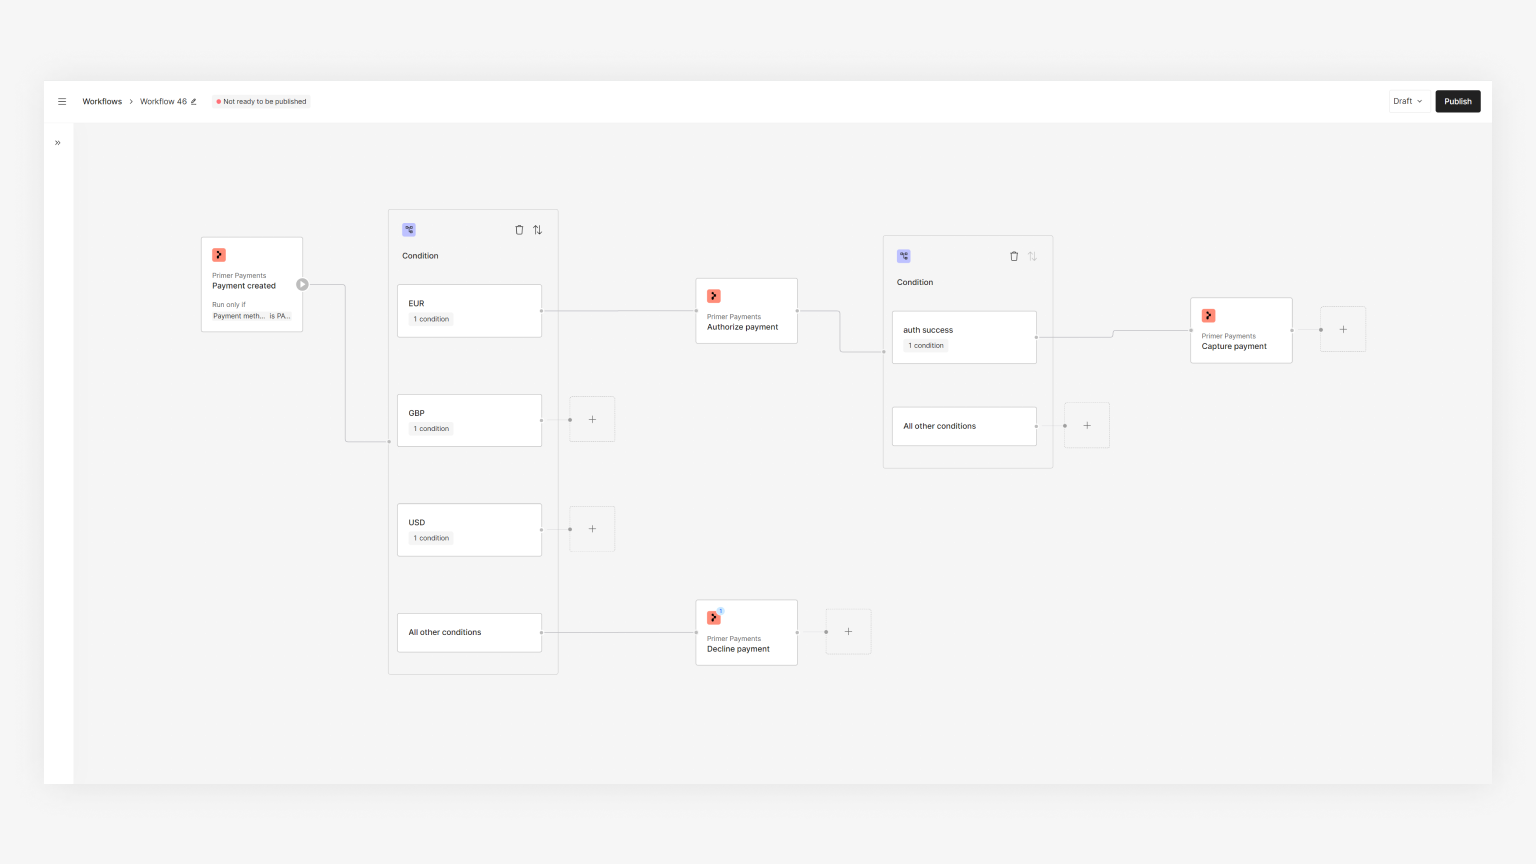
A single payment workflow for all payments that:
* routes to two different processor merchant accounts based on the order country
* captures the payment if authorization was successful
You must have at least one workflow that has the "Payment created" Trigger in order to process payments - see the [Process payments](/docs/get-started/create-workflow#step-2-set-up-a-workflow) guide to learn more.
## Use cases
All your initial payment flows will need to start with the "Payment created" Trigger. Based on your needs, you can utilize it in a few ways. Below are some examples for inspiration:
A single payment workflow for all payments that:
* routes to two different processor merchant accounts based on the order country
* captures the payment if authorization was successful
 A payment workflow that only handles merchant-initiated transactions (MITs) as you might want to send all MITs to a separate processor versus your customer-initiated transactions (CITs).
 A payment flow that uses a Trigger Condition based on metadata and only authorizes the payment, where the capture will take place via API
This is popular in micromobility where the amount to capture is unknown at the time of authorization.
A payment flow that uses a Trigger Condition based on metadata and only authorizes the payment, where the capture will take place via API
This is popular in micromobility where the amount to capture is unknown at the time of authorization.
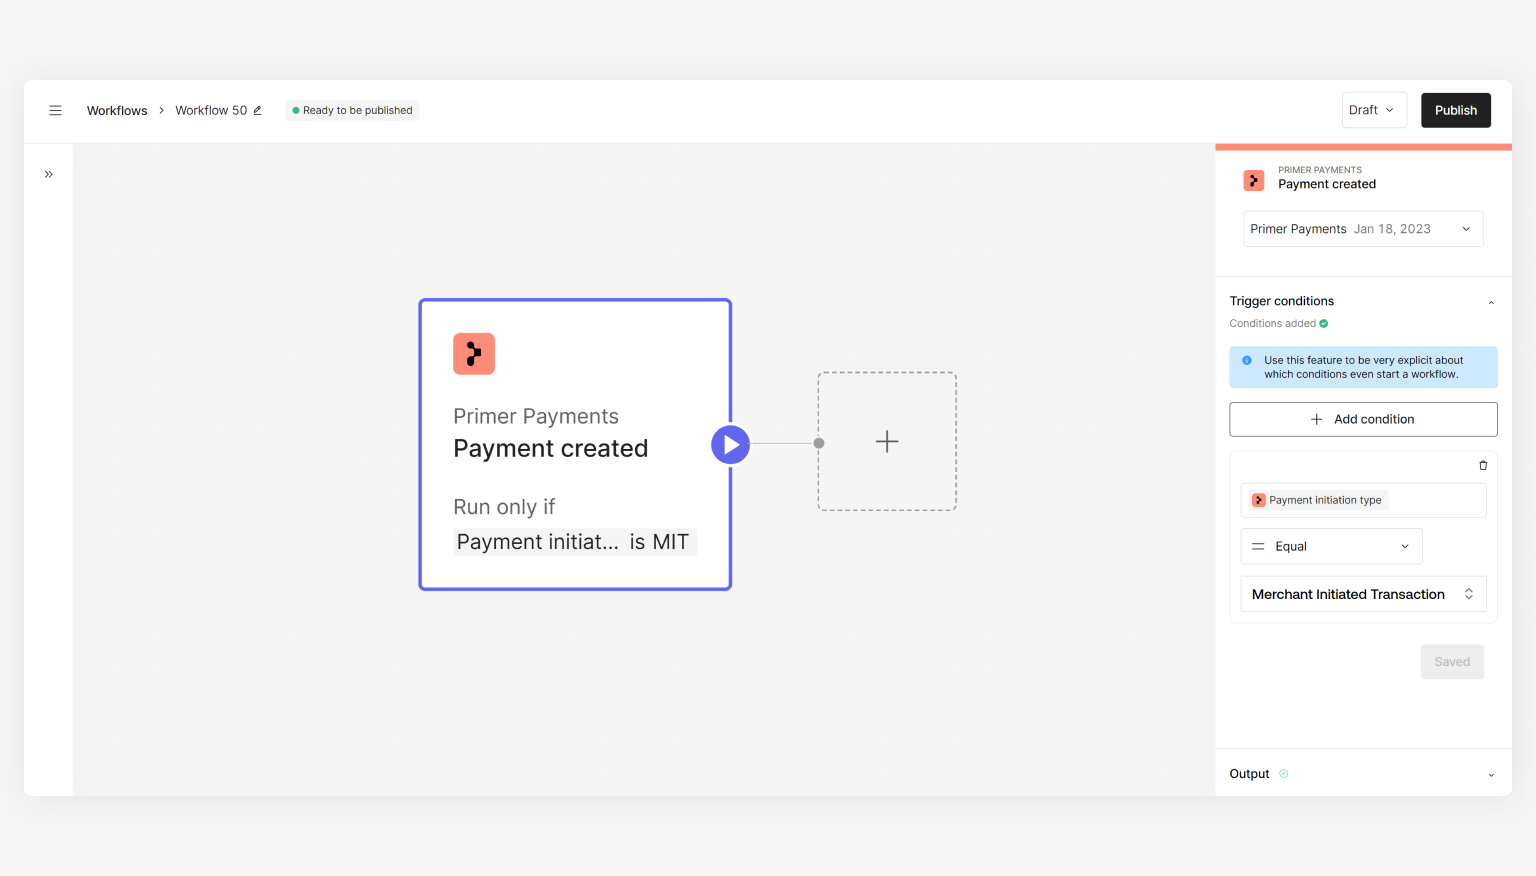
 ## How to set up multiple workflows that use this Trigger
Trigger Conditions allow you to set conditions that determine if a workflow should be started. Only if both the triggering event and Trigger Conditions are met will your workflow start executing.
If you want to set up multiple workflows with this Trigger, you **need** to set Trigger Conditions when setting up your workflow - if not, it's possible to have more than one authorization request for a single payment request which must be avoided.
## How to set up multiple workflows that use this Trigger
Trigger Conditions allow you to set conditions that determine if a workflow should be started. Only if both the triggering event and Trigger Conditions are met will your workflow start executing.
If you want to set up multiple workflows with this Trigger, you **need** to set Trigger Conditions when setting up your workflow - if not, it's possible to have more than one authorization request for a single payment request which must be avoided.